
“Oh my gosh! You’re nesting!”
That’s what the adorably sweet girl at the front desk of my chiropractor said. It was a joy chatting with her before my appointments. She’s one of those people who can put you at ease immediately and have you feeling camaraderie after a 3-minute chat. It’s a gift, for sure. But on this particular day–she was very, very wrong.
She asked how I was feeling. There was just about a month left in my pregnancy. I told her I was feeling great overall and hoped I’d actually be late to deliver. After this comment she told me I was the only person she’d ever heard say that. Welp, that’s me…an anomaly.
“I just have a lot to do around my house. If I had to bring a baby home today I could, but it would really be better for everyone if I had more time.”
At this point she gushed about me nesting. Which, who knows–maybe I was.
“I went through the same thing about a month before I was due. I had so much energy. I reorganized everything in the house. I had this label maker–and I labeled everything. Even the obvious stuff…like a jar with pencils in it. I printed a “pencils” label and put it on there!”
I told you, she’s adorable. And fun. And one of my favorite people to see.
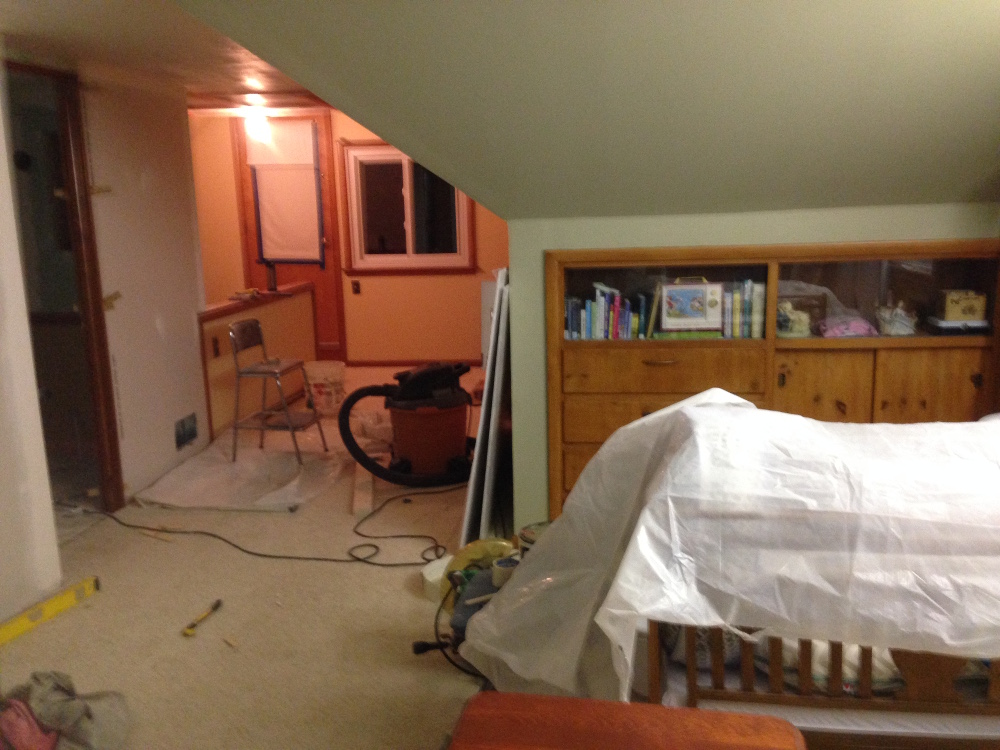
However, in my mind I was cynically thinking of how adorable her pencil label story was. If only I was reorganizing and labeling. That would be a vacation in Barbie’s dream house. Instead, when I closed my eyes and rubbed at them–they were chronically dry at this point from all the drywall dust–I could only see visions of the construction zone that I once called my bedroom.
This photo was literally taken on the day of this interaction. Walls unfinished. My poor baby’s crib full of tools and under a drop cloth. Oh and those whitish looking rags in the lower left corner–those are the clothes I’d been wearing before my appointment and I put them on again after. Grosser than putting on a wet bathing suit.
Nesting. Yeah, that’s cute.
Or maybe this is just how I nest. I don’t know. But I really doubt it.
The doctor called me back at that point. She cracked some things and yanked my legs and I walked out feeling amazing. Then I headed back to my sweet Canyon Cottage, who desperately needed my attention.
In my last post I showed you around the house. Since then I had a pretty big technical issue that required a major data transfer. Combine that time consuming task with finishing the master bedroom and it left me exhausted and with very little time to post. But things are all better now. All my photos and client archives are safe and sound. And I’ve thought about loads of things to post. Soon, a baby will be my excuse for not writing–but we’ll cross that bridge when we get to it.
Anyway. Today I’m showing you the project. To save everyone from a maaaassive post, I’ll keep the full B&A for tomorrow. It’ll keep you on the edge of your seat too.
Okay, so let’s get to some images.
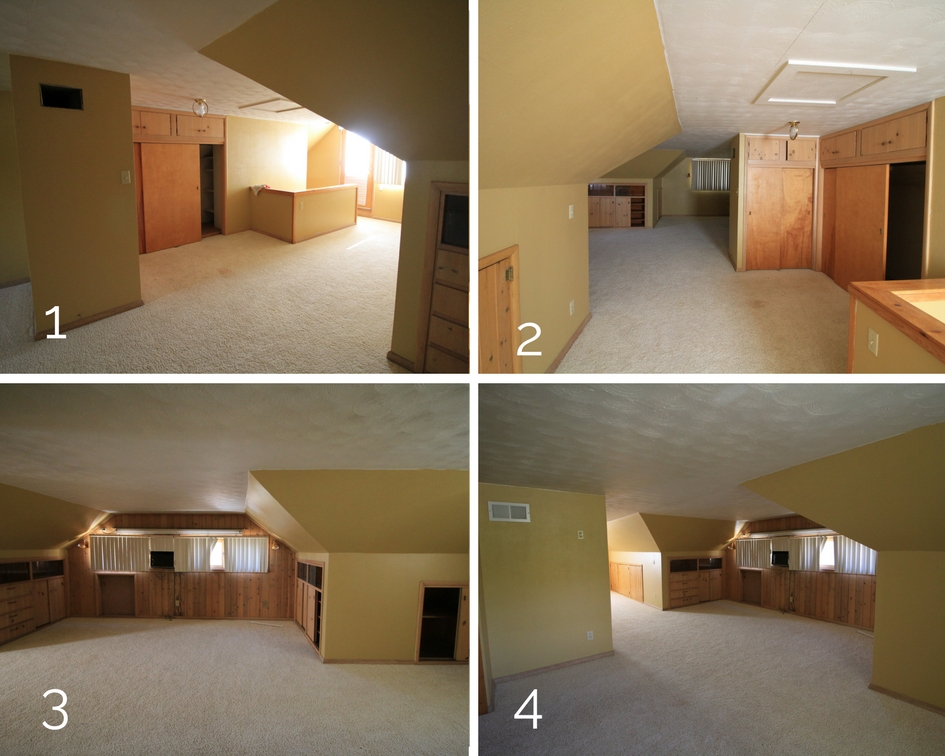
Here are photo from when we closed on the house. Obviously before the furniture got moved in.
I messed up a little on the order they should be in. So #2 is looking from right at the top of the stairs. This space is the entire upper half story of our house. Straight ahead are the closets, on the far end is a window–that’s where our bed sits.
#1 Is taken looking back from that built in cabinet with sliding doors you see in #2. The boxy thing there is the stairway.
#3 is an alcove off to the side, where those built-ins are. The wall there is paneled with knotty pine–which is really pretty (unlike the faux wood paneling so popular in the 70’s). However, the bad windows and window AC leaked on it and left some of the wood pretty warped and gross.
#4 is taken looking back from where our bed now sits at the far end of the space.
There’s a lot of pros to this space. First of all, it’s really big. Which is nice, but can also be a problem, because awkward unused square footage is wasteful and can be an eye sore. There’s lots of storage. Knee walls (the vertical walls that are under the angle of the roof to prevent it from being a giant triangle) were all fitted out to be storage space. There were lots of closets and lots of places to store bulky winter gear. Another big pro is that the space is very separate from the rest of the house. If you are upstairs, you really can’t hear what’s going on on the main level–and you can’t hear the basement at all. That’s a feature we really like since Derek’s schedule requires him to work nights sometimes.
Now, the cons. Majorly drafty windows. These required a few ugly solutions during our first winter here.
Also the warped wood that I mentioned earlier. Those closets, while super handy were also very, very cold. We could hear the wind rattling the doors on cold nights. Oh, and some of the closets barely opened because the doors were a little too low and the carpet a little too plush.
As with any house and any project, Derek and I like to see what a space requires and will tolerate before just jumping in. That’s why we suffered through a very cold winter up there–we are so thankful for space heaters and down comforters! We always start with the structure and eventually move to the cosmetic.
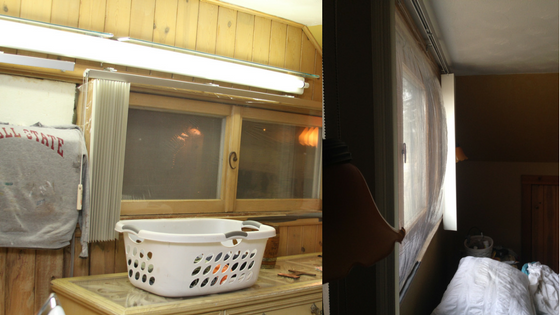
And because Derek works what I call a “real job” lots of the little jobs are done by yours truly. Which is totally fine, because you know I have an affinity for houses–especially my own. I love caring for them, even if the work is hard and dirty and very unglamorous. So first I insulated the knee walls. It was very dirty and an uncomfortable place to work. I installed batts of insulation along a long knee wall that is pretty unfinished (cold storage). In the finished spaces that were rattling because of the draft I used spray foam to seal the edges.
And I put up the plastic and sacrificed my favorite work sweatshirt to keep out drafts from the windows. As with any dusty, dirty project, I looked good doing it. (Because my favorite Ball State sweatshirt was keeping a draft out around the AC, Derek kindly let me borrow his favorite Purdue work shirt.)

Once we’d lived in the space for a few months we were getting some vibes on what it needed. I like to say the houses speak to me and tell me what they want–but that can sound creepy. But I guess I just said it. So if you think I’m creepy now, try to forget that I ever said that.
Moving on.
The house told me…um…I mean, we really thought the master bedroom/half story needed an overhaul. First of all, if it was going to be a master suite, it needed a bathroom. Second of all, if anyone was going to spend time up there, it needed new windows. And third, it’s beautiful craftmanship was being hidden by mismatched wood, dark yellow on yellow sponge paint and other surface level damage and ugliness.
Maybe someday I’ll have a real job and we’ll be able to afford all of that at once. But that’s not the case right now. So we put off the prettying up of the space until the major construction was done–which was hard, but smart. And we lived in it as it was.
Spring meant saving.
Summer meant windows. Which made a HUGE difference!!
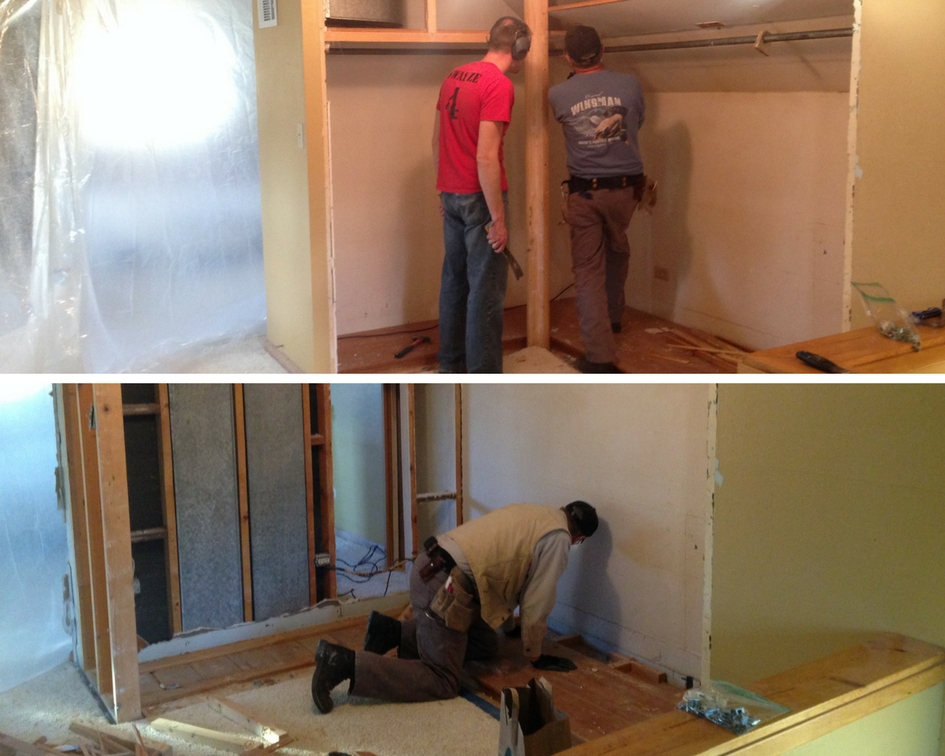
Fall meant demo and tracking down great contractors to help us. (More on that in a future post.)
At Thanksgiving time my dad and Derek did the demo, making space for our very own master bathroom! (Since I am a poor pregnant girl, I wasn’t allowed to help at all. Instead my mom and I went shopping and baked things. I think I got the better end of the bargain on that one.)
Here are photos I snapped just before they started tearing things down.
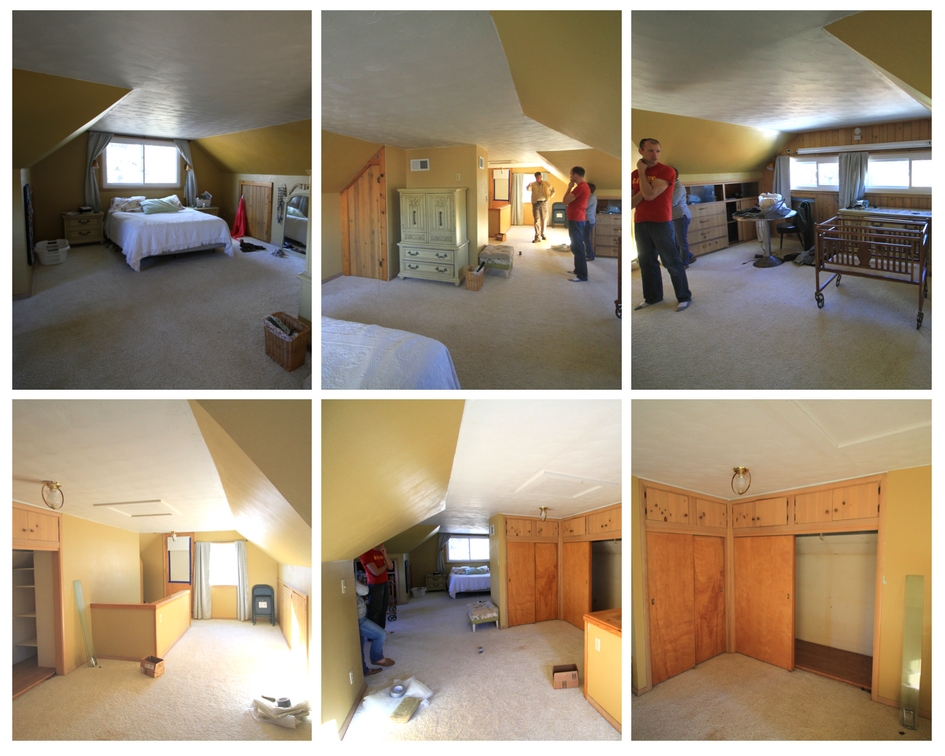
The closets were ripped out and in their place is the new bathroom. For now we don’t have a closet. But we will build one (after the baby settles in) along the wall opposite the stairway.
Then….I did a really crummy job of taking photos.
While Derek worked on framing walls, I refinished all the wood work. Some was stained. Some was stripped. Some was on the way to rotten. None of it matched the wood on the main level. It was a time consuming detail, but it really paid off because it all looks so cohesive!
Once plumbing was in we needed electrical work done, then some ducts rerouted. That was a bit of a hold up, but we love the contractors we used so it was worth the wait. In the mean time we hung any drywall we could, leveled the subfloor, picked out paint colors and installed the shower base. Any down time was filled with painting whatever walls were ready and finished.
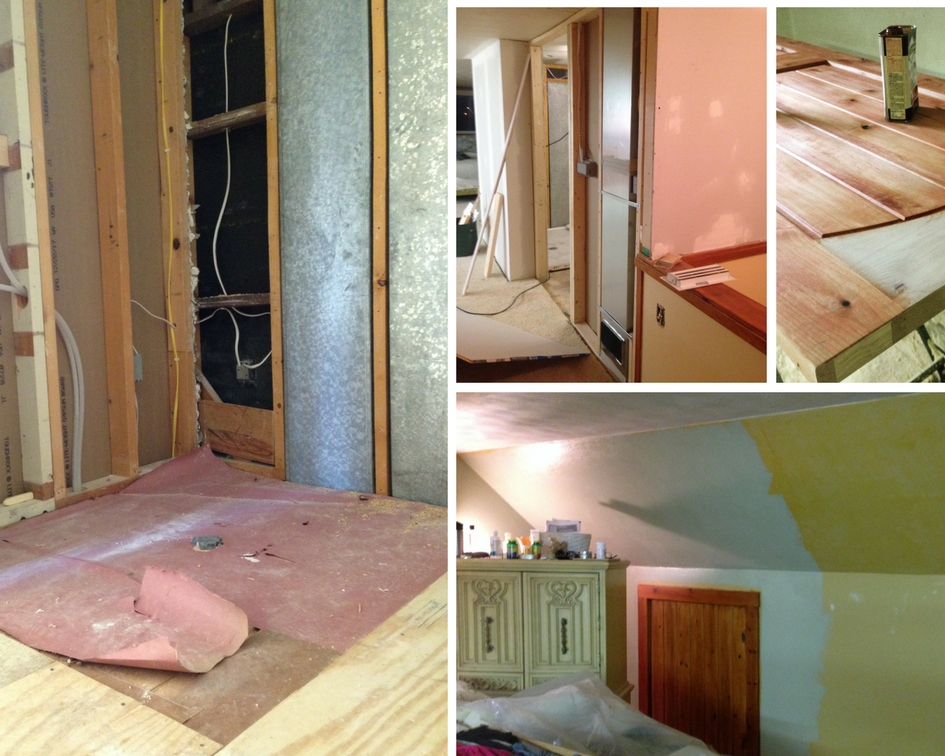
Once everything was in place things really moved fast. We put the rest of the drywall up…and because I have the hand of an artist when it comes to drywall–I took over finishing it. Which is the nastiest, dustiest mess of all time. Just look at my red eyes. I promise I wore eye protection and that the room was properly vented. It was around this time that the “nesting” encounter occurred. Yikes.

Derek had switched to a night shift, so I worked during the day and he worked all night on his nights off–mostly assembling the shower we thought we could “easily” install ourselves. (Again, a story for another time.)
Than came laying the floor. We went with sheet vinyl, which we’ve never used before and are thrilled with. I was really proud because I cut this and it FIT!

Then we built the vanity. Derek did the math and installed the supports and sink top and gave me the plan for the rest. I (still going crazy with stain and polyurethane) refinished the doors (from a cabinet we bought at the Habitat For Humanity ReStore) and built the front.
Somewhere in there I also built a headboard and a fluorescent light cover.
Friends came to help put up shower walls. Plumbers came to hook things up. Electricians came to finish the lights. Trim went up. Then finally, oh finally I was able to clean! A friend let me borrow her carpet shampooer and let me tell you–I went over the carpet five times. It was so nice to have it clean! Seriously, it was like new carpet.

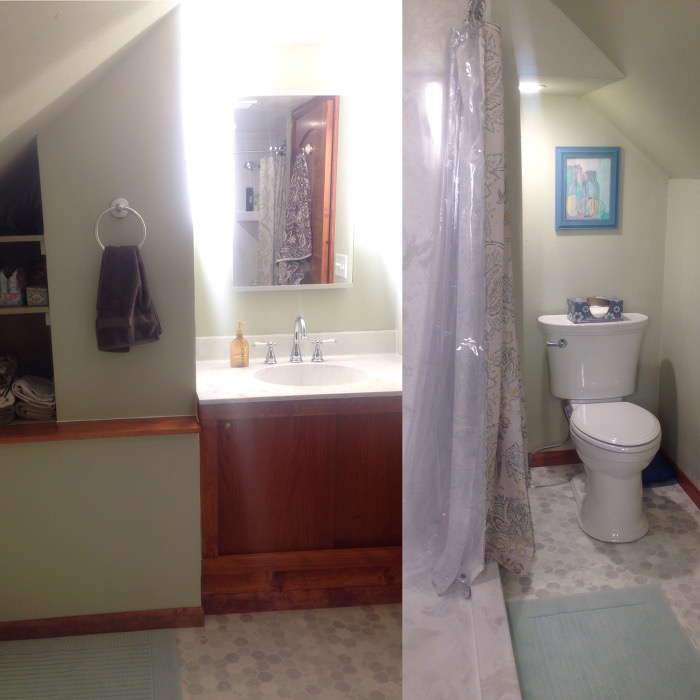
I made a custom shower rod (for our custom sized shower) with some basic hardware store supplies. Then I finished cleaning, arranged furniture and hung things on the walls. That’s the funnest stuff.
The first night I slept up there (we moved to the guest room) it felt like sleeping at a fancy hotel. I still get that vibe when I wake up in the morning. It’s better than I ever could have dreamed. I mean, really–not having to go down a flight of stairs to pee in the night?? It’s amazing.
The last thing to happen was finishing up the shower surround. Once that was in and everything was caulked we called it officially DONE. That’s not quite accurate…because there’s still a bit of ceiling drywall I need to fix and some drawers to install in the cupboards in what is now our nursery space. But it’s done enough not to be a health hazard.
Like I said, tomorrow I’ll have a special Sunday post (which I usually never do) with the full before and after–and maybe that will be the peer pressure I need to install those drawers tonight. Maybe. And down the road I’ll break some of this into posts of their own like: hiring contractors, products I love, refinishing wood, upcycling materials, etc. You get the idea.
Anyway, thanks for stopping by.
xo
Amy


