I am so excited to be showing you my finished master suite tonight!! Seriously, basically anyone who has come into my house lately has been invited upstairs to check it out because it’s been something we’ve been working on and I’ve been talking (and complaining) about for a few months.
I could gush all night, but I’ll let the photos do most of the talking for me. I’ll say this though. Since having a bathroom right in my bedroom I’ve gotten up every morning and wanted to do my hair and make up. Just because I like spending time in there. Crazy, I know. And I make my bed every morning and keep it all nice and tidy (for the most part). We’ll see how long that lasts. Well…without further ado, here’s a full look at the before and after!
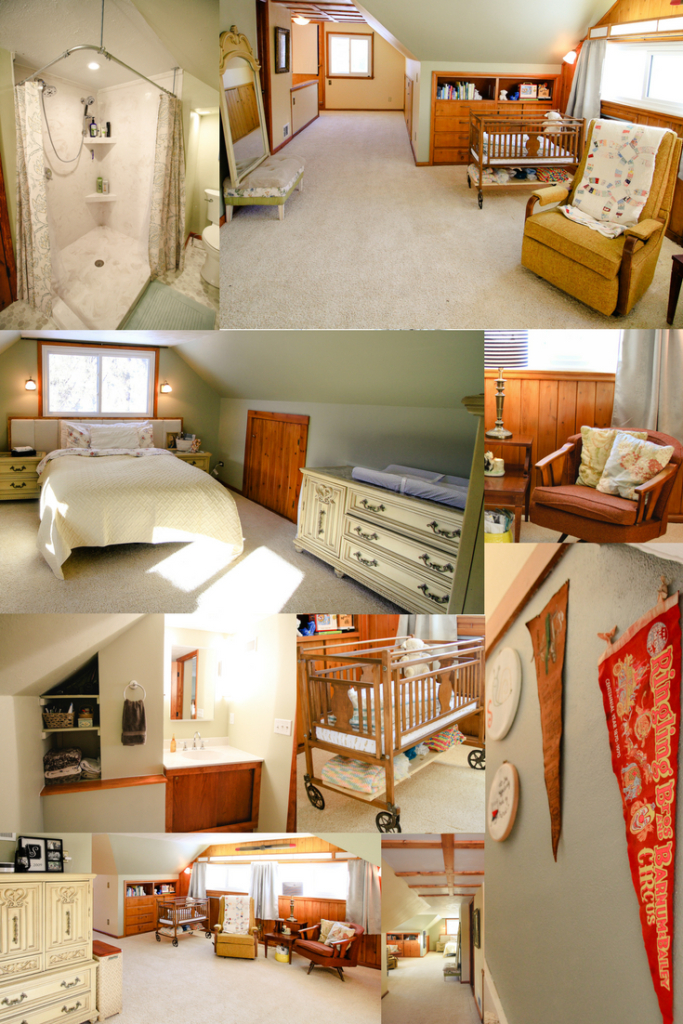
So…it wasn’t just the bathroom that got added and overhauled. We wanted to spruce up the whole space. Here’s a look at our sleeping area in progress.
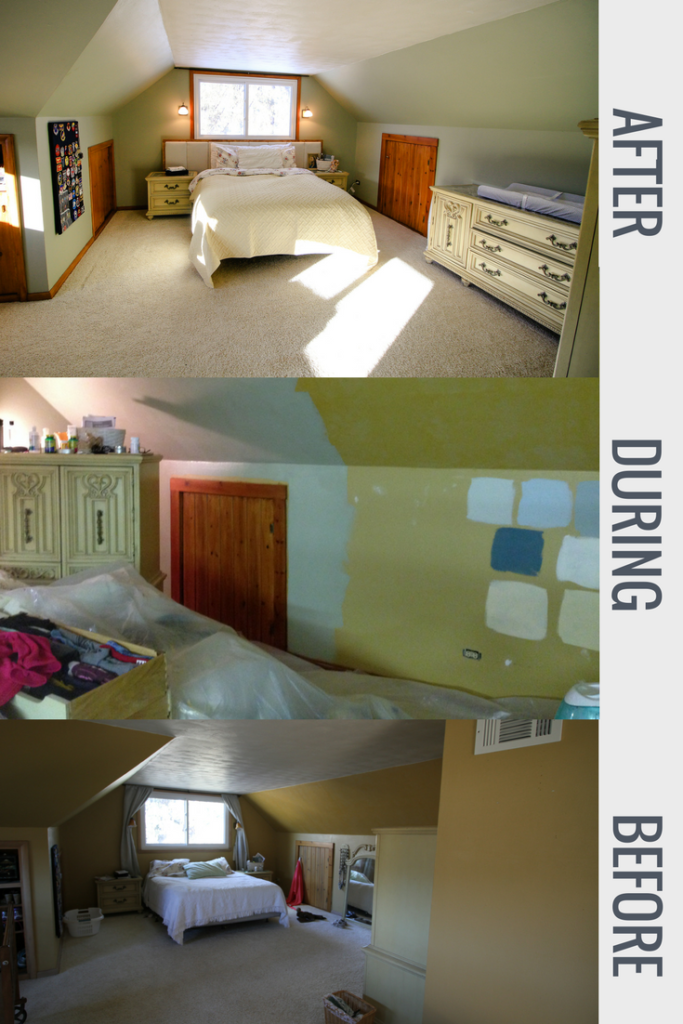
What happened here?
- I stained the wood to be cohesive with the rest of the house.
- Updated the globes on the sconces. And by updated…I mean I took away the trendy yellow globes and replaces them with vintage milk glass globes to match the feel and age of the house.
- After lots of hard decisions…I painted–obviously.
- With cast off supplies from the Habitat ReStore I built a headboard. When the curtains are rehung they’ll tuck in behind it so we can close the curtains without sacrificing our ability to have the window wide open during the day.
- We rearranged the furniture–after some walls were moved and closets were sealed up.
- And I went stain crazy by refinishing the top of our hamper (an estate auction find) to match the other woodwork.
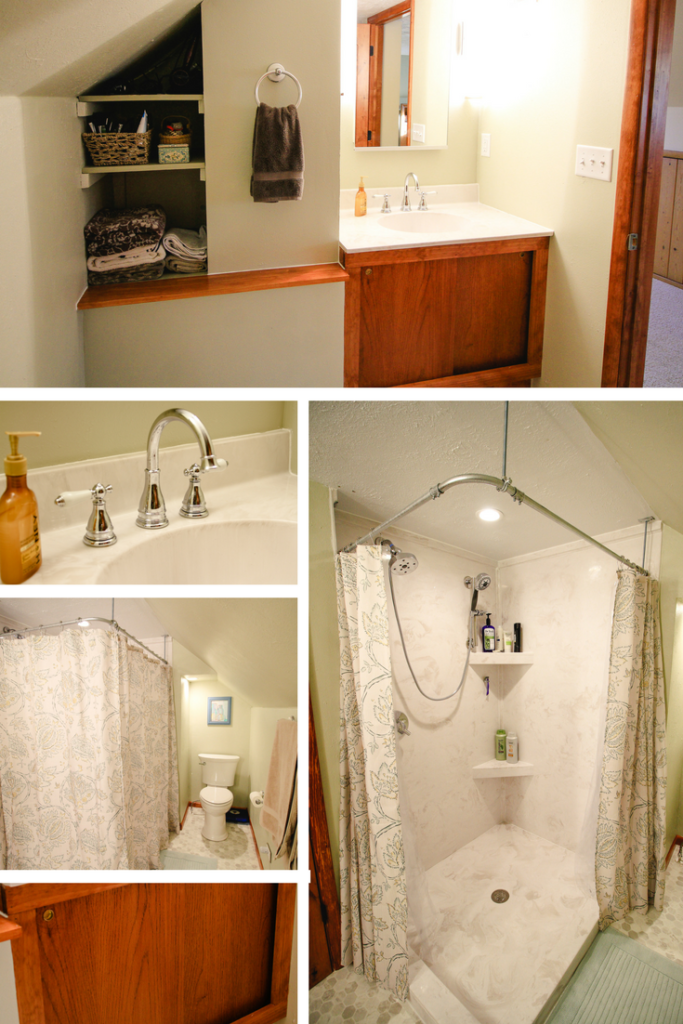
Next up let’s look at the bathroom.
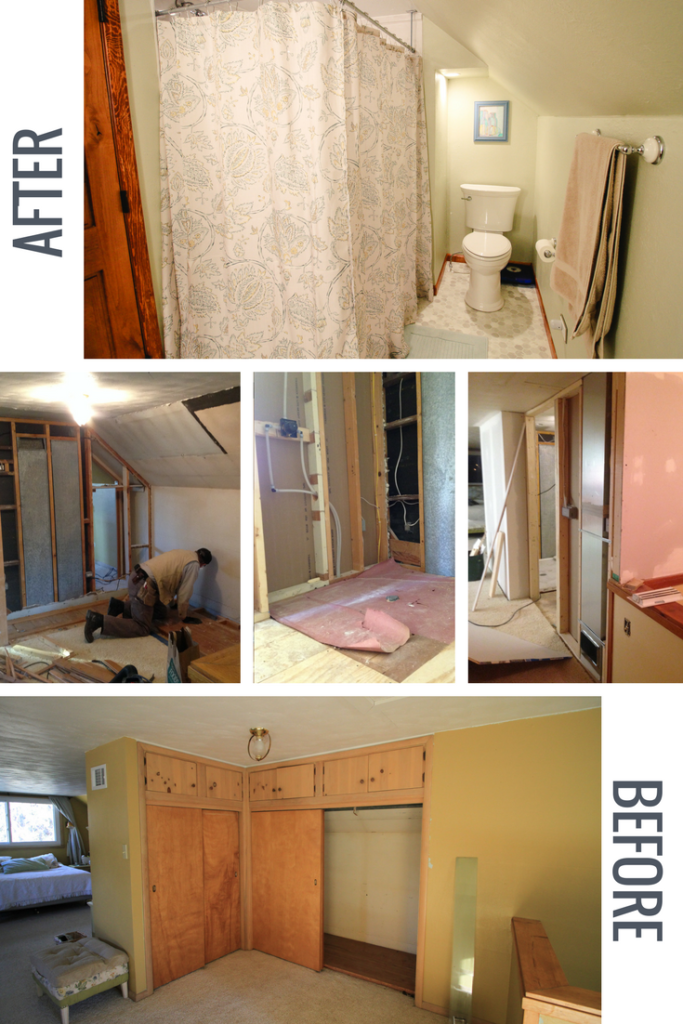
I hope the way I formatted the photos makes sense. I started with the pretty and worked backwards. If you like it (or not) let me know in the comments. These photos show where the bathroom now sits. those corner closets are now our shower!
What happened here?
- Our closets were removed to make room for the new bathroom.
- Plumbing was run up for toilet, sink and shower.
- Electical outlets were added, as were can lights, two bar lights–hanging on either side of the medicine cabinet, switches, and a vent fan.
- A supply duct was rerouted.
- We tore apart an old vanity from the ReStore and rebuilt it into a custom piece.
- The shower–a 42×48″ masterpiece with TWO shower heads!
- The paint
- Sheet vinyl flooring
- Some new walls and a lot of corrective mudding on the existing walls
- And everything else that goes with making a brand new bathroom
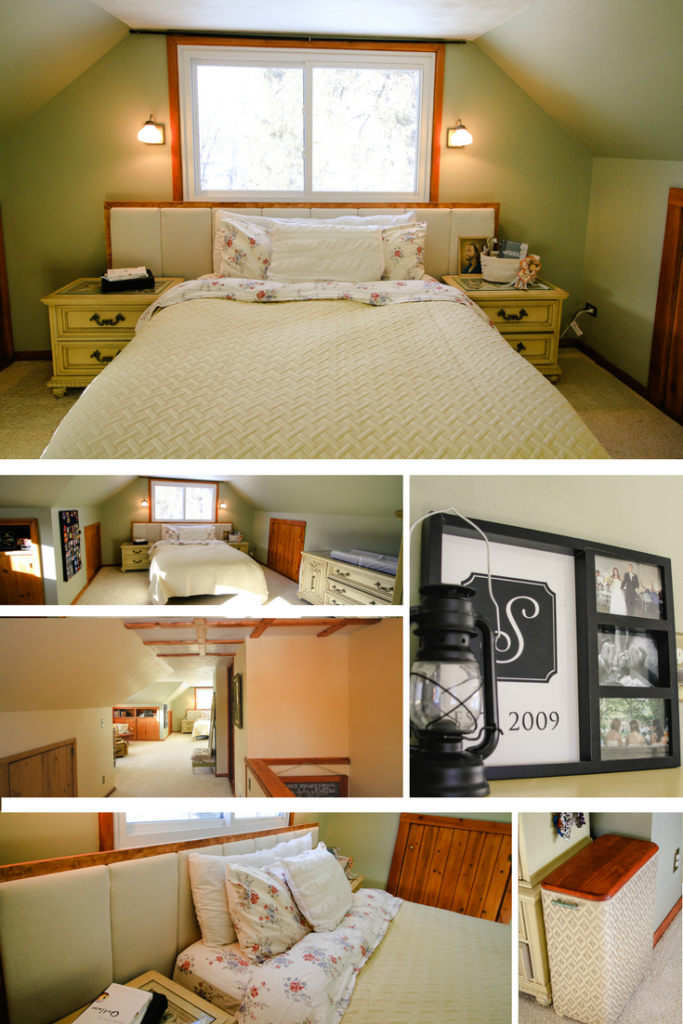
Okay, shifting to the side we’ll look at the sitting area/nursery. I’ve always thought it would be nice to have a little sitting area in the master bedroom. We kind of had one before…but it mostly housed my sewing machine and collected those only-worn-once clothes that aren’t quite ready for the hamper.
When friends of ours moved into a new house and set up a precious sitting space in their room my yearning for one of my own was rekindled. So once we started renovating, I knew a sitting space was on the list of things I wanted for sure. This will be especially nice since it’s near our “nursery.” Derek and I have already enjoyed sitting there and chatting in the sunlight–and I’m sure we’ll soon enjoy late night rockings and feedings there by moonlight.
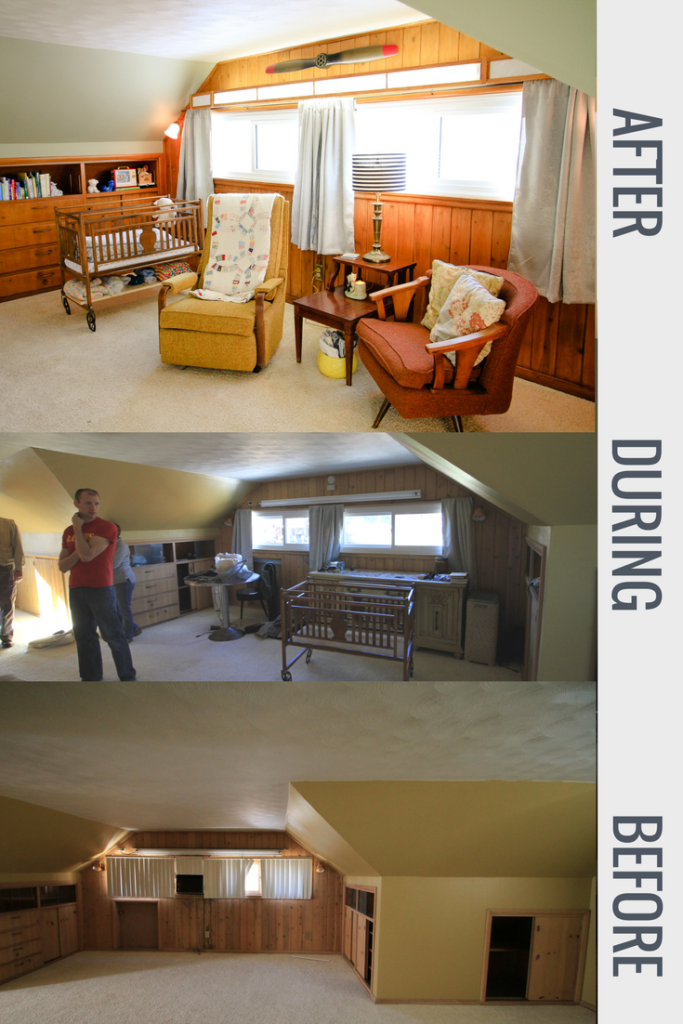
What happened here?
- New windows!! They eliminated the need for the ancient, leaky AC unit in the window.
- I sanded and restained all the woodwork and built ins with PolyShades.
- We swapped out the table for a crib and once an old closet was replaced by bathroom walls we had room to move the big dresser over toward the bed. (It’ll serve as our changing table.)
- I removed the glass sliding doors covering the shelves to make that storage space more accessible.
- Since Derek’s schedule is always changing an sometimes requires sleeping through the day, we traded the slat blinds for blackout curtains.
- Sconce globes were replaced with something more age appropriate for the house.
- The eyesore fluorescent light was covered up with a cover I built from pieces of molding and a panel of drop ceiling.
- The space was painted.
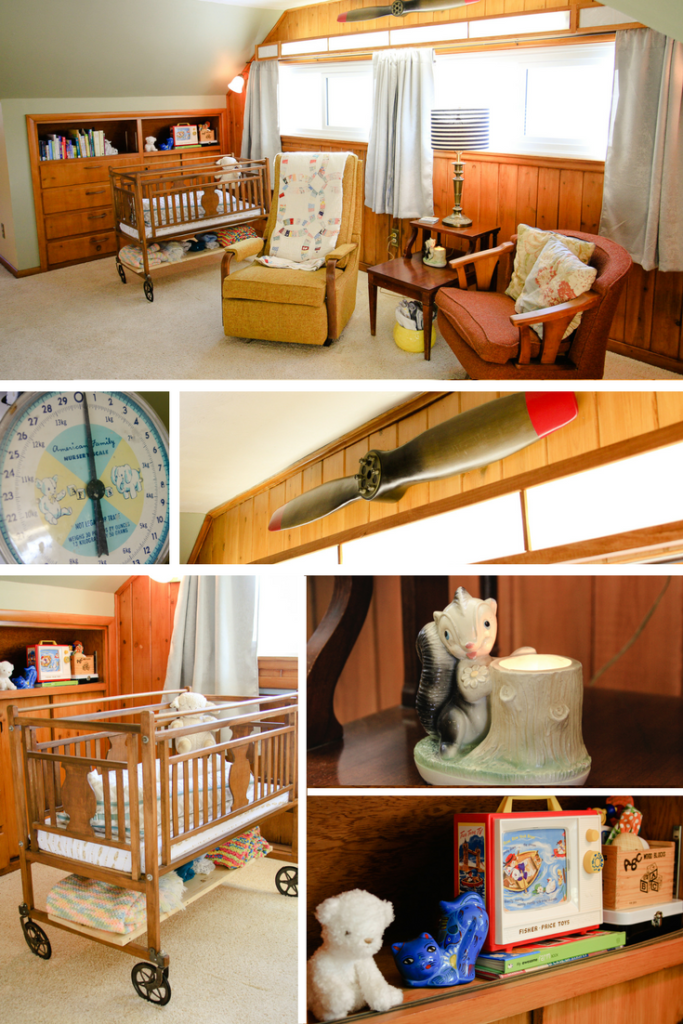
- We furnished this area mostly with items we already had on hand. They were things we likes and had stored in the basement because we didn’t have use for them until we finished the bedroom.
- The end table is a hand-me-down from Derek’s grandmother’s estate.
- I bought the orange chair from Salvation Army for a project I did over the summer…but it didn’t end up staying, so I brought it home. (There’s something undeniably awesome about it.) They yellow recliner was purchased from the St. Vincent De Paul Thrift Store specifically for this space. It’s really hard for us to purchase new furniture…because those items tend to stick out like a sore thumb in our home. Maybe someday I’ll upholster the two chairs to match…but not quite yet.
- The crib–which is the coolest thing ever–was my grandfather’s when he was a baby in 1936. I’m so honored to have it in my home.
- The lamp I’ve had since college.
- The night light was my mom’s. Again…I’m so blessed to be able to incorporate such special items into my child’s space.
- The nursery scale is something I bought while living in Minot at a vintage fair. I used to use it in newborn photo sessions and it’s way too cute to leave in storage.
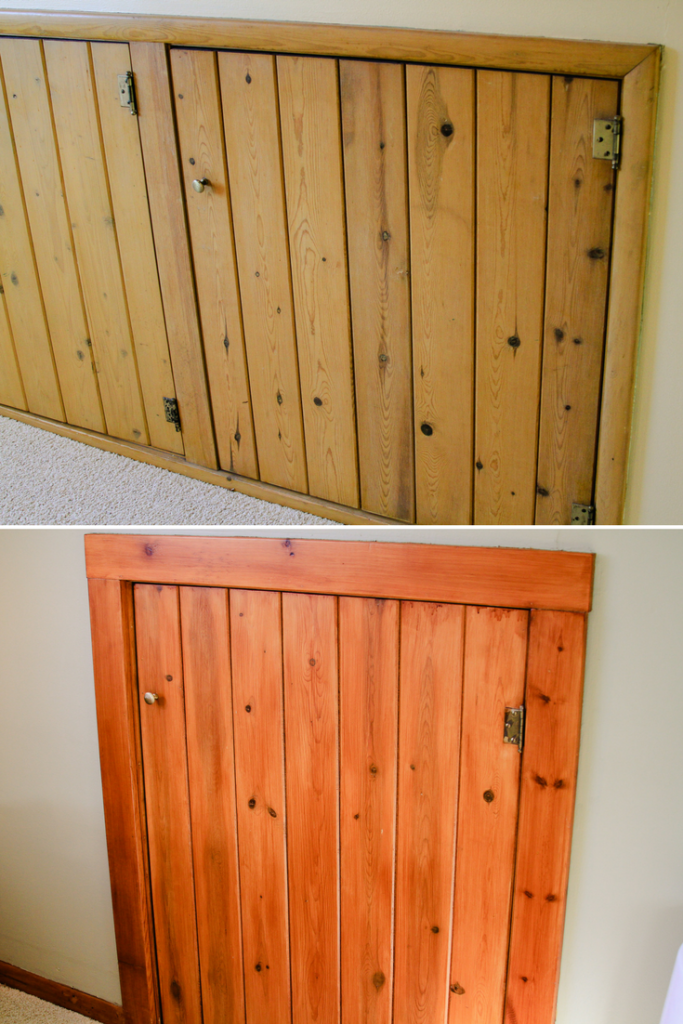
Oh, and now would be a good time to show you the B&A on the woodwork. This is what most of the doors looked like before…and how they look now. There were also parts of the woodwork (mostly trim pieces) that had been completely stripped, so they were a different color. Now everything looks cohesive and content. The red hue matches the rest of the house as well as what was popular in mid-century construction.
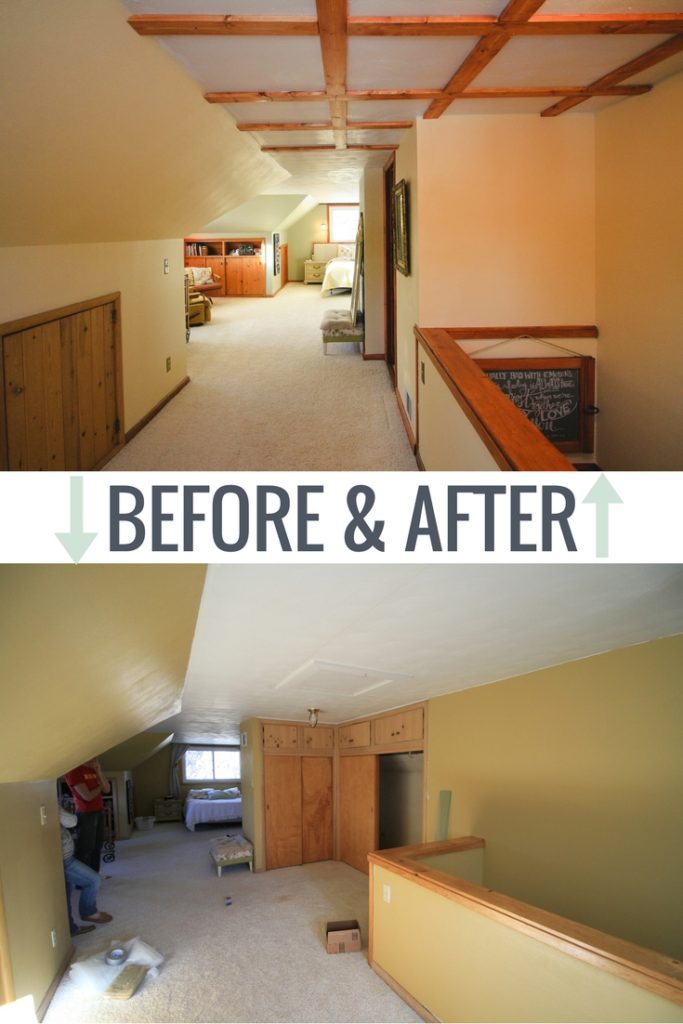
Last, let’s look at the space outside the bathroom. I love that this doesn’t feel “new.” It seems right, like it’s always been this way. When our closets were here we lost a lot of floor space. Now, that’s all been put to good use. In the coming days (months) our new closet will be built in under the slanted roof on the right. The low closets currently built into the knee wall will stay, they’ll just give added space at the back of the closet. This will be handy for storing bulky stuff like luggage, bins of puffy winter gear, etc.

What happened here?
- Obviously the closets were taken out and new walls were put up.
- We chose to paint the area in front of the bathroom a light cream color and the bedroom a sage to separate the spaces visually.
- Our attic access door had to be moved.
- We added the beams on the ceiling to reinforce some places were the attic joists were causing the drywall to crack…and to disguise our new attic entrance. And they look cool. But mostly we did it to be practical. Because no one wants to redo a ceiling right now.
- It’s not very obvious, but we also swapped the light above the stairs, which hung kind of low and collected lots of dead flies, for a classic mid-century, semi-flush-mount fixture.
So there you have it. Project complete. Man, I love saying that. I get asked often what my favorite part of doing projects is. My answer is always: “Uh…when it’s done.” I like the work. Really I do. But by far my very favorite thing is when it’s all done and beautiful. I just like to sit and look at it. To enjoy the space. It’s like I can feel the house sigh with relief that the work is over and it can relax. In my own home I don’t take on projects I don’t think the house needs or wants. This one I can say for sure: the house wanted it and it’s very, very happy. Did I mention it’s really nice not to have to go down a flight of stairs to pee in the middle of the night?? Especially when you’re pregnant!
But enough about talking houses and my urinary habits. Here’s one more collage of the finished product. I wish all of you could come over for coffee and sit in the kitchen–or the bedroom with me. But for now This will have to do. Thanks for stopping by.
Amy


