I do lots of things here in Practically Canada. Lots and lots of things. Lots of varied activities that lend themselves to a never-boring {but sometimes a little too busy} lifestyle. But–of all the things I do, working with the Minot Area Council of the Arts {MACA}’s Artists in the Schools Program is definitely in my top three.
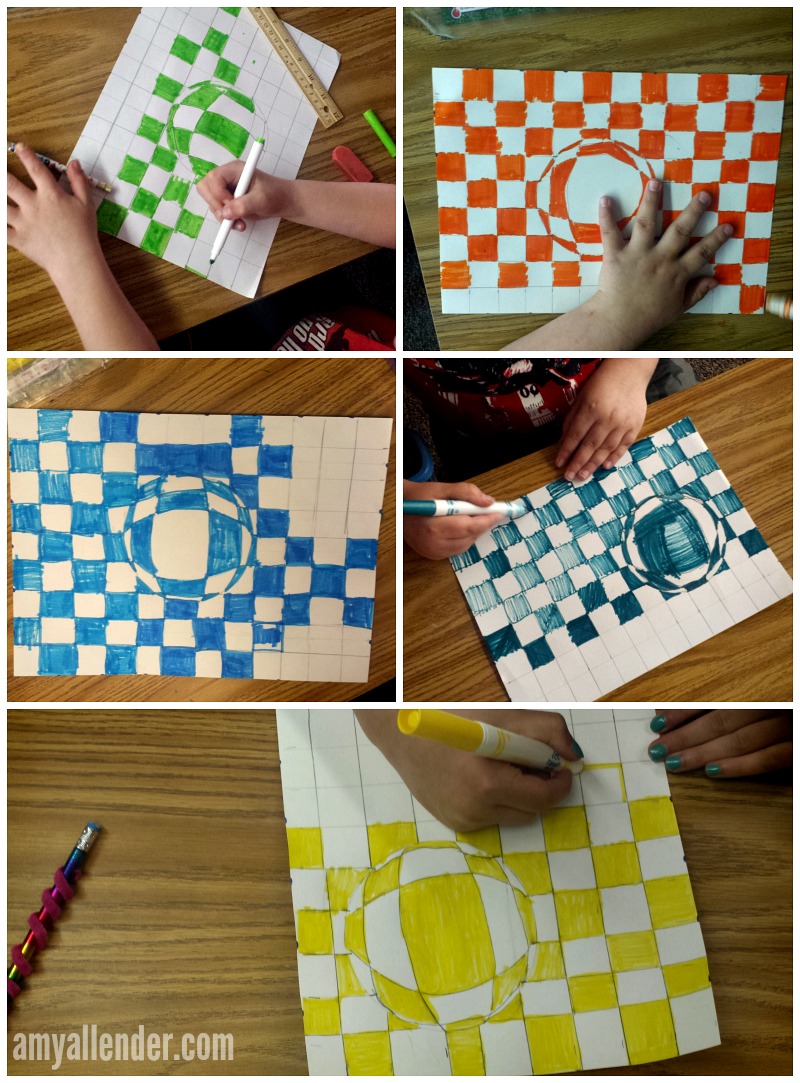
You’ve heard me talk about this before. I’ve cut snowflakes, learned the color wheel and painted many, many canvases. Last week I did another class focusing on optical illusion art for kids with an outstanding group of 3rd grade students at Bell Elementary. This project is a little tricky, so I don’t break it out unless the group is well behaved and able to tune in and follow directions. This particular class was fantastic on all fronts.
I started with the usual discussion on what an optical illusion is. How sometimes things aren’t always as they first appear {a lesson not only for art, but for many aspects of life.} The kids always love learning about optical illusions and they are so excited for the chance to make their very own version of op art.
This particular project is great because it combines artistic skill with mathematical skills such as use of a ruler, measuring, and pattern creation. It’s also cool because every kid can turn out a really cool product–even those who don’t see themselves as “artistic.” I love proving to kids that they can be artists even if they don’t have a natural aptitude for free hand drawing or painting. I believe it is vital that little ones embrace their creativity–and that adults don’t stifle it by instilling an attitude that “you aren’t artistic.” Creativity is key to problem solving…so let’s not crush their creativity! Agreed?
Okay. I’m finished ranting. I just love art. And kids. And kids doing art.
So. Now I’ll explain how we did this one. It’s pretty simple really.
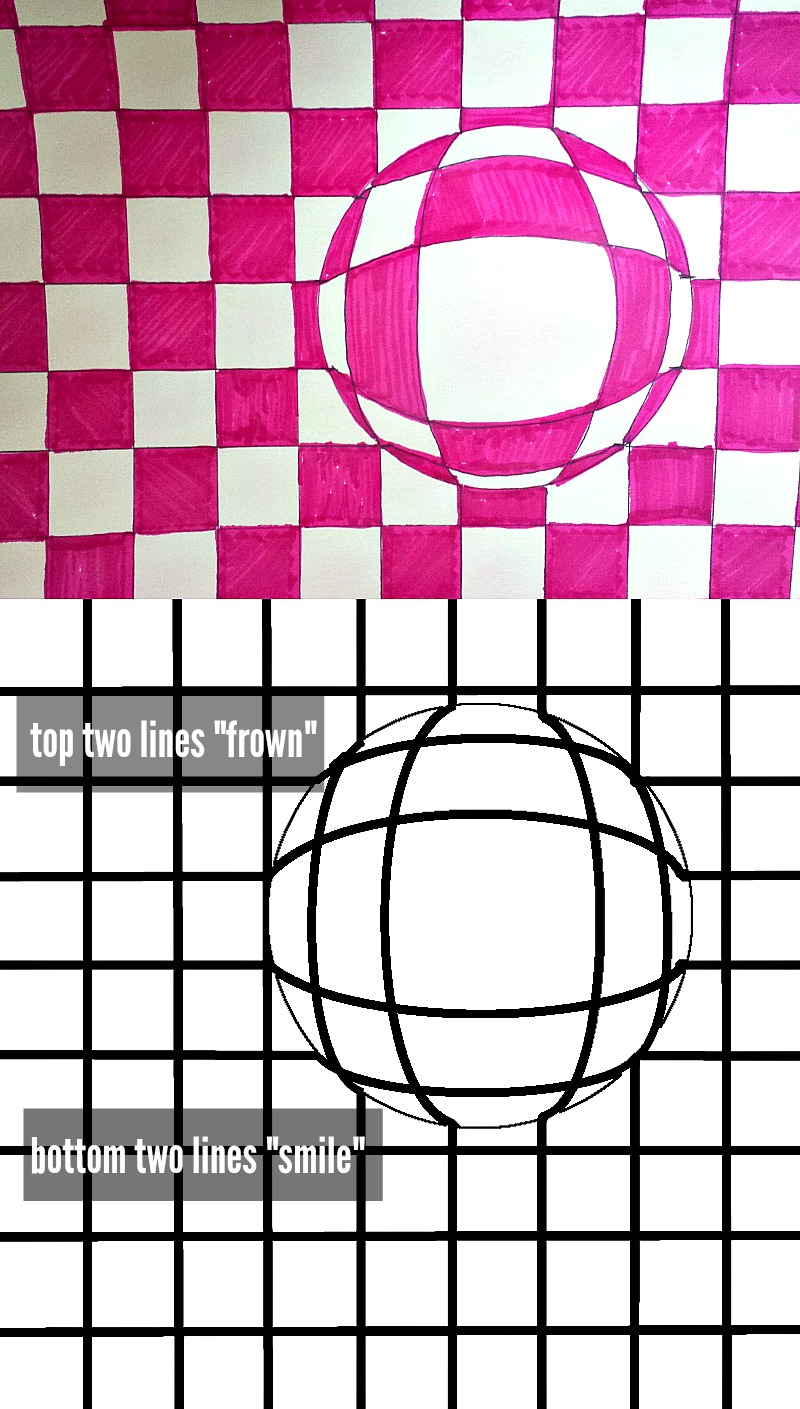
The top is my example. The bottom is how the grid looks before it’s colored.
Start kids off with their paper flat on their desk. Have everyone trace a circle on their paper. Anywhere is fine.
Have them use a ruler to mark every inch. Then, without turning the paper…have them slide the ruler to the bottom of the page and mark every inch again. Have them connect the dots–stopping at the edge of the circle so they don’t draw through it–repeat on the other two sides of their page.
Once the grid is done, have them connect the lines that but up to the edge of the circle. The top two should be connected with a line that looks like a frown–following the arc of the circle. The bottom two should “smile.” Then, turn the paper 90˚ and repeat that process. Then, it’s just a matter of creating a pattern of color.
Start with a row that runs through the circle. Color every other square. Where the circle intersects with a square it should be the opposite color. {If the square is uncolored that section of the circle will be colored; if the square is colored that part of the circle will be uncolored.} Inside the circle every other space will be colored. Then resume the pattern in the squares.
Once that first row is finished, complete the pattern within the circle. Then finish the pattern in the squares–every other should be colored, with the rows alternating like a checker board.
So that’s it. Hopefully that’s helpful to my teacher friends out there. It really is a great project for honing in on all kinds of skills. Just maybe it’ll be something fun for your classes at the end of this school year!
Amy


