A long time ago….way back when there wasn’t frost on the ground and it stayed light until 11 o’clock at night, and I’d just had back surgery and wasn’t allowed to do much…I got glue gun happy and made this adorable DIY sisal tote bag.
That first one was a bit of an experiment so I didn’t document the process. But it came out lovely. I gave it away as a gift to my cousin and she just couldn’t believe that I’d made it from rope, a pillow case and a flat-rate mailing box. In my efforts to craft early for Christmas, I’ve made another, and this time I’ve got photos and instructions.
First gather your supplies:
A flat rate mailing box–or another cardboard box. Any size will do, but it’ll affect the finished shape of your tote.
Glue gun and lots of sticks.
A pillow case.
Sisal rope in a couple sizes.
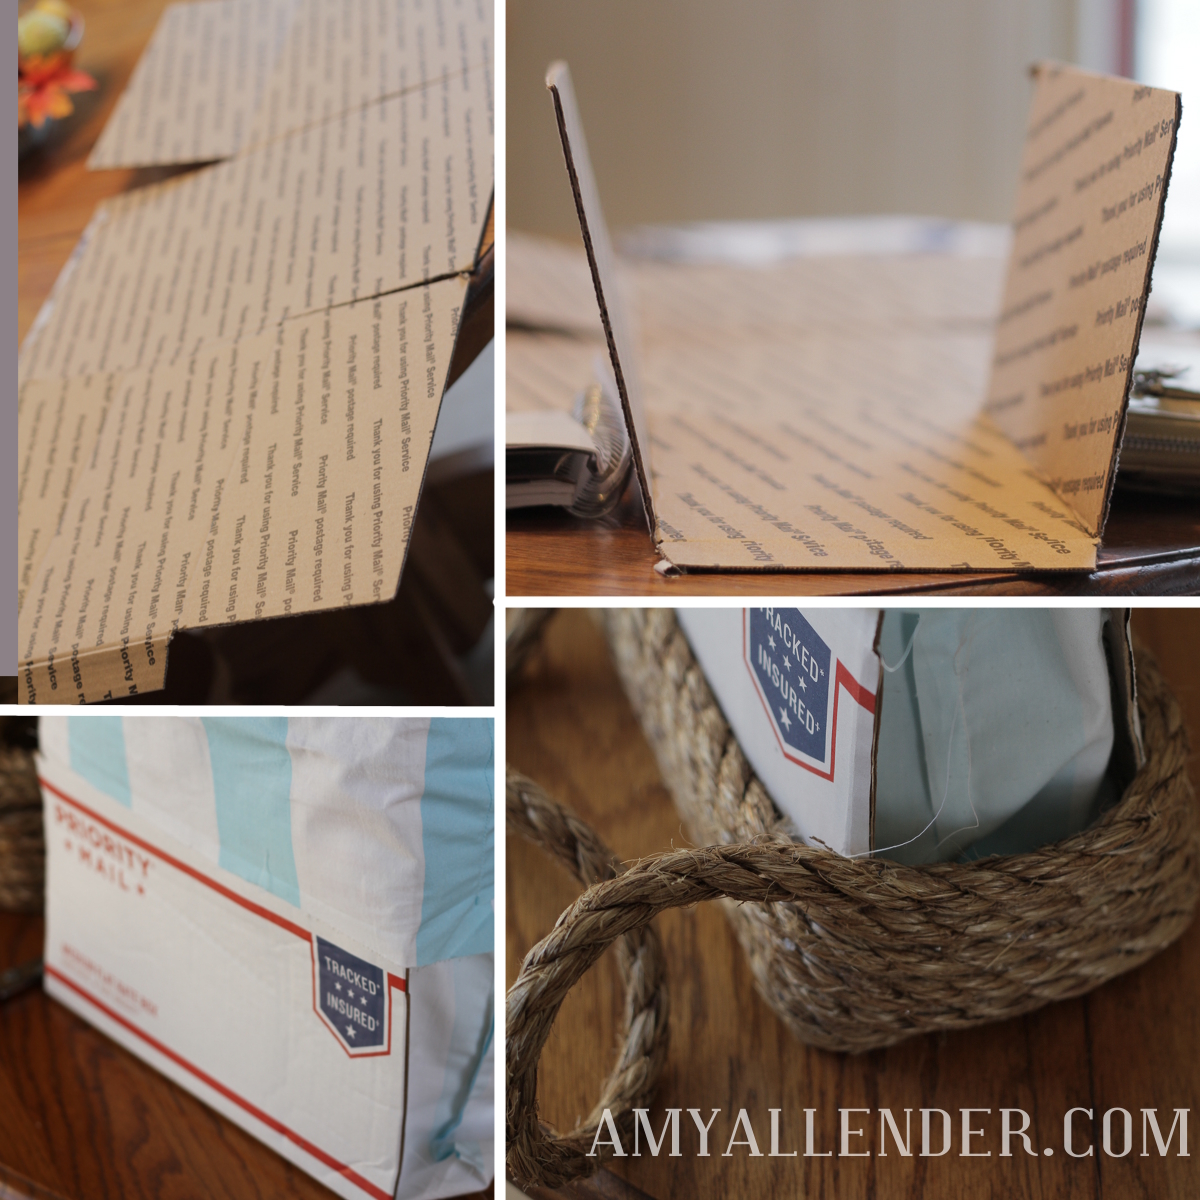
Start with your box. Lay out flat, like the fist image. Here you can play around with folding up different sides to form the shape of your tote. The first one I made used a large flat rate box…the skinny kind. This one is a medium, more boxy box.
Fit your old pillowcase inside as a lining. Use some glue to adhere it to the bottom then fold the sides over the top. Cut away and excess you have, then glue the top of the pillowcase to the box. It doesn’t really matter how it looks right at this point, since it’s going to get covered up.
Then, start wrapping. Use a bead of glue to secure the rope to the box. When you get to the skinny sides with no cardboard, gently wrap it around and secure it well on either side.
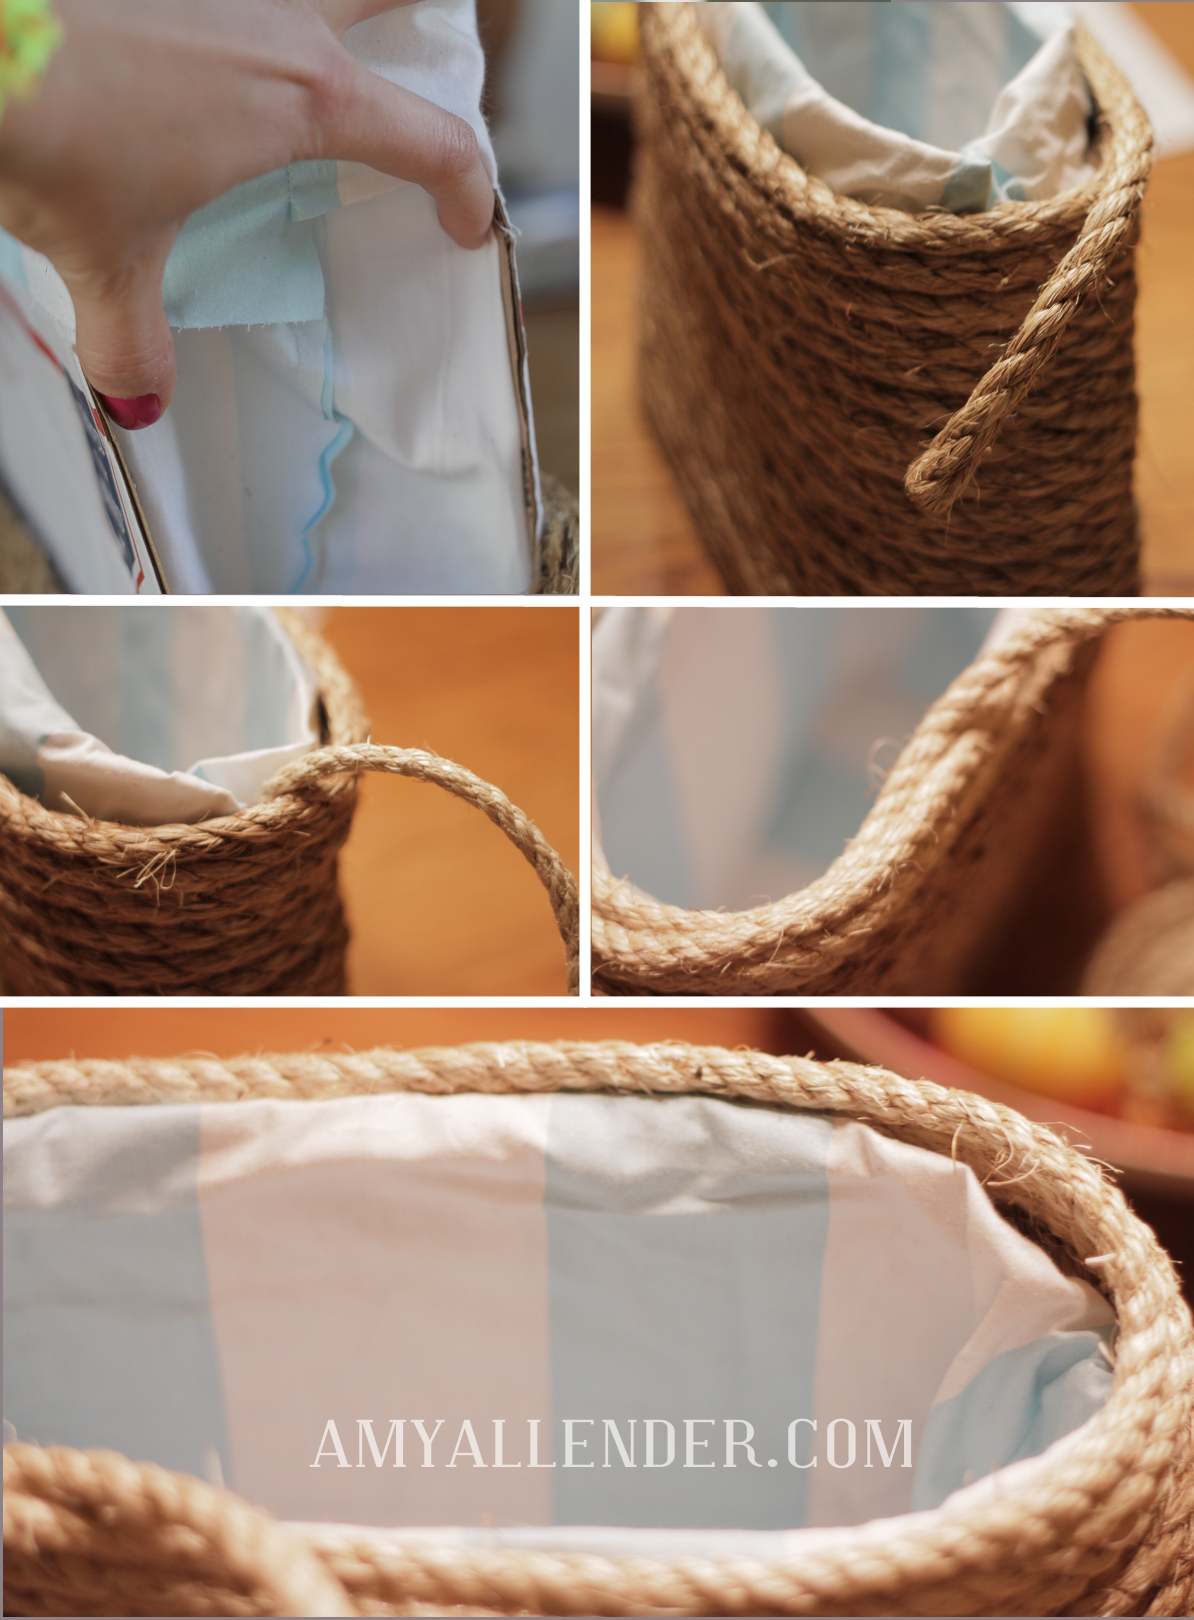
This next part is pretty important. So listen to me and take my advice. As you continue wrapping, use your hand to keep consistent space on the sides as you wrap the rope around. Naturally, the box will want to become narrower toward the top. Every time you wrap around the side, use those polished fingers of yours to keep the space…so you don’t have a tote with a wide base and a really skinny opening at the top.
It’s kind of basic after that. Just keep wrapping. Switch rope sizes if you like. But keep going, around and around and around.
When you want to switch sizes, wrap to the side of your box, then tuck the end down the size {the lining will hide it} and glue it in place. Then take the end of your new rope, tuck it inside the side of the box as well, glue it in place and start wrapping where you left off.
Once you get to the top, wrap all the way up and over the rim, and do a row or two on the inside of the lining. You can see that part in this image of the first one I made.

Coil and glue rope on the bottom…and you’re almost done.
The last step is making handles.
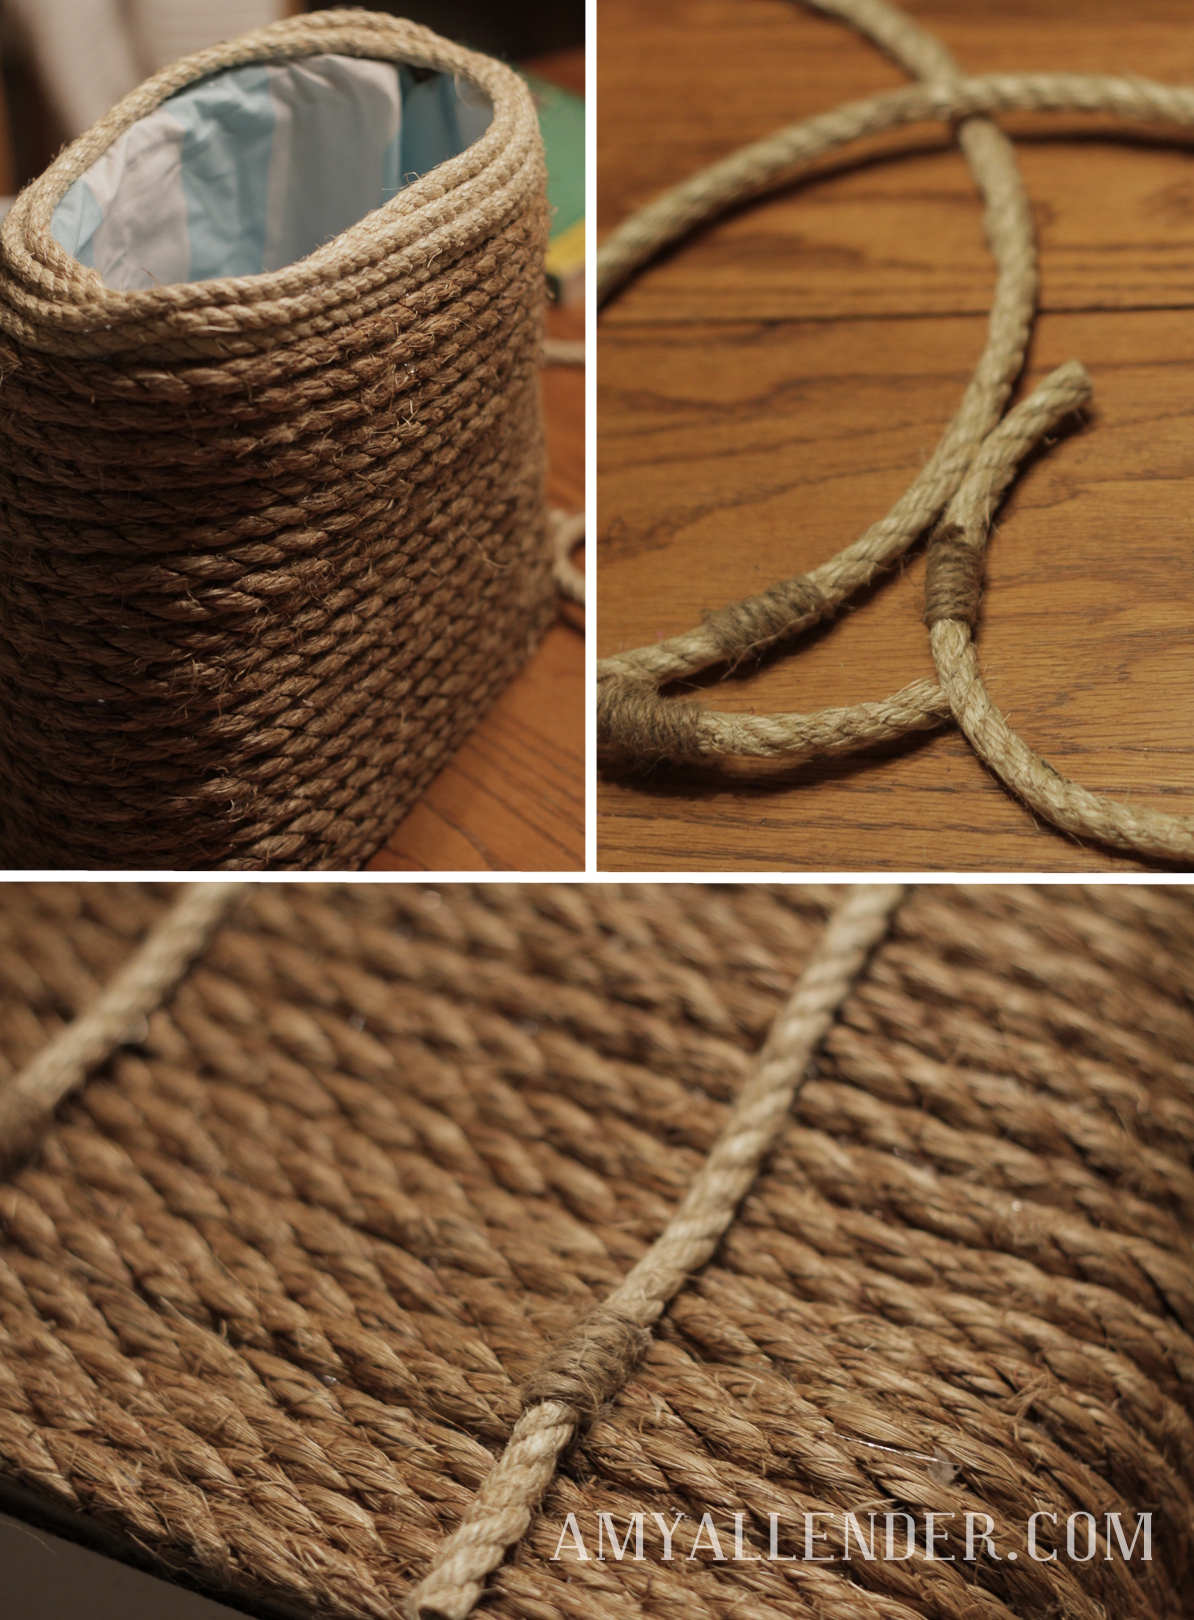
Cut two pieces of rope for handles. If you want to embellish them a little bit, you can wrap skinny cord around them. Just be sure to space the details consistently so they are symmetrical once the handles are attached.
Attach the handles with hot glue or a combination of hot glue and super glue. If you are planning to use your tote mostly for decor, hot glue will be fine. But if you are planning to haul anything heavy in it, I’d recommend using super glue to be sure it can hold up.
Let everything dry and you’re done.
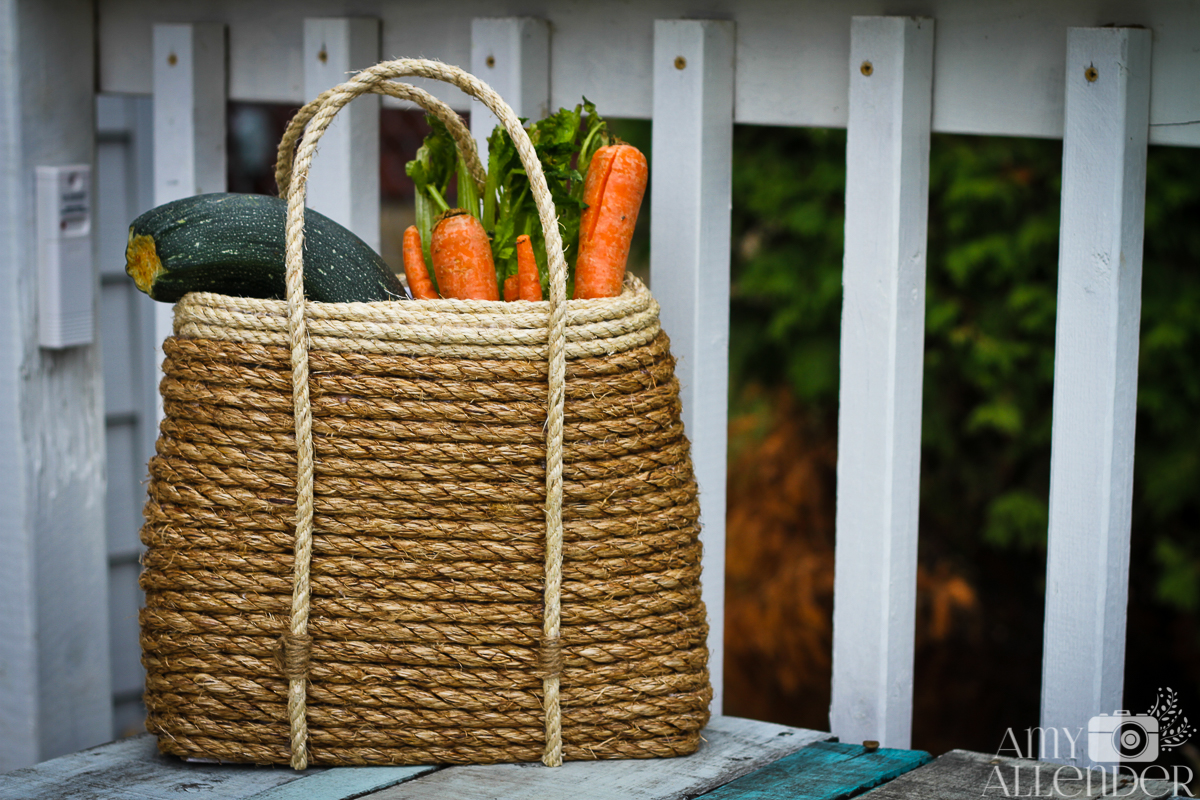
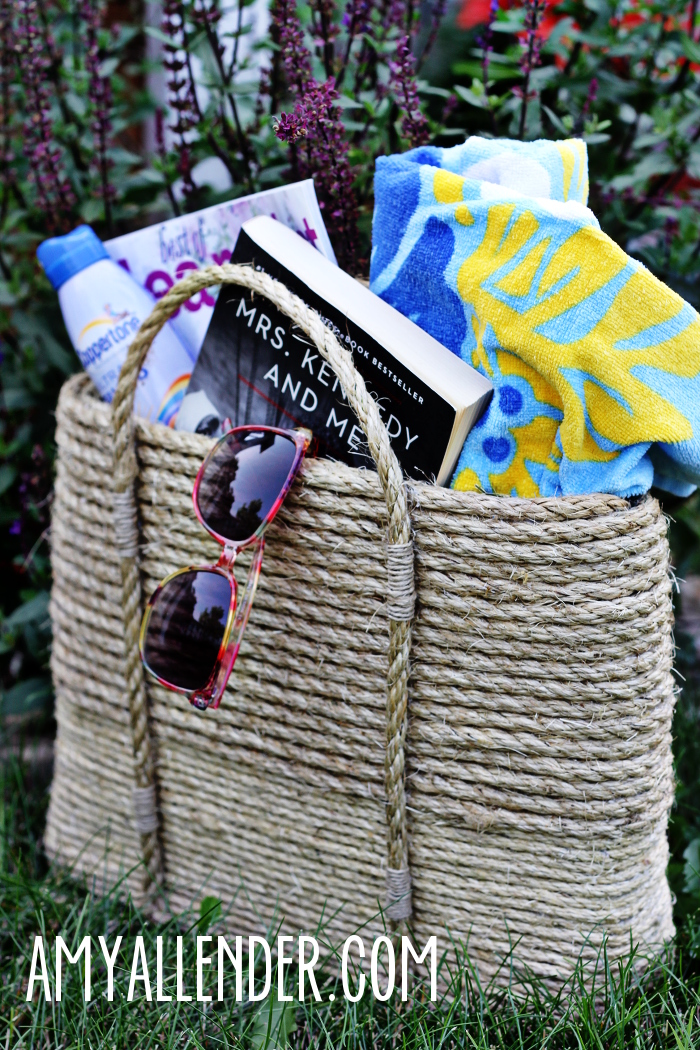
I really love the way these turn out…even it it does take some time, some glue burns and maybe a hint of crafter’s rage to produce one. They get easier and easier the more you make…so don’t be afraid. I’m totally confident in your ability to make a DIY sisal tote. They really do make awesome gifts. And they are super fun to fill with goodies and give away. You don’t even need to wrap it, just slap a bow on it and put it under the tree.
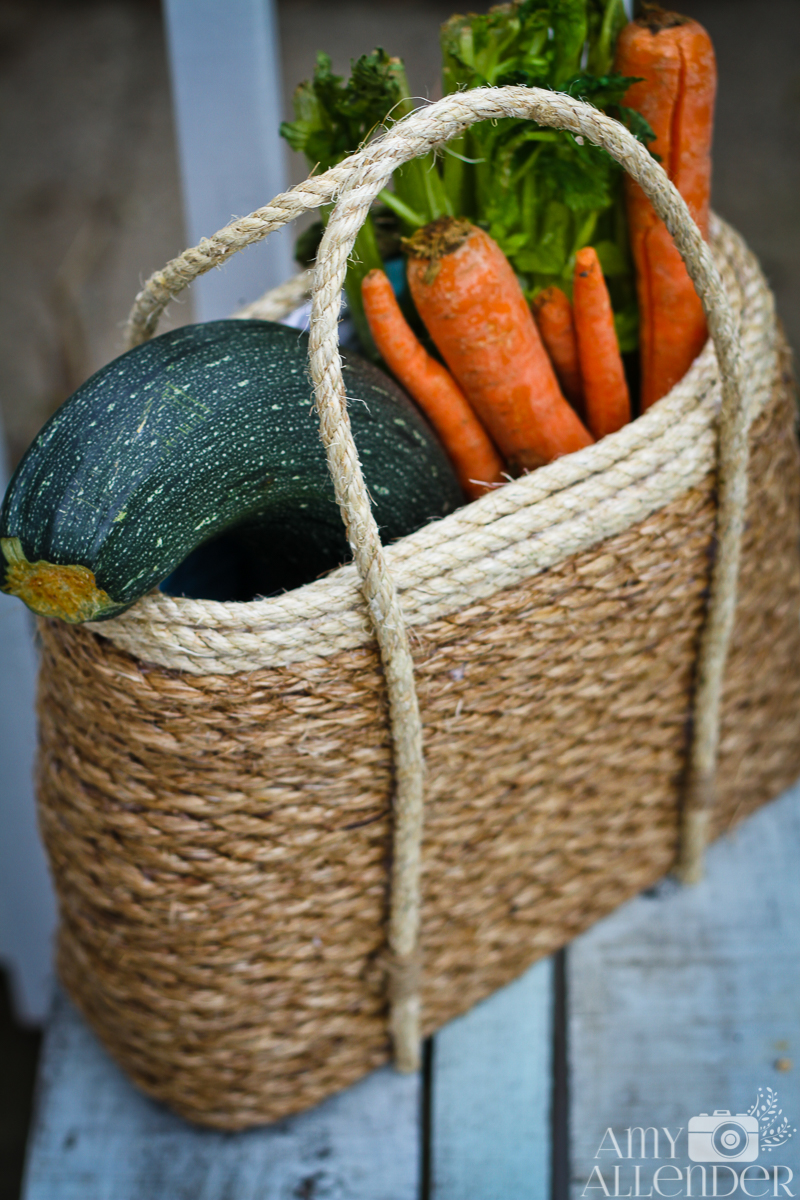
I haven’t decided what direction I’ll go with this one. {I won’t be giving it away filled with produce…} Two bottles of wine or sparkling cider and two pretty glasses fit nicely inside. Or, a couple magazines, a throw blanket and a subscription notice could be good filler. Or maybe I’ll pack it with picnic supplies. The options are endless.
Happy Friday. Happy crafting.


