by Amy | Jan 30, 2014 | Blog, Crafts, The Art of Projects
Well friends, Derek worked late last night…which means I was up late working on finishing the cloffice. Today is January 29 and my goal was to have it finished by the end of the month. Looks like I met the goal with 2 days to spare. It’s really nice when that happens.
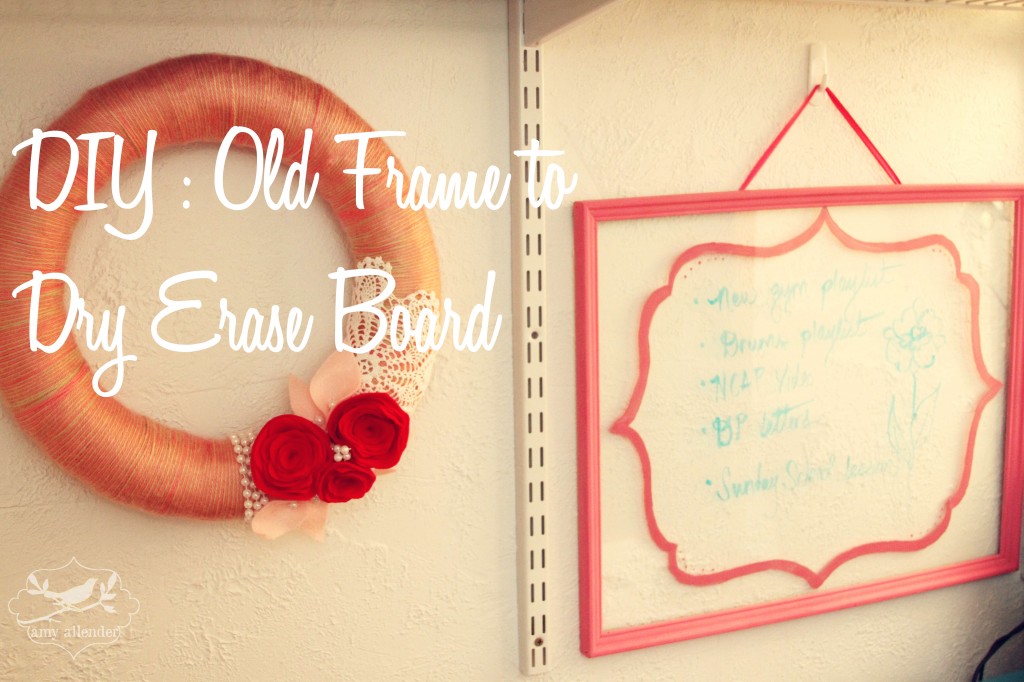
One of the final pieces of the cloffice I really wanted was a dry erase board. I’m a major list maker and I’m trying to cut back on the amount of small pieces of paper with mini lists on them floating around. Hopefully a board near the desk will allow me to make an ongoing to-do list without paper trail.
The only problem is, I think white boards are kind of ugly. Especially against a white wall. Then a friend mentioned that he was going to replace his office’s white board with a painted glass storm door. That got me thinking, “Could any glass be written on and erased from with dry-erase markers?”
Google told me yes.
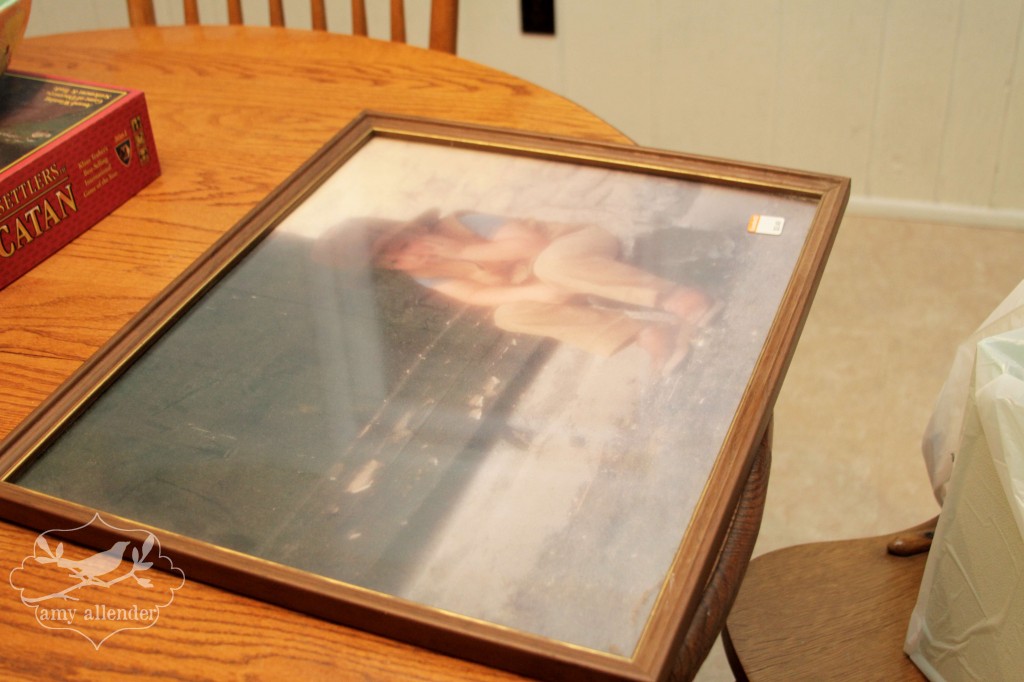
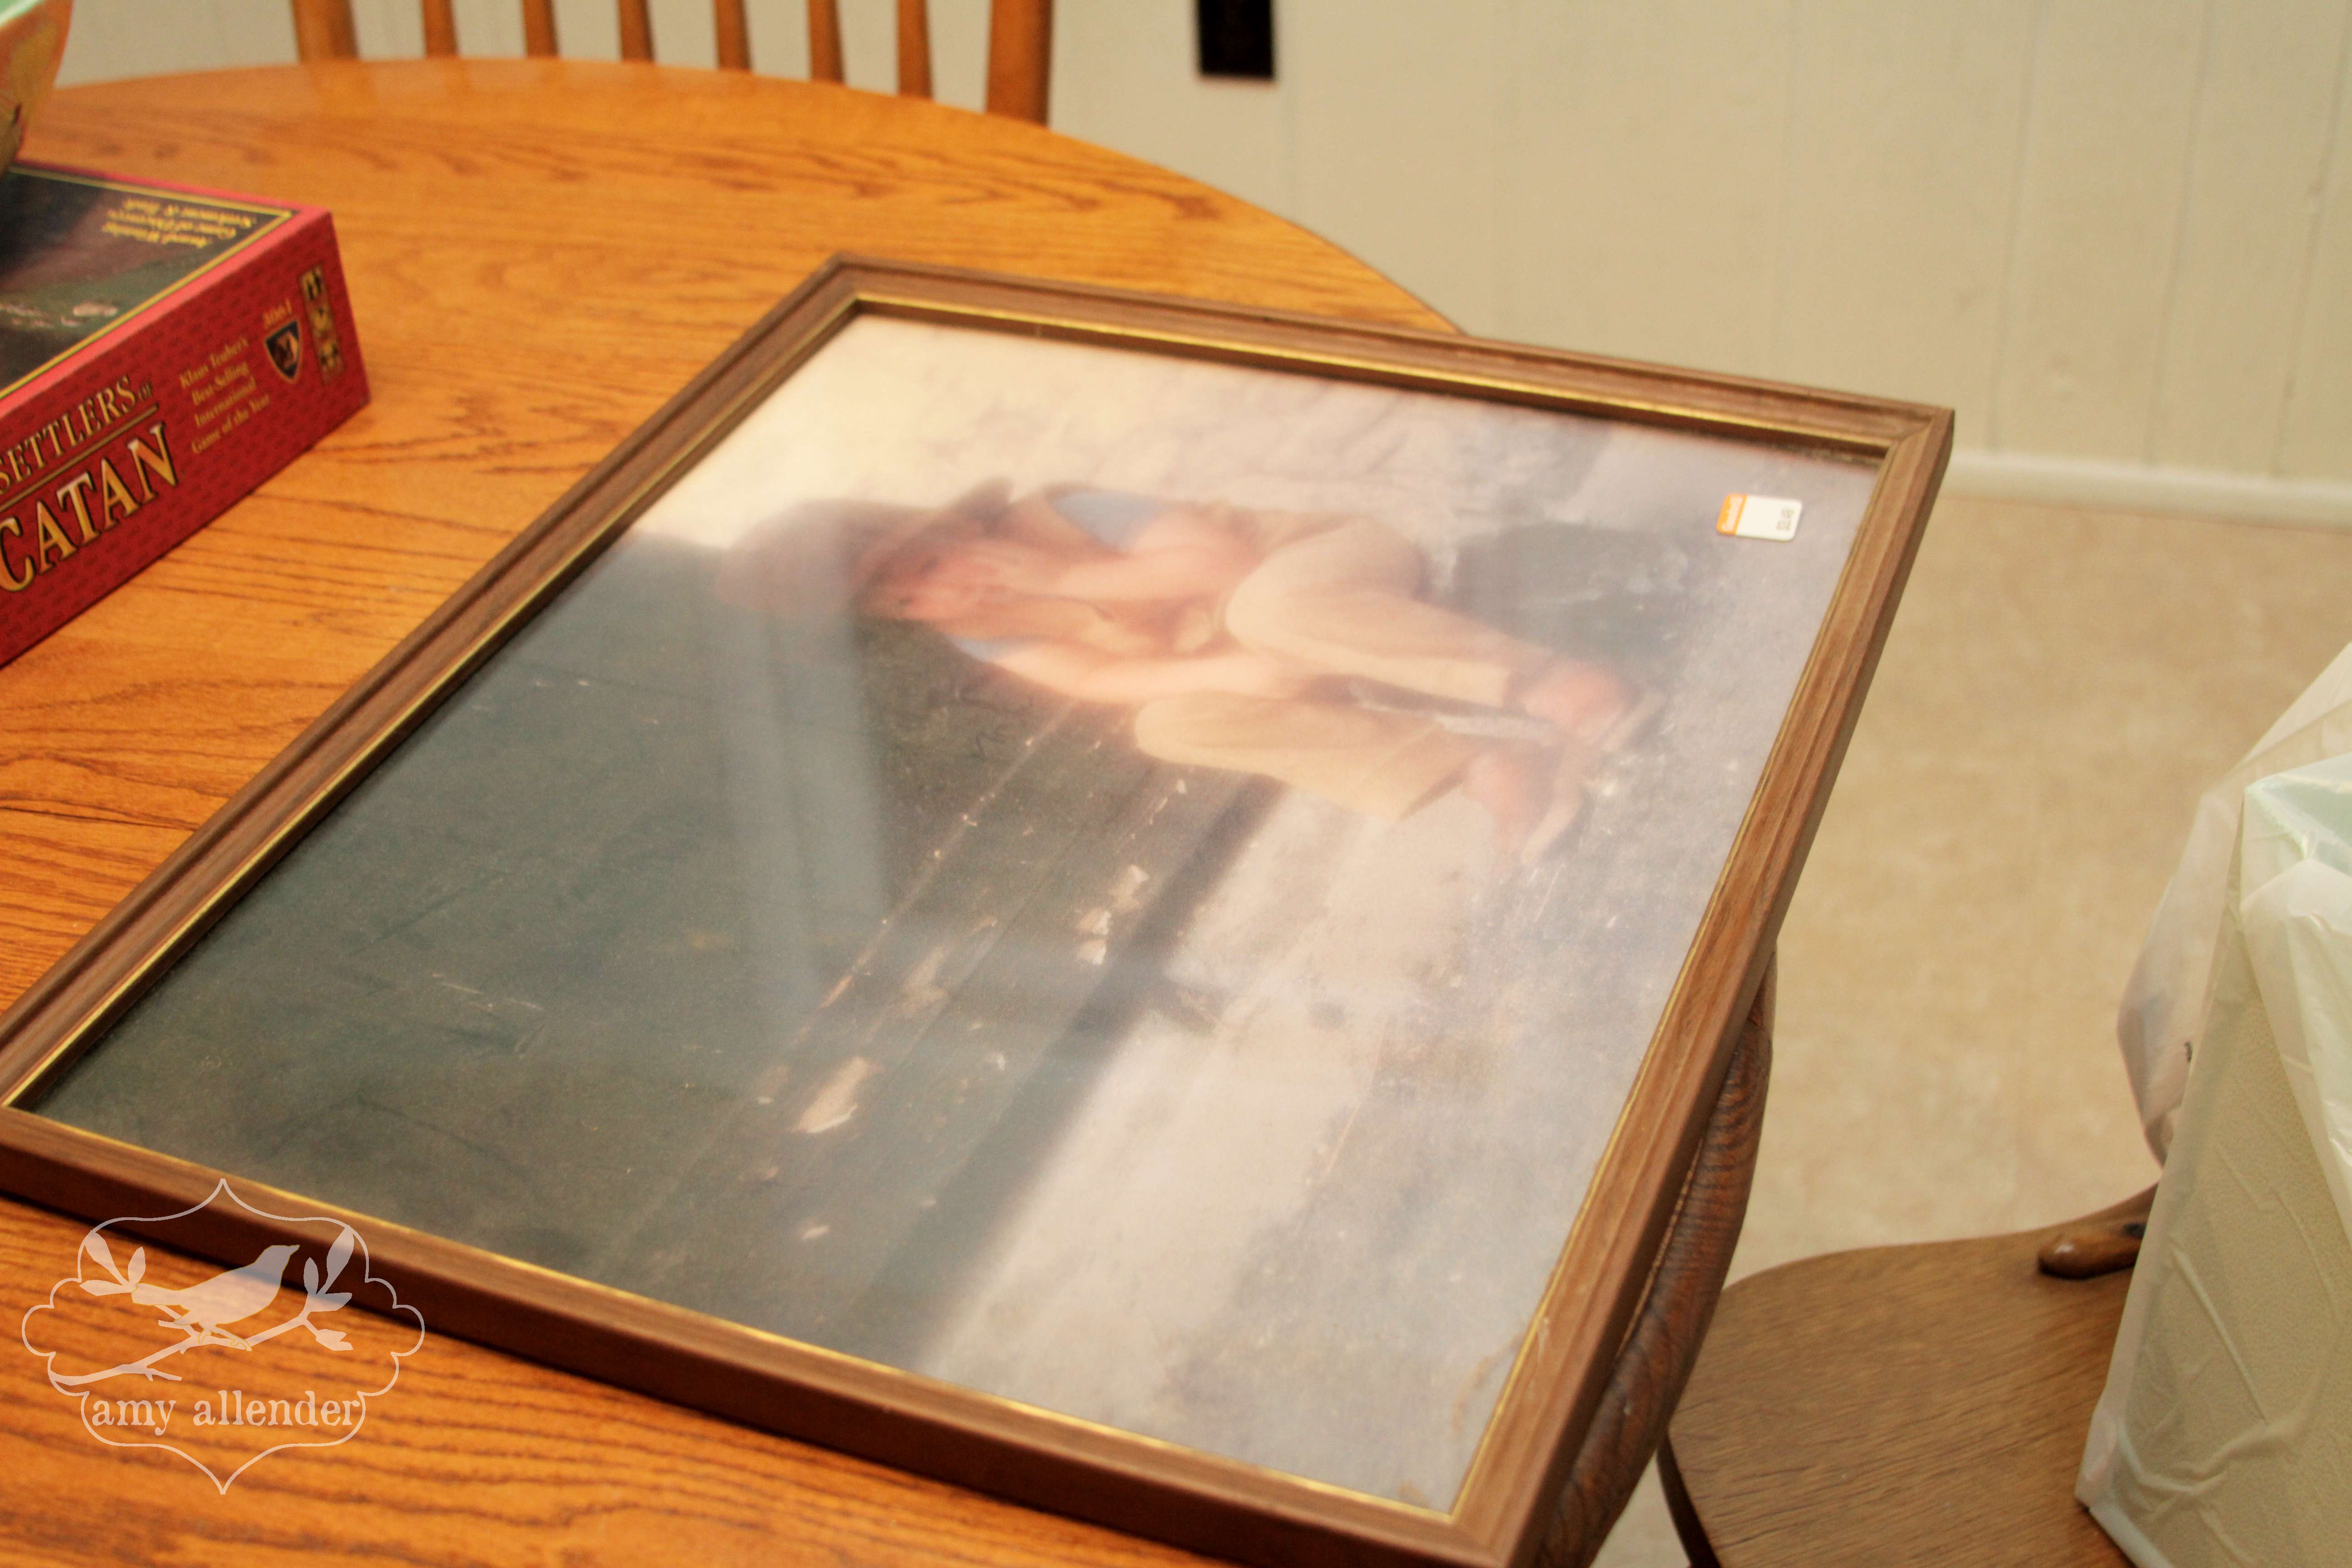
So I went to Goodwill last night and picked up an old frame. It even came with a complimentary picture of a sad little boy in period clothing. Case in point it was $3. Just be sure you get one with real glass in the frame. I’m not sure the markers would erase as well off of plastic.
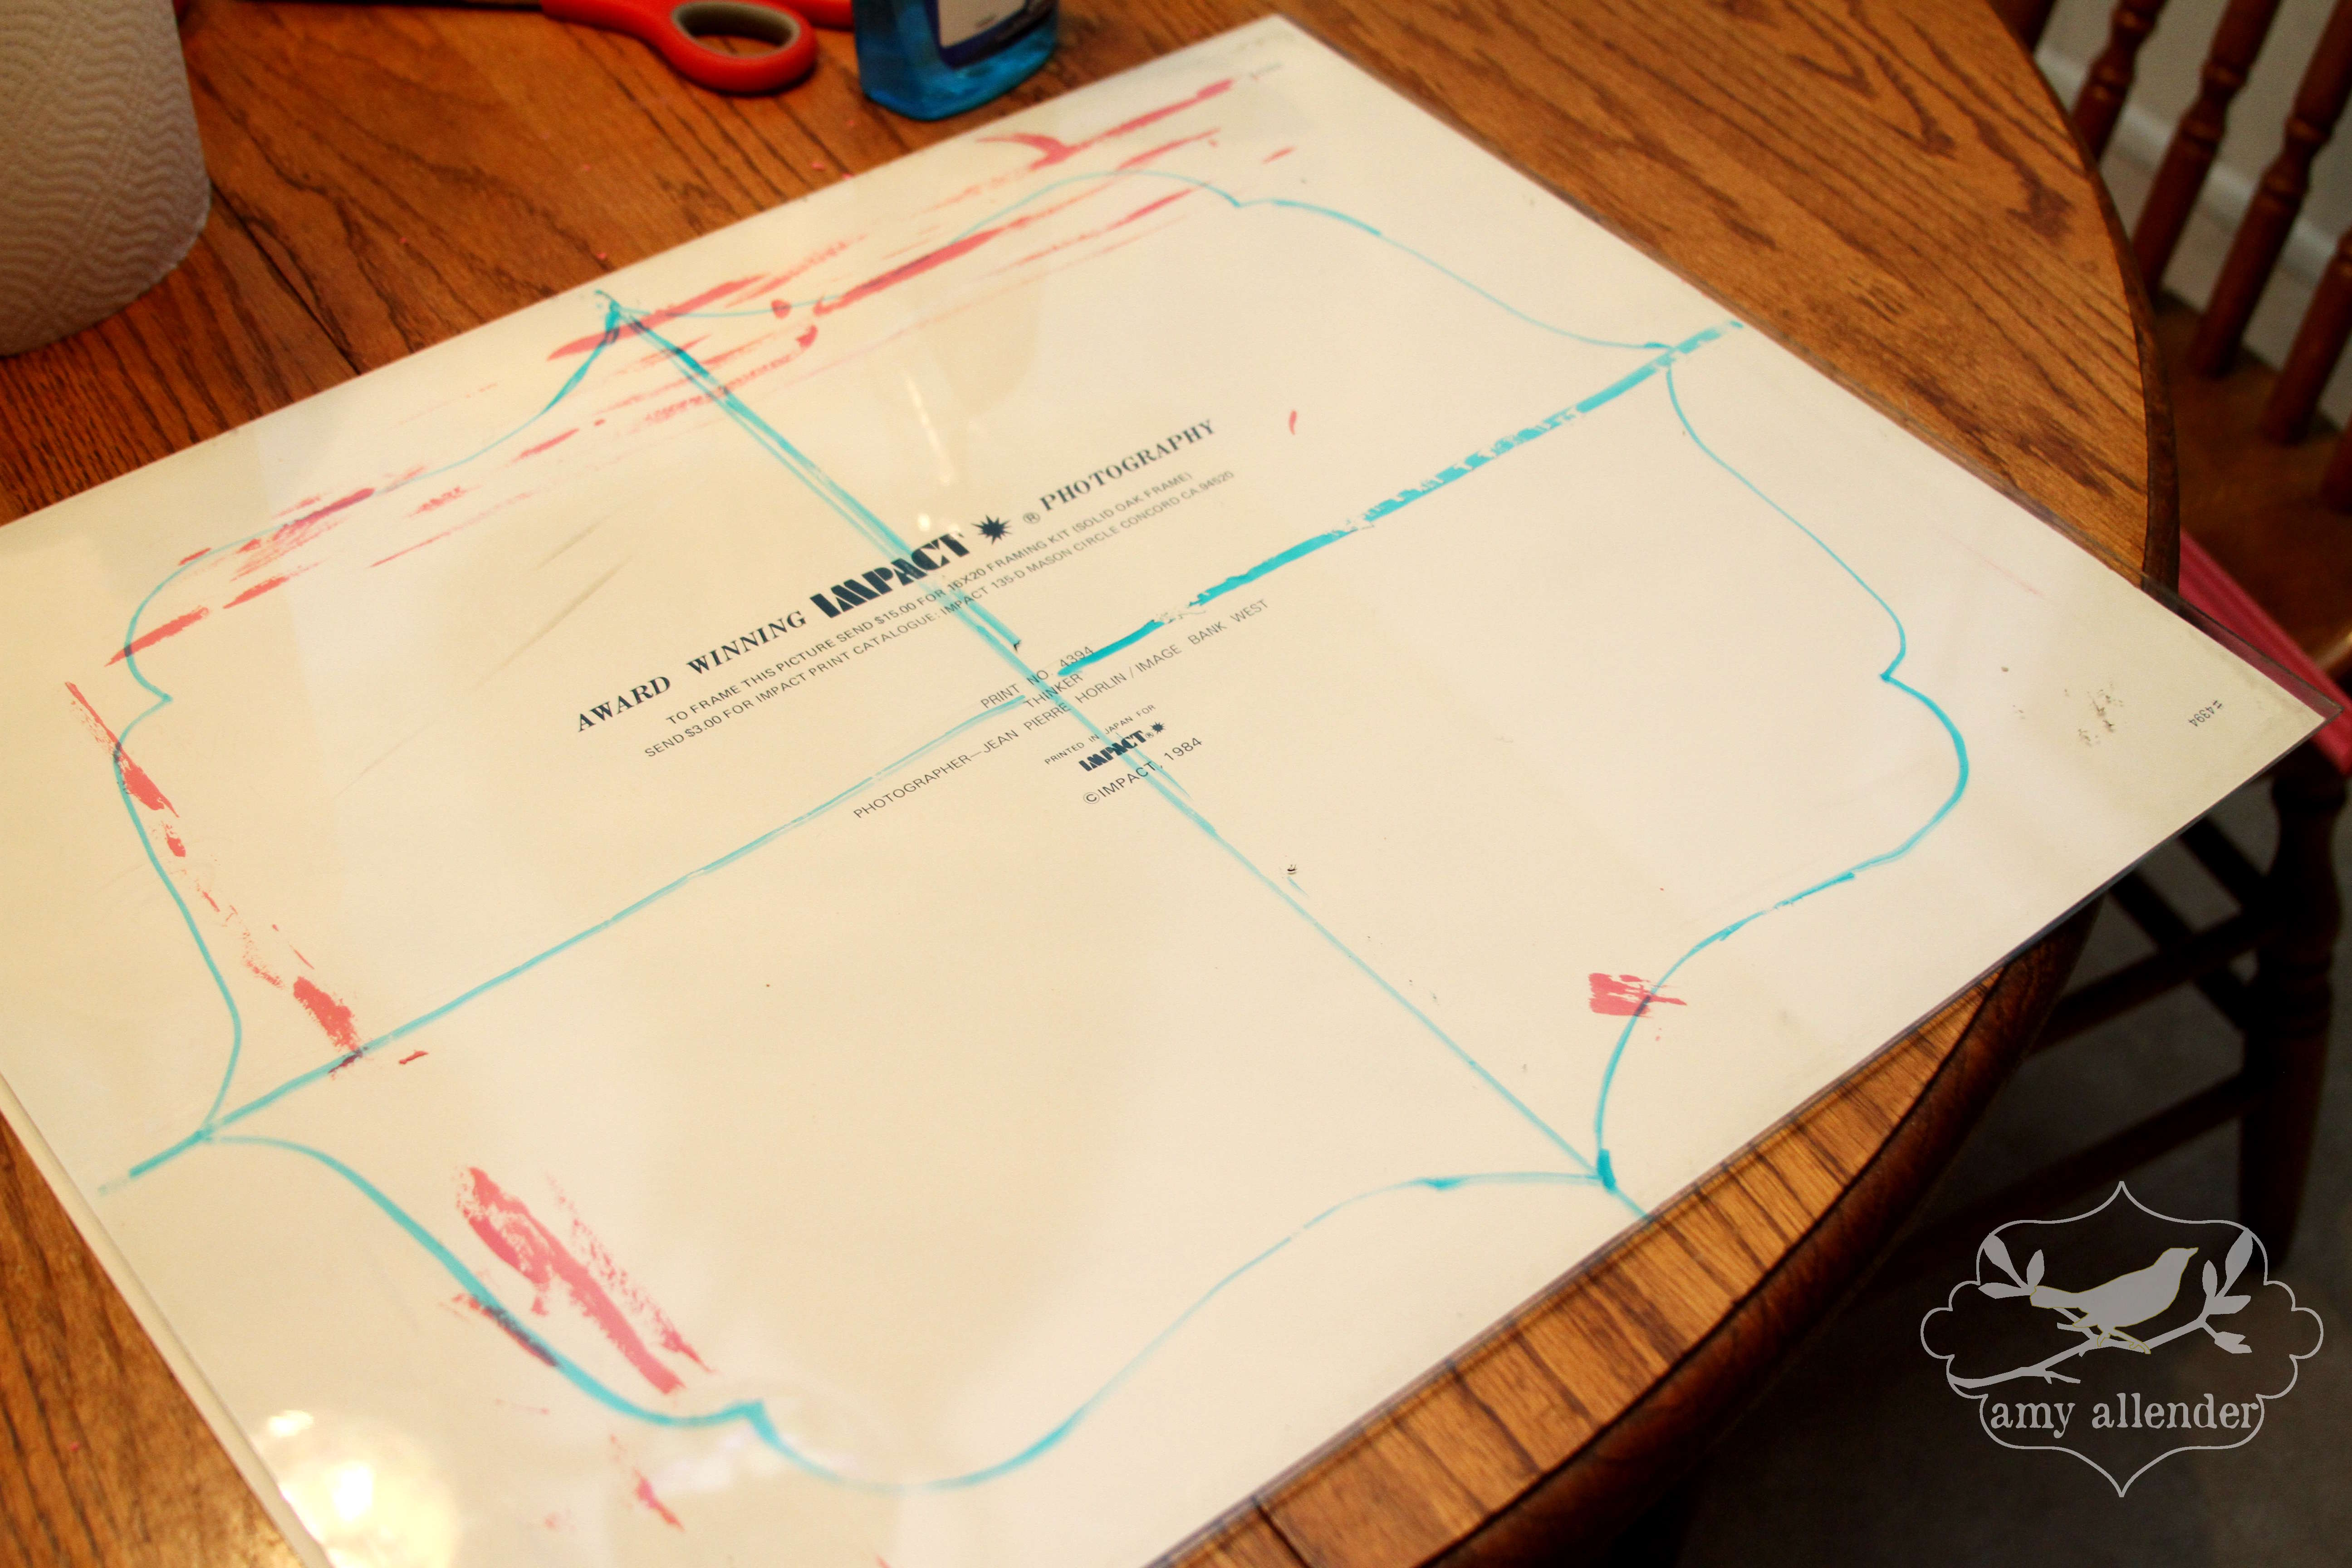
Once I brought it home I painted the frame. While that was drying I cleaned the glass and started making a stencil. I free-handed a curve similar to the shape Martha uses on her labels. Also, to keep things tidy, I used the frame’s poster to prevent paint and markers from getting on my table. I only drew one quadrant of it to keep things symmetrical. I used the poster that came with the frame to find the center of the glass and a dry erase marker to split it into four equal sections.
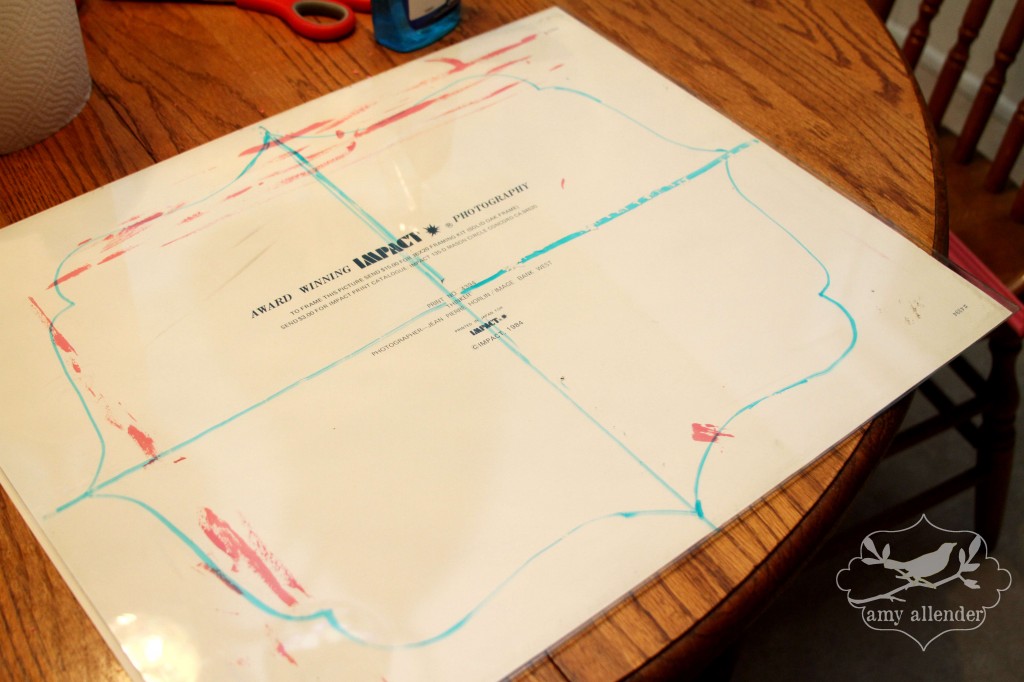
Once the quarters were drawn on I traced my curve four times…once in each section. Then I flipped the whole thing over.
Next I used the curvy line as a guide and acrylic paint to trace over it. Let that dry.
Then put your frame back together {minus the dated poster}. I used a staple gun to attach a ribbon to hang it by, but if your frame comes with a hanger on the back you could use that too.
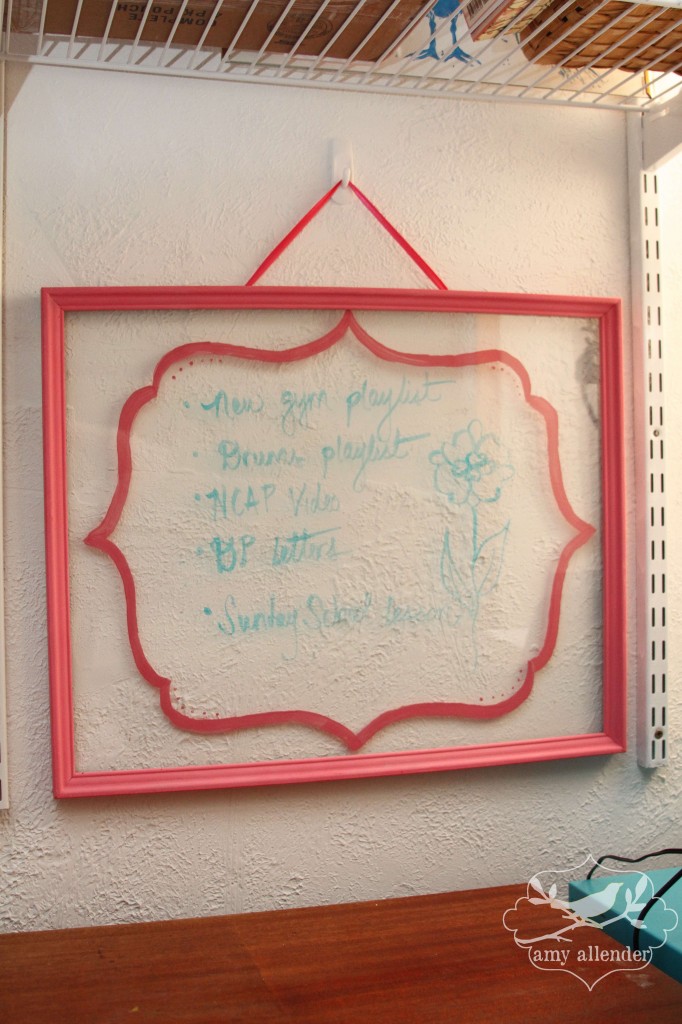
It’s cute and it writes on and wipes off easily.
If you aren’t known for your artistic handiwork here are some alternatives to making your own curvy frame.
1. Trace a platter to make a circular frame on your board.
2. Print out a giant brace…that’s what these are called {{ }}…and use that as your template.
3. Paint all of one side of your glass a solid color.
4. Use painter’s tape to create a guide for a square frame.
Get ready because tomorrow I’ll show off the finished cloffice!
by Amy | Jan 21, 2014 | Blog, Crafts, The Art of Projects
I know many of you are creative types. Like me you probably have the skills {and enjoy} whipping up a new wreath, making felt flowers, pretty-ing things up with scrapbook paper, doodling, stamping, sewing…
If any of that describes you, you’ll probably also relate to this word: Accumulation.
For those of us who like to create it’s easier {and more cost effective} to slowly amass an arsenal of supplies instead of running to the craft store every time the making-mood strikes. And since our supplies are often put away in a closet, binned up in the basement, or neatly shoved under a bed…sometimes we don’t even realize how much stuff we’ve accumulated.
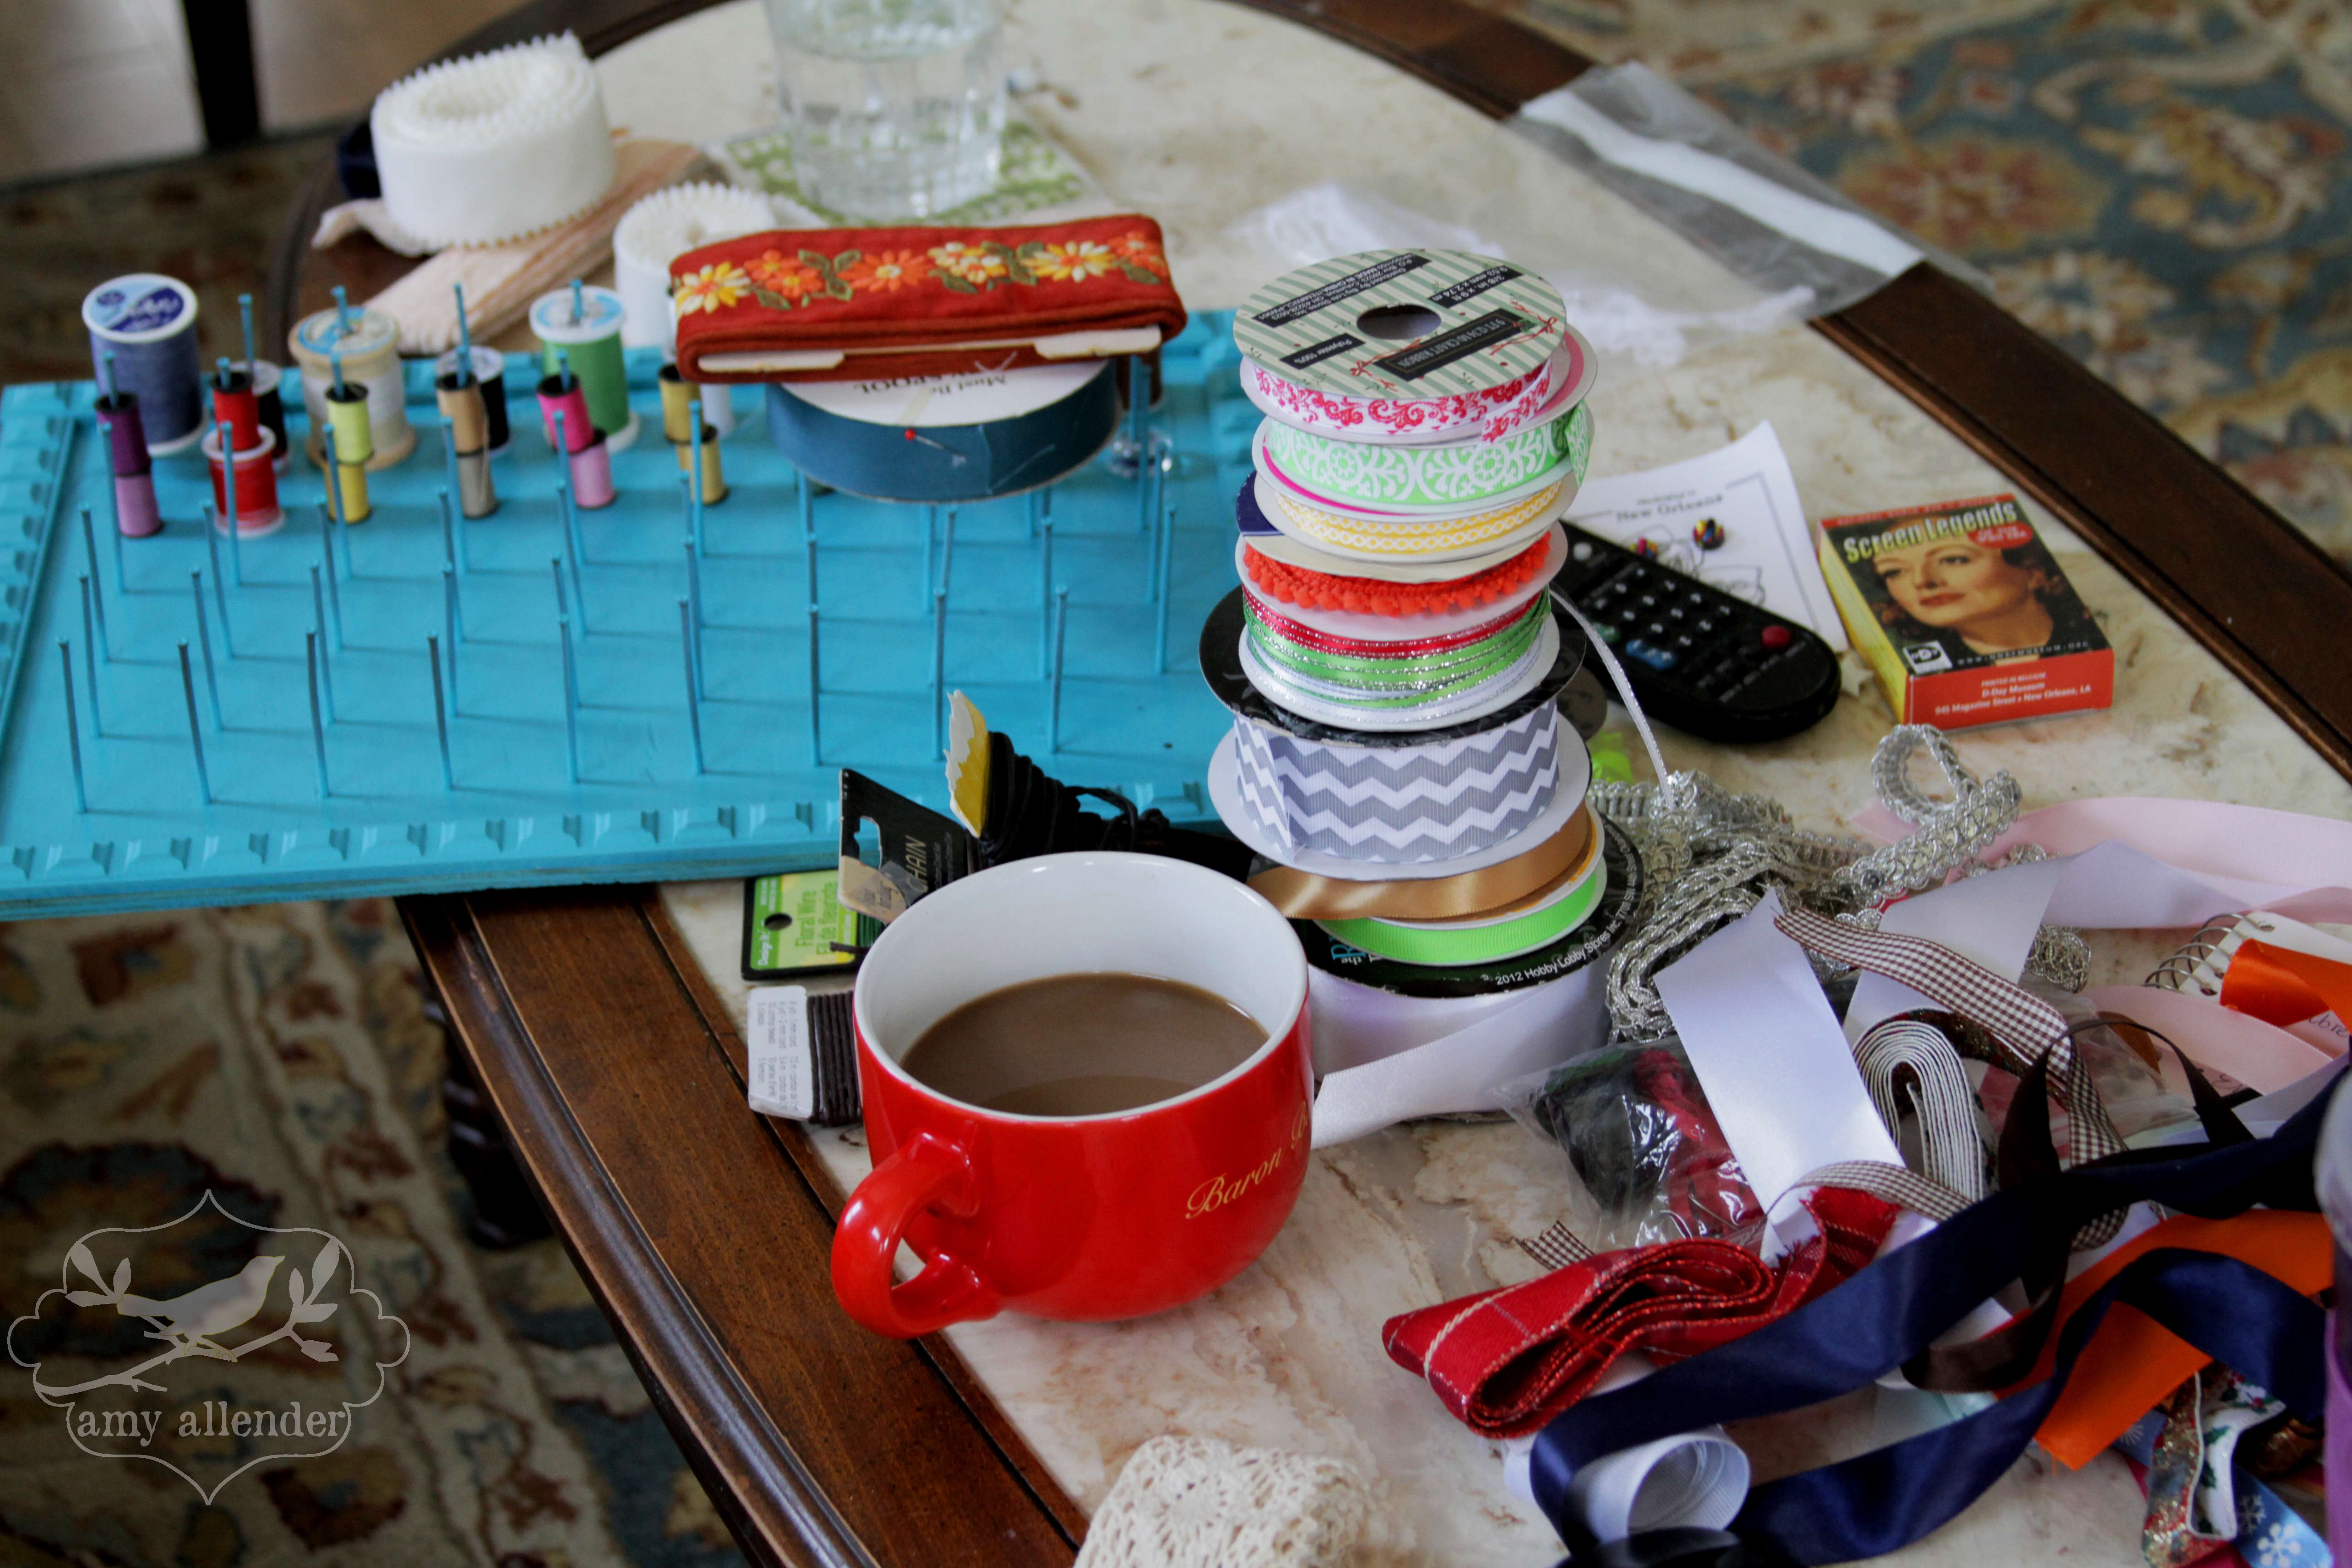
I’m still working on the cloffice, which will also serve as a place to store some of my crafty supplies. So while I was making the move from dark, dingy basement to bright, pretty cloffice I started to process some of my goods. Let me tell you…it’s a little disgusting. I’ve got supplies that date back to my freshman year of college. At this point, if I haven’t used black plastic beads, wooden star cutouts, and glittery wired ribbon…chances are I never will.
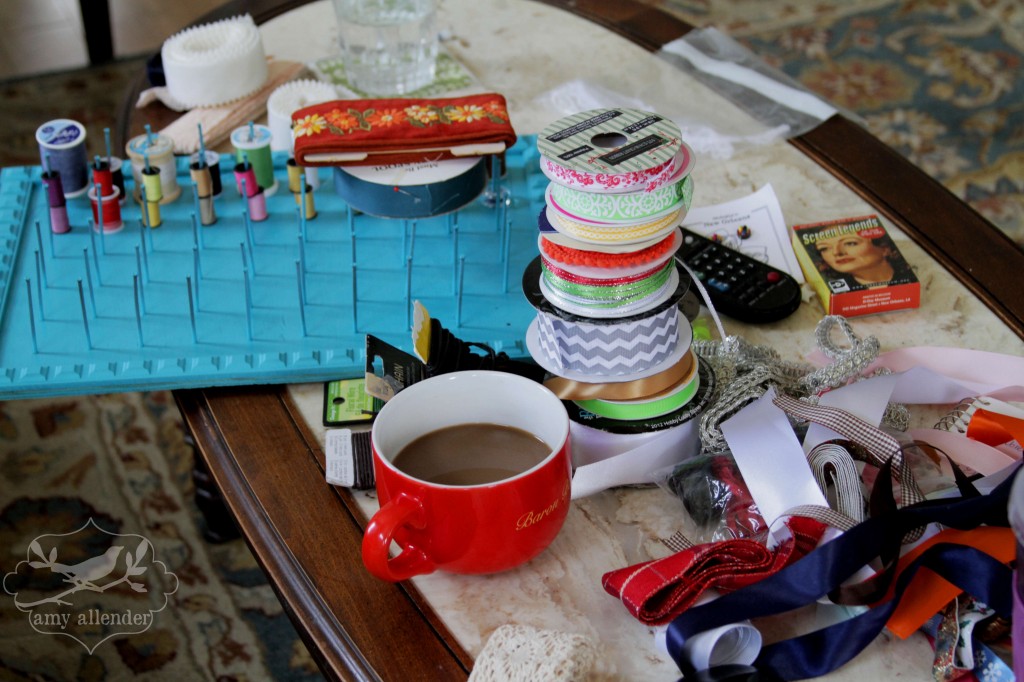
Going through it all was quite a task. As I’m sure you can tell by the photo, it was a messy task and a lengthy task. But I’ve been through my ribbon and string, tested all my markers, sorted my colored pencils, wrestled my buttons into one location, and weeded out my stationary. In the process I’ve made quite a pile of things I don’t need any more.
It’s so easy to hoard craft supplies. I think we all get that irrational itch, thinking “I can’t throw this out…what if I want to use it someday?” Friends, take it from me, you’ll feel better when you purge. And 5 years down the line if it turns out you actually do need a handful of black, plastic beads, it’ll only cost $1 to get more. In the meantime I think that’s money well saved to take back your space, organization and peace of mind.
This year I’m going to try to use up some of my arsenal. So put some cute things on Pinterest, so I can make them. Okay? Thanks.
Amy
by Amy | Dec 5, 2013 | Blog, Crafts, The Art of Gathering, The Art of Projects, The Art of the Kitchen, The Art of the Moment

Did you have a happy Thanksgiving?
I sure did.
As most of my holidays go, the day revolved around being in the moment with family and friends. Oh, and it also involved quite a bit of food too. I’m a big fan of eating later in the day so that there isn’t a big rush with baking the turkey. It also takes away the need for a second giant meal of the day…we do dinner, pie, tea, games and bed time. Eating at dinner time {instead of that awkward 2pm “lunch”} gave everyone time for a little Thanksgiving activity time.
For Derek and my dad that meant time in the field hunting. For mom and me it meant time at the gym for a little turkey trot {aka an hour on the treadmill.} Of course we were home in time for THE parade.
You like the place setting in the photo above? I thought you might. I bought a new {cheap} table cloth from Target’s Threshold line. I just love that stuff. Then I topped it off with a runner made from some unhemmed gingham fabric I had in the basement. My favorite part of the table was the place mats I whipped up. They are paper bags I ran through the printer {cut to 8.5″ x 16″ long} with this adorable free printable. Paper bags! {And you know how I like paper bags.}

On the menu:
An herb rubbed turkey stuffed with sliced apples. It was just enough sweet. Mashed potatoes mashed with nonfat Greek yogurt, milk, chicken bullion, garlic and green onions. Homemade yeast rolls that Mom and I worked on throughout the afternoon. Jiffy corn casserole {it’s a classic, but I sub Greek yogurt for the sour cream called for in the recipe.} Sweet potatoes with cinnamon and pecans. Apple butter. And the prettiest part of our meal, apple cider sangria. Thanksgiving and Christmas are two of the few days of the year I have a glass of wine, and I can’t think of much prettier than this sangria with pieces of apple floating in the glass. And since Derek doesn’t drink at all {ever} he had his non alcoholic. Just cider with apples in a fancy glass. {Which means this can be a fancy drink for the whole family.}

As much as I like cooking and setting the table, my favorite part of the day is sharing a meal with a table full of people I adore. After the meal comes something I like even more than eating…games. Then of course, hot beverages {tea, coffee, cocoa} and pie. Between activities there is lots of chatter, story telling and foolery. I love the rhythm of Thanksgiving at our house.


Where’s my mom? Probably on the couch with Derek and me…occupying my dad’s lap after dinner was his “lap” dog.


This year was very special because the living room was taken over by the chalkboard for mini sessions. But for us it only added to the merriment because it meant that I could take Katie and Sean’s Christmas photos. Here’s a peek. You’ll have to wait a few days for the rest…

xo Amy
by Amy | Nov 15, 2013 | Blog, Crafts, The Art of Projects, The Art of the Moment
Thanks for the input on the upcoming Christmas sessions. I took your advice and made a giant chalkboard. Take a look.

My floor is a chalky mess, but it was worth it, because this is precious. Here’s the finished product. Email me, call me, text me, facebook me if you want a session. All sessions come with high resolution digital images and a print release…and hot cocoa.

Amy
by Amy | Oct 30, 2013 | Blog, Crafts, The Art of Projects
If you’ve ever visited me here in Practically Canada, or talked with me about this place, or read my blog for a while, you know I like it here. Despite the cold and the remote location, I like it here. Despite the small town living and the limited Saturday-night options, I like it here. I really, really do. I like it because the people are hard core during the winter. They walk boldly into -20 temps without flinching. In the spring when it hits 35 it’s officially sweat shirt weather. I like the people because they have cute accents and they use the phrase, “Oh, for cute,” when they like something. I like the people because they are nice and they have quirky traditions. For one, they refer to wedding receptions as “wedding dances.” For two, often at these dances, the whole crowd does the hokey pokey. I mean everybody. Not just the kids. Cutely, adorably bizarre. Generally the natives are nice and genuinely care for one another. Someone once told me that the cold weather keeps out the riff raff.
Which leads me to the point of tonight’s post. North Dakota, Practically Canada and their traditions. Since tomorrow is Halloween, I thought I’d share a spooky tradition I just learned about. Boo-bagging.

Ever heard of it? The super-cute example above from Simple Girl give you a pretty clear idea of what a Boo Bag is. You can follow the link to get her free printable!!
It’s sweet and simple really. You pack up a bag with Halloween themed goodies. As extravagant, as Martha, or a lazy and store bought as you want. Some people make fancy bags, other people just store bought bags, or just paper lunch sacks.
Once you’ve got your goods, it basically turns into a game of ding-dong-ditch. Go to a door, ring the bell and hide or get away before the recipient opens the door and finds the bag. Cute, right? Speaking of cute, you can also be inspired by this Boo version from I Heart Nap Time. She shows you how to make this bag and how to make candy corn trail mix.

Some folks include a poem that asks those who have been “Boo’d” to Boo someone else. But I’m not a fan of pressuring people into things, so I’d just as soon leave that out. Gifts are more fun if they have no strings attached.
I love this tradition so much, I want to spread it to the world. If I had known about this I would have done it years ago. How about you? Have you heard of Boo Bagging before? I’m sure there are other places that do this, I just haven’t lived there yet. And since I have no plans for 10/31 I think I’ll drop some off tomorrow night. {Mine will be of the lazy, store bought variety.}
Amy
by Amy | Oct 10, 2013 | Blog, Crafts, The Art of Projects
I’m in love with Glade candles. So I was super excited when I came up with this easy, cheap and quick way to dress them up for fall.

I just made one for an end table, but a group of three would be hefty enough to stand alone as a Thanksgiving centerpiece.

{Photos via Glade.com, DollarTree.com, and OhNuts.com}
I bought quite a few nuts, but for just this project you’ll only need a couple to keep things extra cheap. Looking for another cute way to use up those nuts? How about revisiting this centerpiece I created for last Thanksgiving. If I remember right…I think this one also featured a Glade candle. I’m telling you, they are the best.

Amy
by Amy | Oct 7, 2013 | Blog, Crafts, The Art of Projects
Many moons ago when I first started writing about all my projects and adventures, I wrote a post about an adorable fall garland I made with my mom.
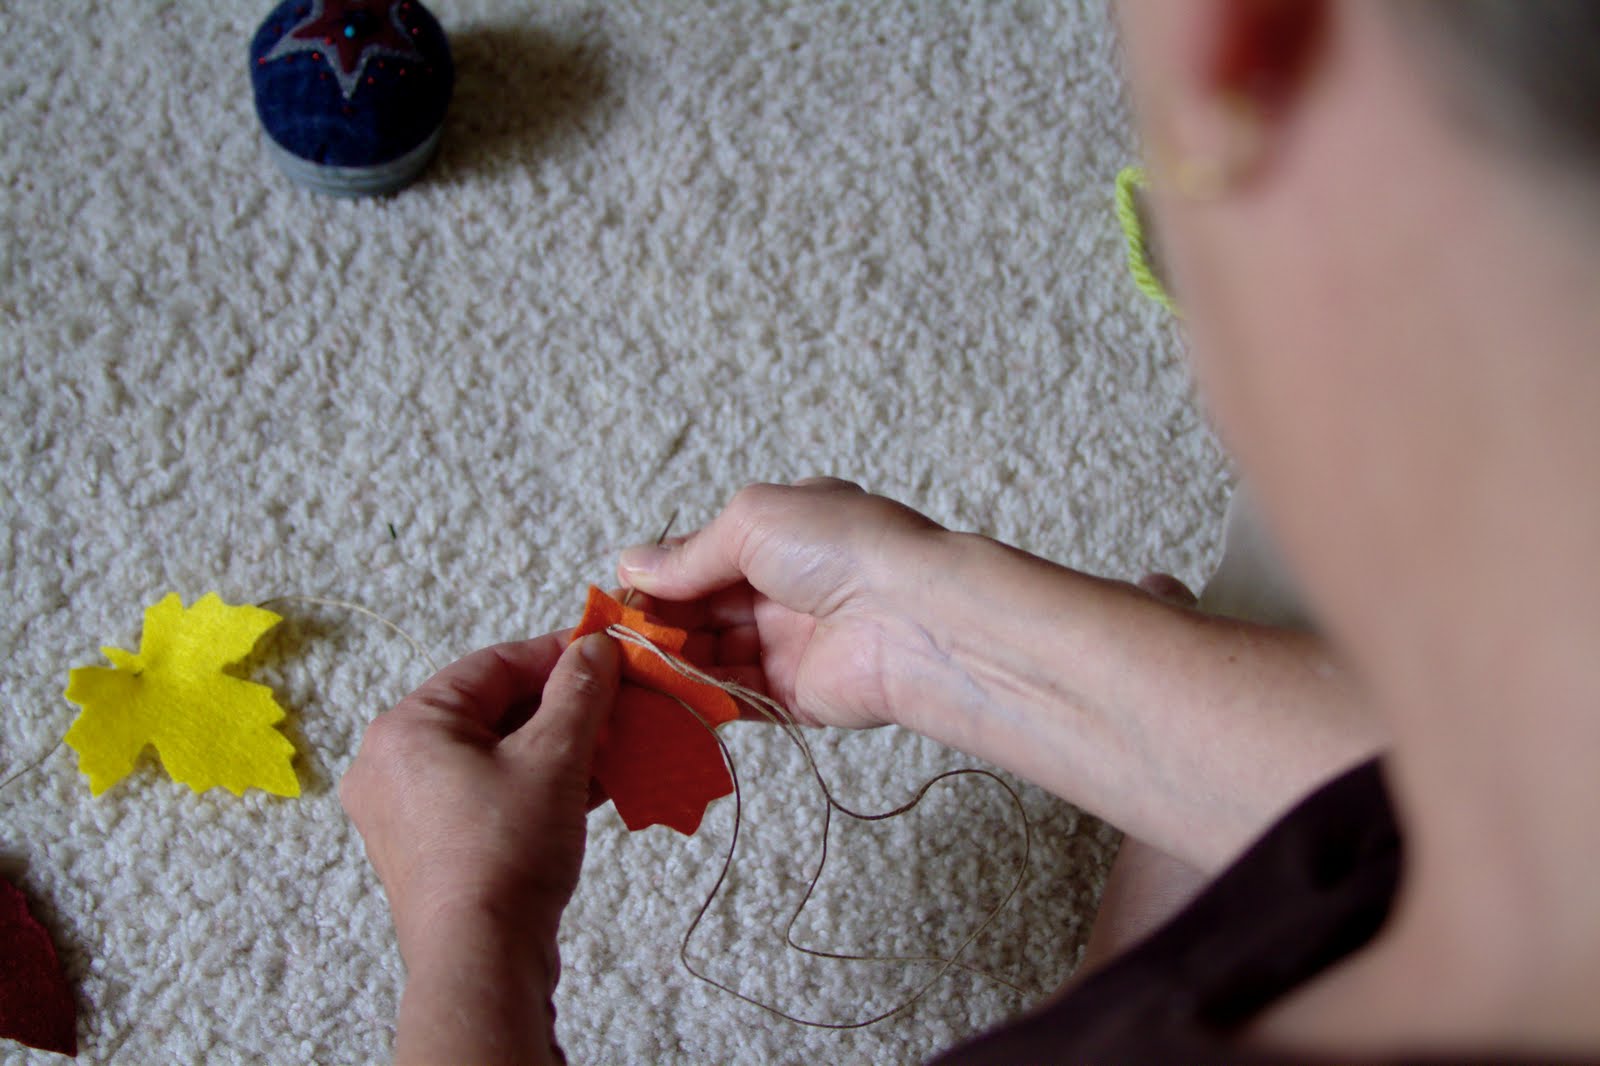
And since most of you weren’t reading back then, and it’s not fair that you miss out, just because you didn’t know this blog existed, I thought I’d do a rerun. The adorable fall garland you see below is a compliment catcher. I get comments on it every year when I hand it up. And it only cost $5 to make two of them. All you need is some felt, very sharp scissors, a Sharpie, and a buddy to chat with while you snip these bad boys out.
Here’s the finished product. Simple and lovely.
I originally made this to be hung on my mantle. But now I live in a house with no mantle. So it resides here. On my piano.
Here’s what you’ll need:
Craft twine–I got a big spool of it at Hobby Lobby for $2.
Felt–Your choice in colors
Computer
Paper
Sharpie
Sharp Scissors
Wide Eyed Needle
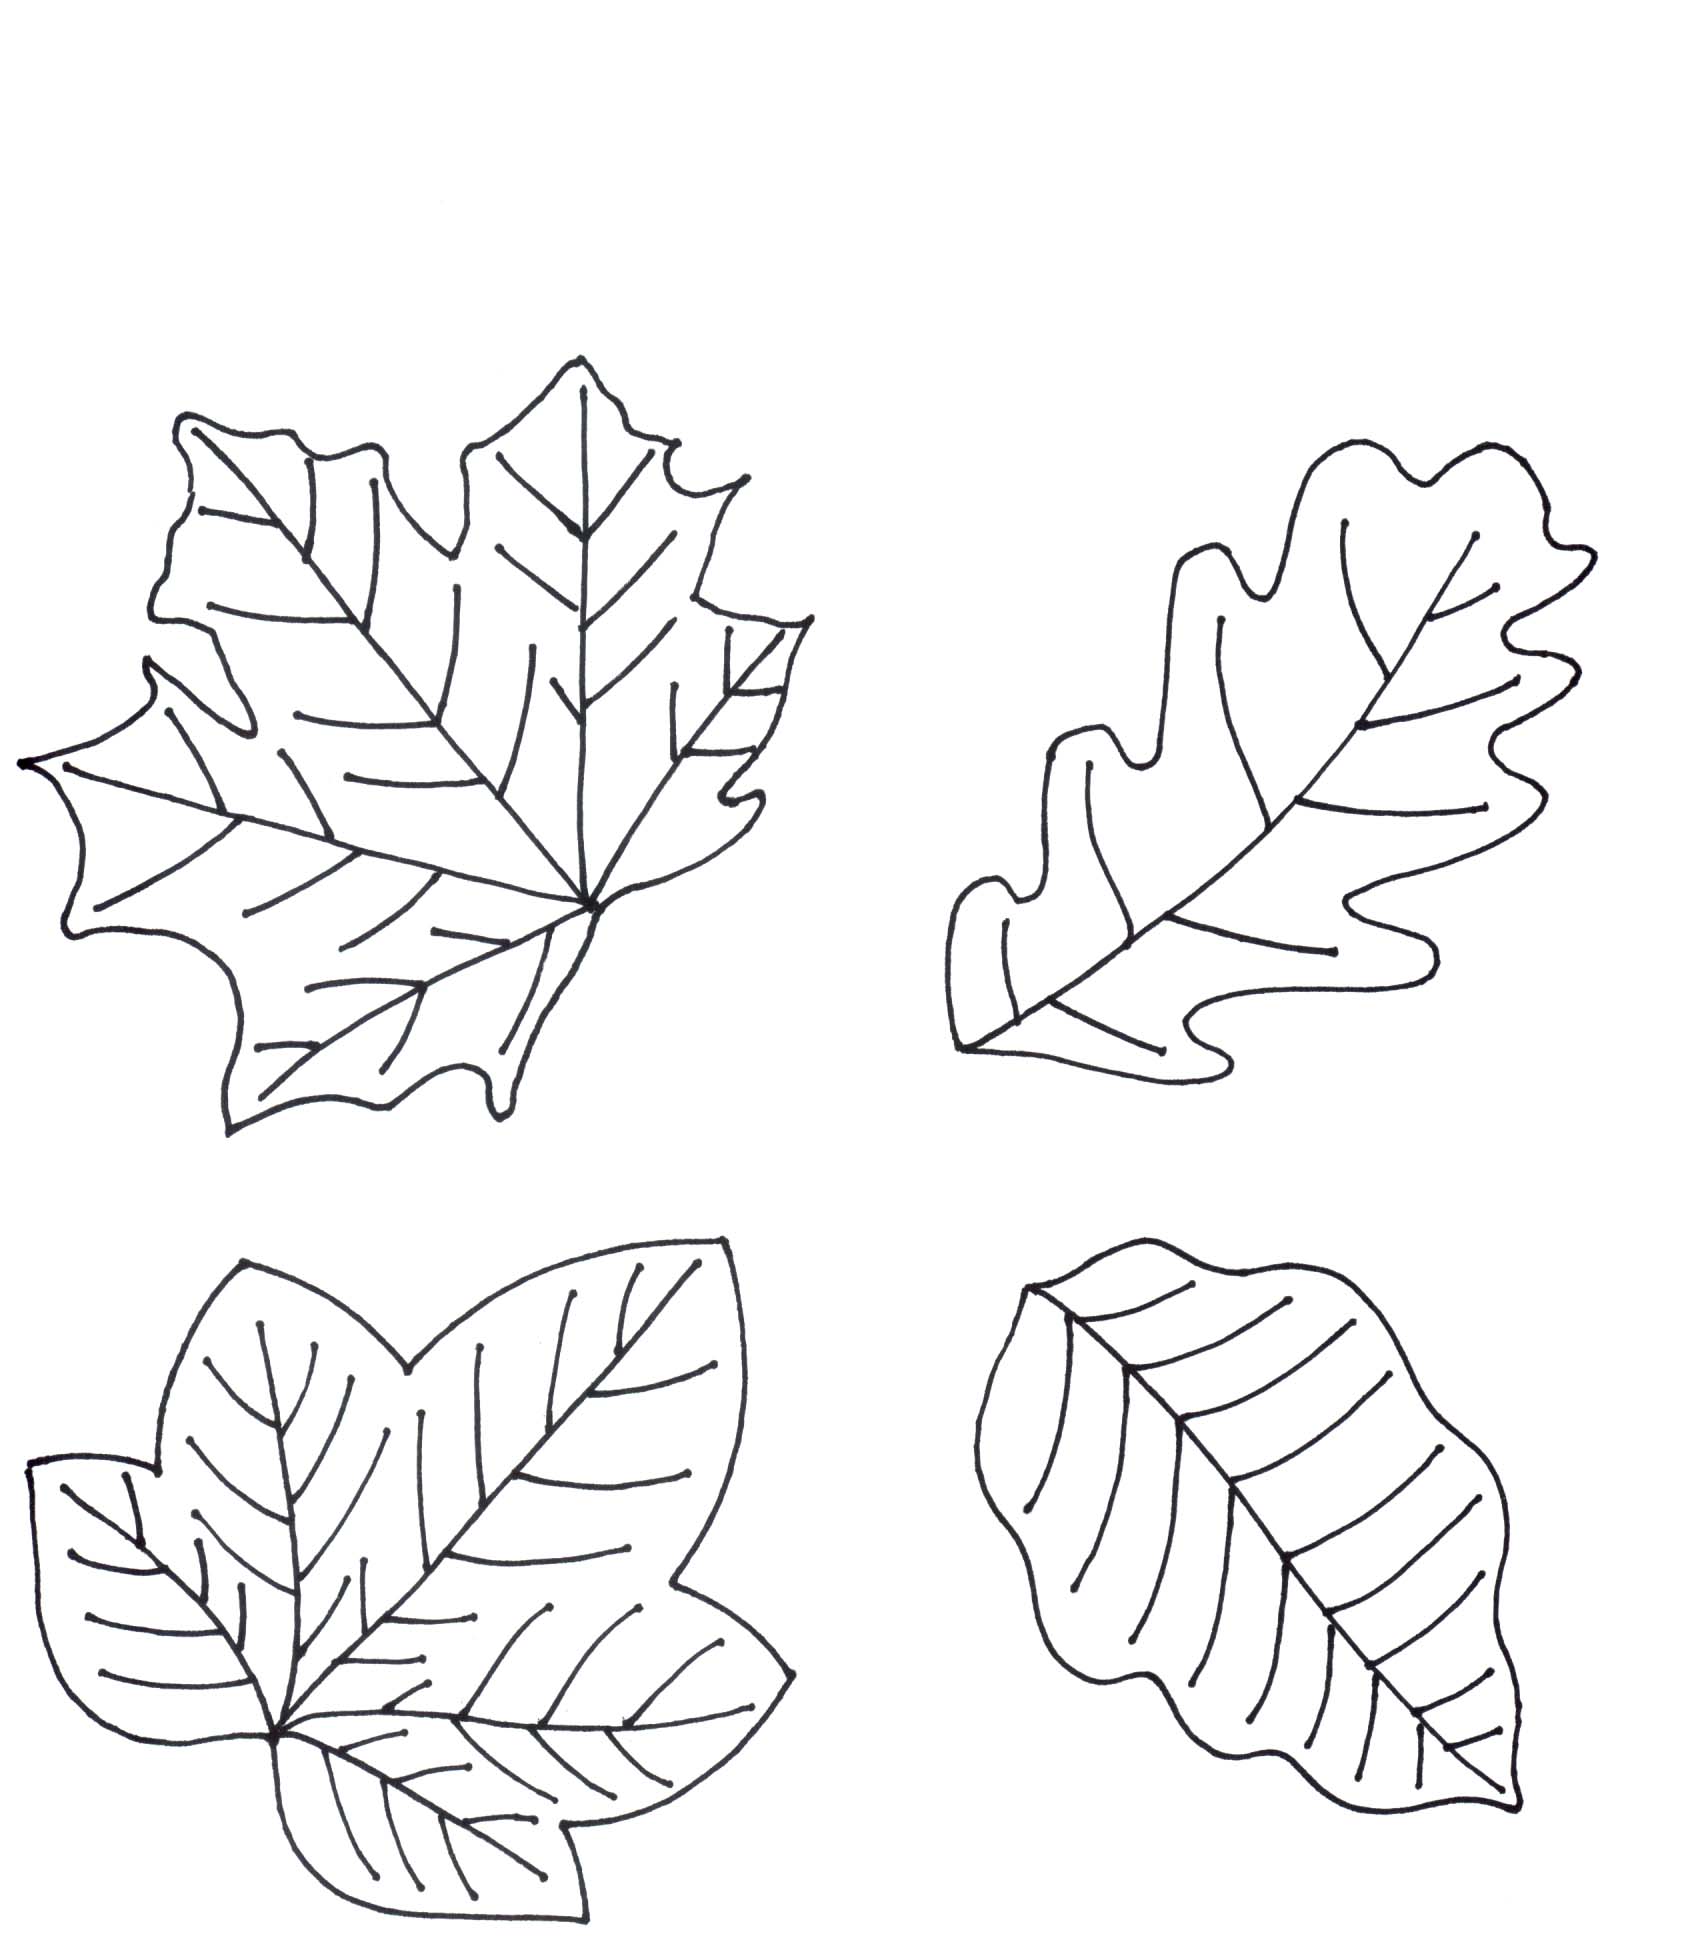
Step one: Google Image some leaves. I used five different shapes. Then, use your computer as a light-box and trace the shapes onto some regular or stiff paper. You could easily do this using only one type of leaf. The templates I made were about 3-4″ long. But, you pick the size. Next, cut your templates out and trace them onto the felt. I used a Sharpie for this.
Remember, this is a craft. It’s not going to be judged by a tree specialist. Do your best on tracing and cutting but it doesn’t have to be perfect.
Step Two: Cut out your leaves. My garland used 16 leaves for my 4′ mantle. It may be helpful to decide where you want to hang it before you start, so you have the right amount of leaves.
Step Three: Cut your twine the length you need. Leave a few inches on either end to hang by. Thread a wide eyed needle with the twine. Begin to stitch the leave on the line. Use a simple running stitch so you can adjust the spaces between leaves once they are all attached.
Step Four: Once they are all on the line, space them out how you like. I left a few inches between mine. My mom finished hers by tying scraps of fall colored fabric between each leaf. I left mine bare. Do what you like. To hang it, tie the extra twine into a loop on either end. Use a small nail or clear thumb tack (that’s what I use) to secure it to the wall, window or mantel on either side.
Amy
by Amy | Oct 2, 2013 | Blog, Crafts, The Art of Projects
If you follow the Facebook page, you saw that yesterday I was working on a couple new chalkboards. A while back a friend gave me a couple old window panes that she didn’t need. It’s been months and finally I’ve converted them into something useful. I plan to use them in photo sessions, but when they aren’t in use there, one will be hanging on the gallery wall.

Nearly a year ago I showed you guys how to make your own custom chalkboard paint. Today I thought we’d revisit that technique. Since last time I forgot to take photos and the tutorial was really lacking.

Here’s what you need:
Paint in the color you’d like your chalk board
Unsanded grout
Water
Something to mix in
Something to mix with
Something to chalk board
A paint brush
Here’s what you need to do.
Start by priming your surface. In my case, I primed window glass. But you can use basically anything that can hold paint. I prime with basic acrylic or latex paint.

After you’ve let that dry completely, mix up your chalkboard paint. I mixed mine in an empty baked beans can. It was handy, free, and disposable.
Mix together, 2 TBS unsanded grout and a few drops of water. Just enough water to make a really thick, but smooth paste. If yours is looking thin because of too much water, add a little more grout. Then mix in 1/2 cup of your paint. Paint an even coat all over your surface and let it dry.
Once that’s dry, season your new chalkboard by rubbing the side of a piece of chalk over the whole surface and gently wiping it off. Because of this, your color will not be as vibrant as it was in the jar. Keep that in mind when you choose a color.


Now you are ready to write on your new board.
I used this graphic I made for a little inspiration. But, let’s face it, everything looks cool written on a chalkboard.


Hope this one helps you more than the last tutorial. See you tomorrow,
Amy


