by Amy | Dec 3, 2012 | Blog, The Art of Adventure, The Art of Living
I can’t guarantee that this is the only awkward thing that will happen in my life this holiday season. But I can tell you that the event I’m about to describe goes down in history as one of the most janky, rigged-up, random things Derek and I have ever done.
And we’ve done a lot of weird things in our day. I’ll start by showing you a photo of the tree while we were decking it out. Now let me tell you how we got here…
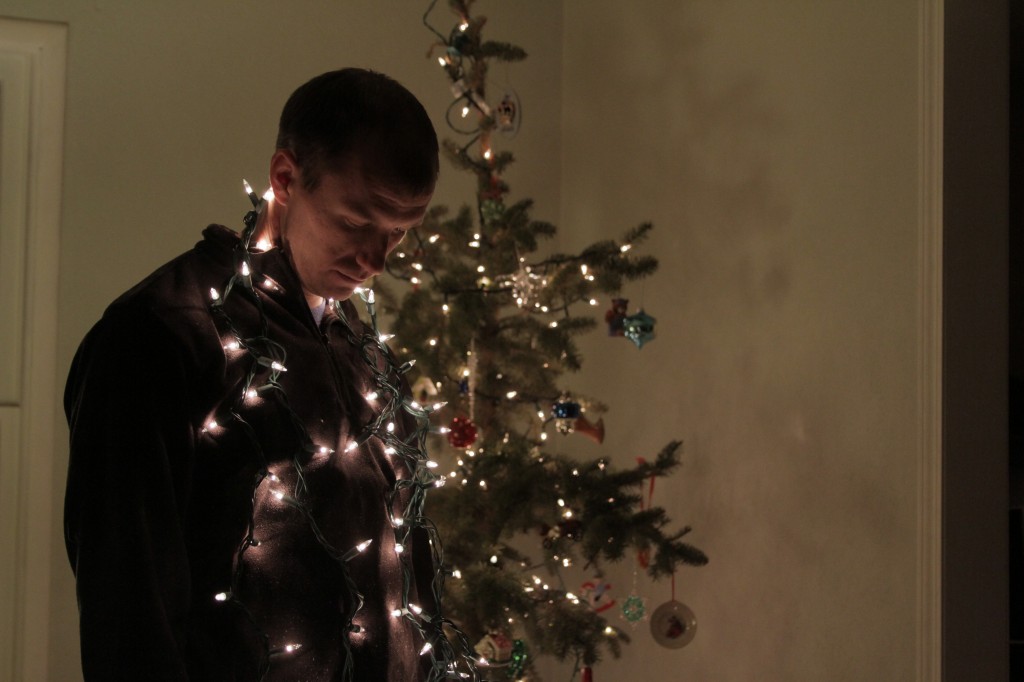
So it’s Christmas time and we needed a tree. One of our favorite holiday traditions is finding our Christmas tree…and cutting it down ourselves if at all possible. The only time we’ve bought off a lot was when we lived in Oklahoma, and that’s only because they are so hard up for trees down there.
Over the years we have found some pretty precarious trees. Like the tree we got in Florida after driving by a random evergreen field. There was a mailbox with a saw hanging from a nail on the post and a sign that read : “Christmas Trees $25. Use the saw. Put money in the mailbox.”
Seriously I can’t make this stuff up. We hauled that one home in the back of our 1995 convertible LeBaron.
But what happened this weekend was even more redneck than that.
Saturday started innocently, with our weekly trip to Menard’s. {We always need something from Menard’s.} After picking up screws and bolts we went to the garden section to get a tree. But when we walked outside it just didn’t feel right. Sure, the nearest Christmas tree farm is hours away. But there had to be a Christmas tree for us somewhere in the wild. So we left tree-less and took a drive into the sticks to see if we could find a tree that we could whack down ourselves.
It turns out…there aren’t many more trees here than there were in Oklahoma.
We drove and drove. And what we found was that evergreens are planted intentionally up here. They lined lawns and created property boarders, but none seemed appropriate to cut down and haul off without facing criminal fines. We were about to give up and drive home when suddenly…there it was…
It was a true Clark Griswald moment. You know like at the beginning of the movie when he sees the tree, and it doesn’t matter that it’s way too big, or that it’s not even the kind of tree you use for a Christmas decoration. “Thith tree is a thymbol of the thspirit of the Griswold family Chrithmath.” And we knew it would be ours.
Where was this magical tree? I think this photo can speak for itself.

Yep. You are seeing correctly. It was at the edge of a gas station. All alone. Obviously an intrusive tree, not meant to be there. What gave us further calm about taking it for our own was the fact that it was half uprooted by the wind. If we left it, it would just die anyway…this was much more dignified. Sure, it was leaning back on another tree…but we’d be able to straighten it up in the stand. Sure it literally had empty bird nests in it…but we’d shake it good before taking it inside. Sure it was full…but we have tree trimmers at the house.
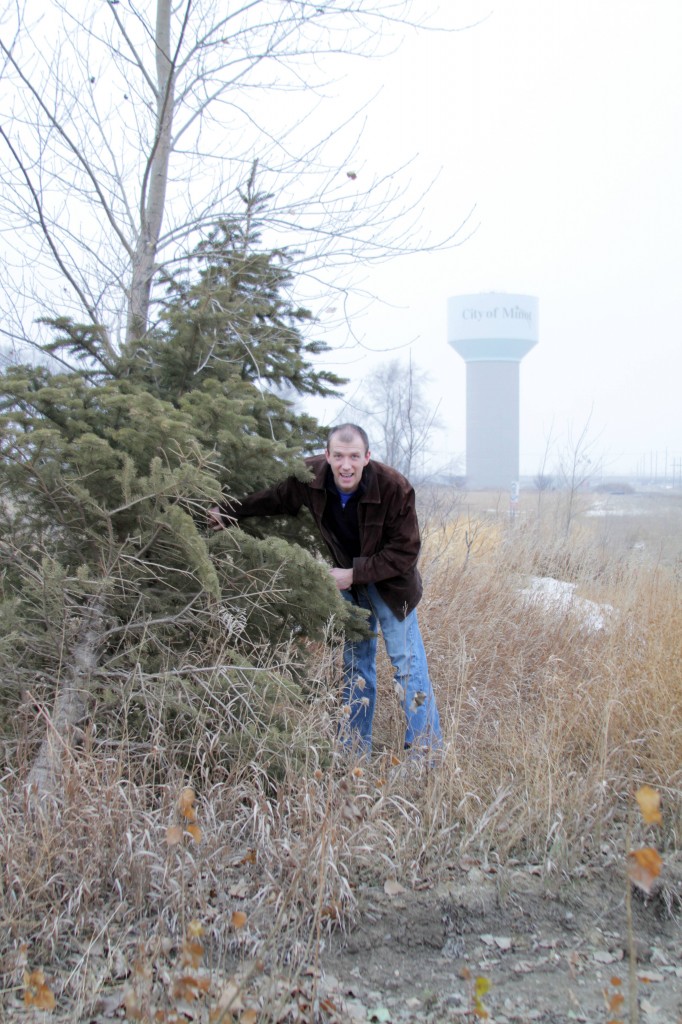
So Derek cut. And once it was cut we had another Griswald moment. Pretty much the same realization Russ has when he says: “Dad, that thing wouldn’t fit in our yard.” But we knew, “It’s not going in our yard, Russ, it’s going in our living room.” It was big.
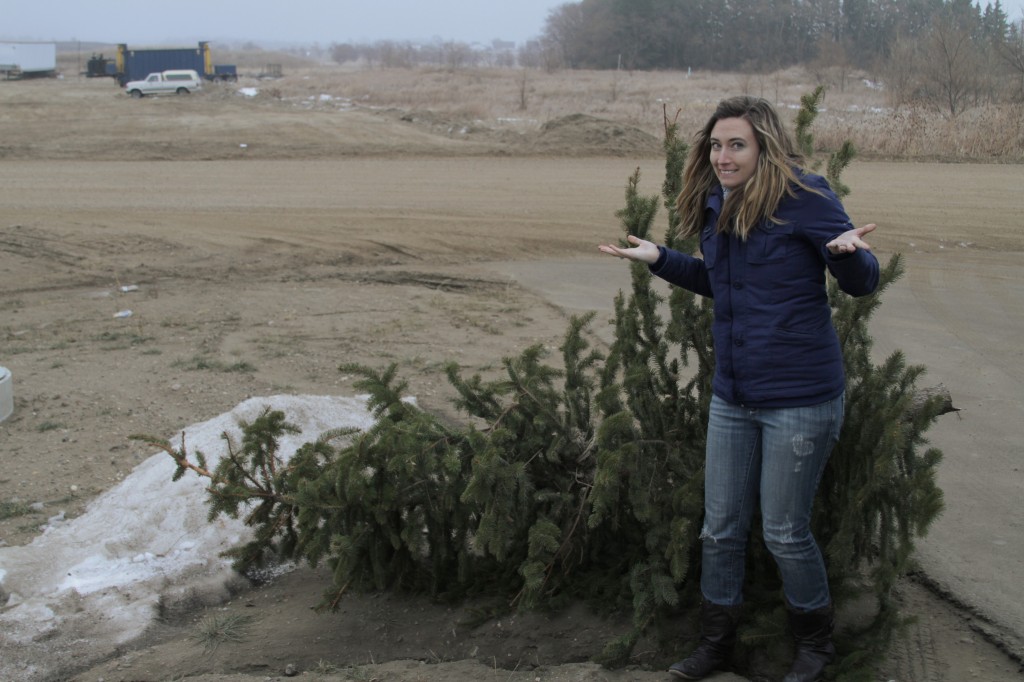

But stuffed it in the back of the Equinox anyway. Somehow we got the doors closed and we hauled it home where we whacked off a few feet at the bottom, and I trimmed it into a respectable shape. Once up in the living room we really realized how ugly natural it looked. Full of holes, still a bit crooked. It looks as awkward as the circumstances it came from. But we put it up, slathered it in lights and used the trimmings to deck the rest of our halls.
In 2012 we cut down our own tree. And it was a beaut, Clark.

Amy
by Amy | Nov 30, 2012 | Blog, The Art of Adventure
Most of you have heard me lovingly refer to my new home of Minot, ND as “Practically Canada.” It is. The boarder is only a stone’s throw away. People here are silly-friendly and sometimes they drag their “oos” and “ohs.”
But that’s beside the point right now. Today I’m just itching to tell you about how I, Amy Allender, became Practically Canadian last night.
Derek and I….went curling!
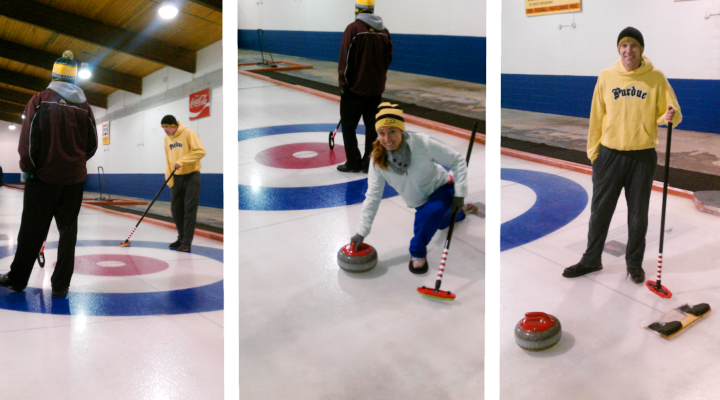
Yes, Minot has a curling club. And, let me tell you…it’s awesome. {More awesome than it looks on TV.}
Let me describe the set up for you. Our friend Zach was cool enough to introduce us to the curling club and let us crash their exhibition practice.
I’ll be honest. We drove around for a while looking for the right place. First we actually missed the mark and ended up at a gymnastics studio. Lots of little girls in leotards. Hmmm…I was looking for teenage boys and middle aged men dressed in sweatpants and ski caps. Guess we were in the wrong place.
A second try landed us in the right place: The commercial building at the fair grounds, if you’ll believe it. Zach told us it would be cold…but this was really insane. They literally froze the floor. You could see your breath. Like a walk in freezer, but more fun. {Freezers aren’t that much fun. All the food is frozen solid and there isn’t enough room to play games.}
We were coached on by a curling pro. Do you believe that? I didn’t. Yeah, he’s so legit. He’s been to nationals. {Whatever that means.} And his son competed on the junior Olympic team. Legit. I don’t think he understood at first just how little we knew about the sport. As in “Umm…okay, so what is the point of the game?”
I’ll be honest, I change the channel when I see curling in the winter Olympics. I was clueless.
Here’s the brief on how the game works. Players take turns shoving heavy granite rocks down the ice toward a bulls eye. The rocks closest to the center score. You wear one slippery shoe to help you glide across the ice. Your teammates can sweet these little brooms in front of your rock to melt the ice a bit to help it keep moving further. Get it?
Now, here is the best part of the night. Kebly the curling pro said this to Derek:
“So…Amy must be pretty athletic. Did she play lots of sports in school?”
Yep. He said that. About me…B-Team Allender. Yes, I played lots of sports…poorly. Anything that required skill or coordination was pretty much out of the question. On the tennis team I got “most improved” {we all know that’s what they give the worst player. I went from awful to…pretty bad.} I was so bad I wasn’t even a real part of JV. I played exhibition. So if the opposing team had extra players that didn’t match up with ours, they could hit around with me. Pretty bad, right?
Anyway. The curling pro said this could be my sport. He says I’m a natural.
{Leave it to me to brag about something this weird and awkward.}
It was amazing. We are joining the curling club. I’m practically Canadian. Done-dundee.
Amy
by Amy | Nov 28, 2012 | Blog, Crafts, The Art of Gathering, The Art of Projects
Is there anything better than a pretty cake stand?
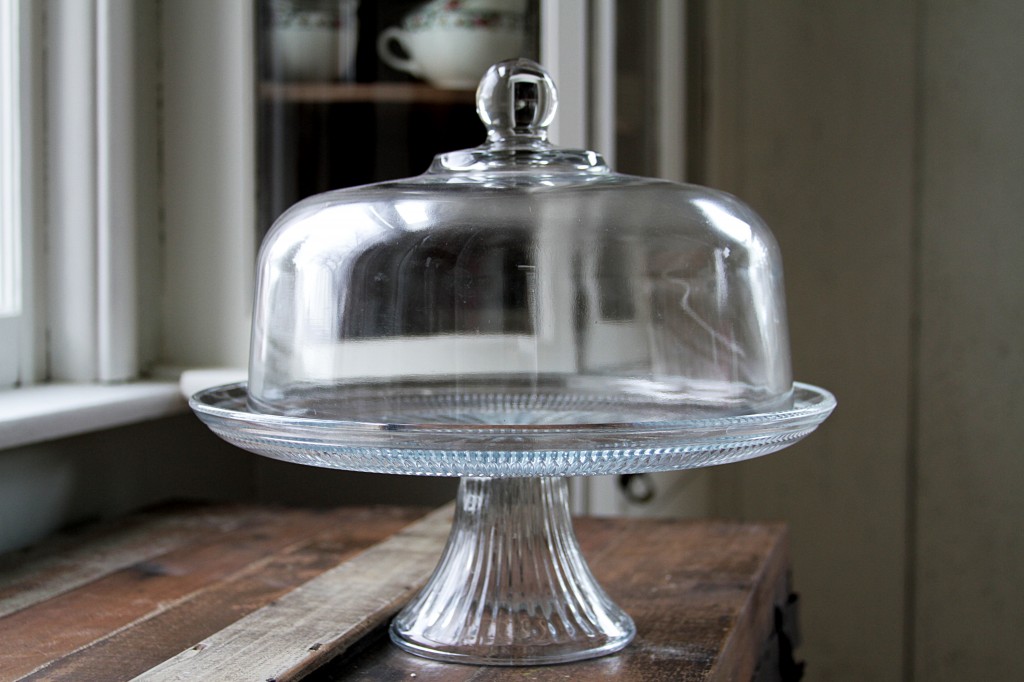
Not in my book.
Derek actually had to put a limit on my cake stand habit. I’ve got more stands than pans to make cakes in. But c’mon. They. Are. Awesome. Even the most aggravating icing job looks down right delectable when displayed proudly on a cake stand. Beyond their ability to display desserts {of all kinds…not just cakes, mind you} they are maybe the best decor around.
On Thanksgiving I threw together a quick centerpiece. It wasn’t anything special. It took all of 5 minutes to make…I didn’t think it was extraordinary. But my mom did. I thought I was using a trick that everyone knew…but she didn’t…and you might not either. So, I’ll tell you.
Most basic cake stands {the kind you get with a globe to match…like in the picture} are multi-tasking. Yes, that is right. Multiple uses for one beautiful piece of hostess-ware. Here’s the secret…make it do a handstand.
Yep. Take the globe off. Turn the stand upside down, so the cake plate is resting on the table. Most stands have a fluted base with a hollow center. Grab the glob, turn it upside down, and put the handle into the base.
Viola.
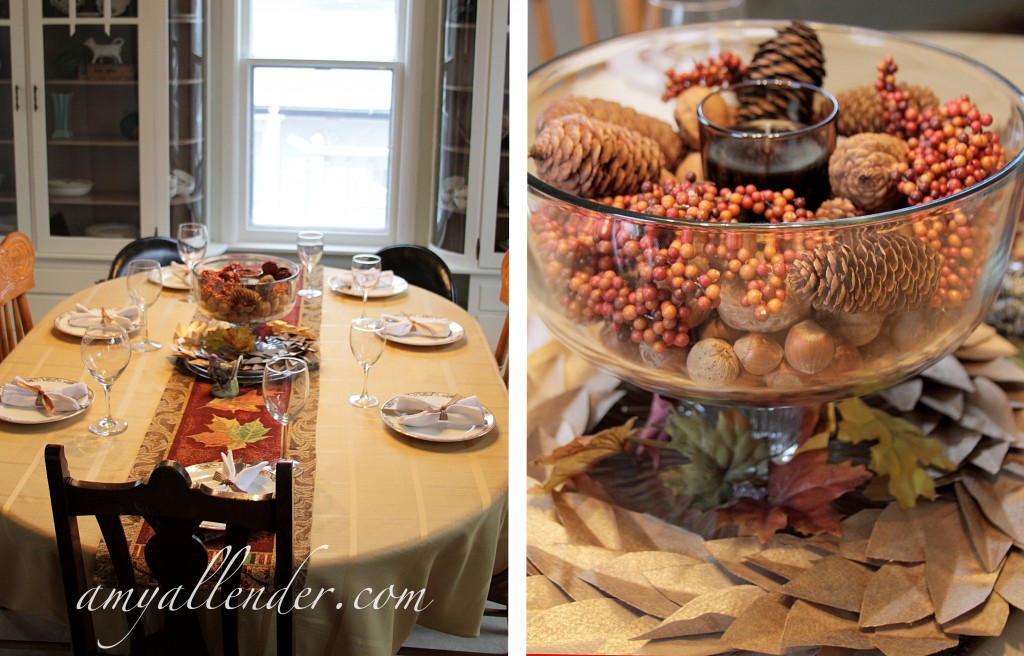
Now you have a truffle dish. Or in my case, the basis for a last minute centerpiece. {Recognize that paper wreath?}
For Thanksgiving I filled the dish with nuts {the kind you scoop into a bag at the grocery store} and pine cones. Now {since it was such a hit} it’s filled with Christmas bulbs {the cheap kind from Family Dollar}.
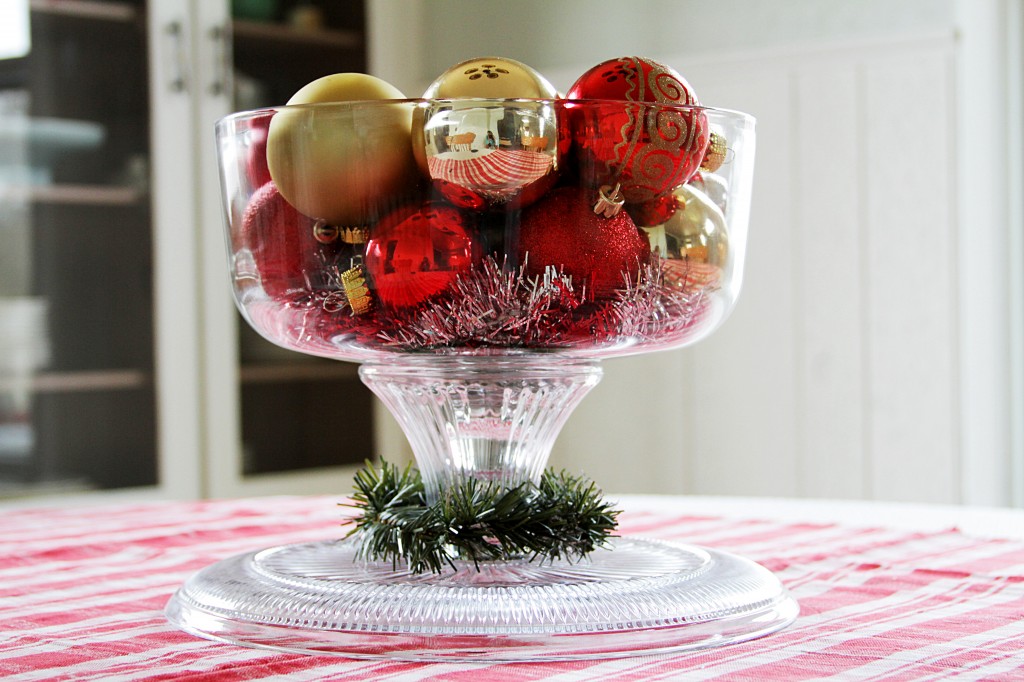
Derek uses this as an argument against me getting more hostess-ware. “Why do you need a truffle dish, when the cake stand does both?”
Um…duh…for those occasions when I’m making cake an truffle. Or when I want to use it as a centerpiece and bake a cake. I’m not budging on this. A girl can never have too many cake stands. Period. End of story.
If you don’t have one. Go buy one. You won’t regret it. It can take your blah-domestic skills to…whoa! Domestic skillz. {Yes, that’s right, the kind with a “z” at the end. That’s how cool you’ll be.} And make sure it can do double duty.
Amy
by Amy | Nov 27, 2012 | Blog, Crafts, The Art of Projects
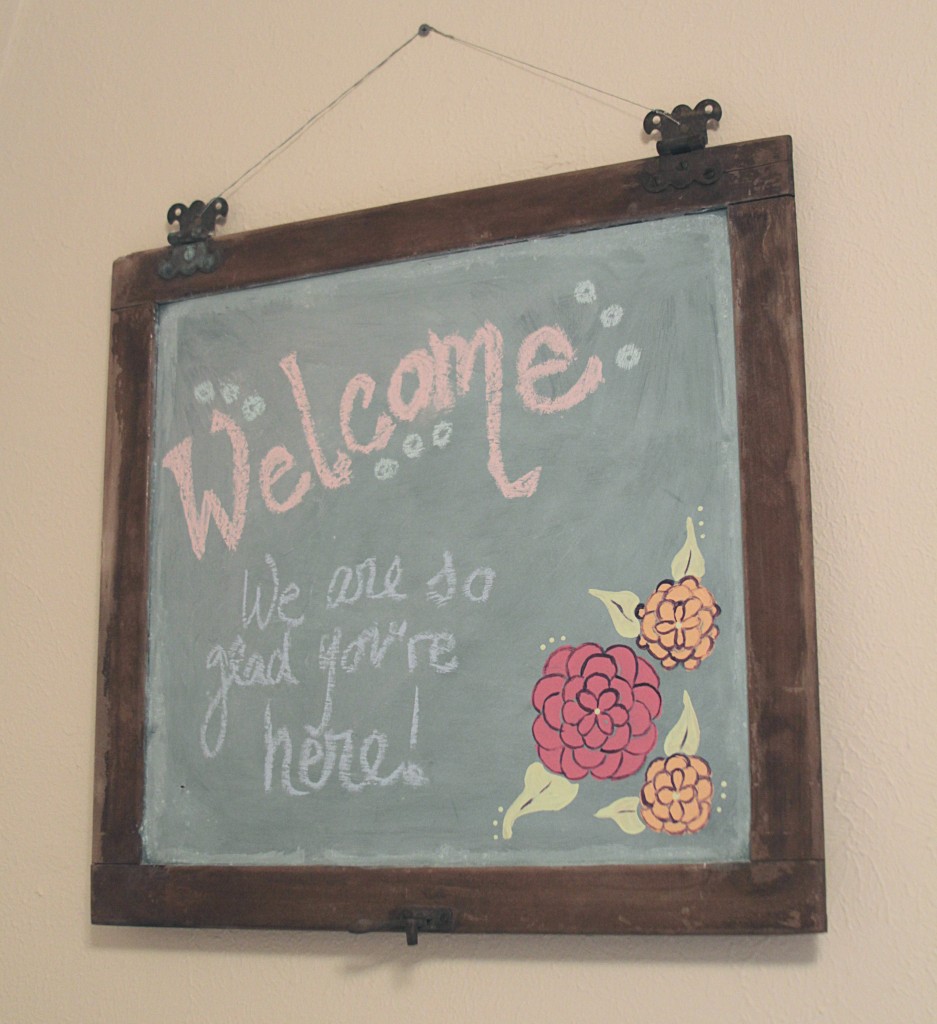
Here’s the thing. A few years ago {about three to be exact} I found an awesome old glass cabinet door in my family’s barn. You never know what you’ll find in there. There was something so…perfectly rustic about it. I needed it.
So I asked my dad if I could have it. He obliged.
And I convinced Derek to haul it back to Florida from Indiana.
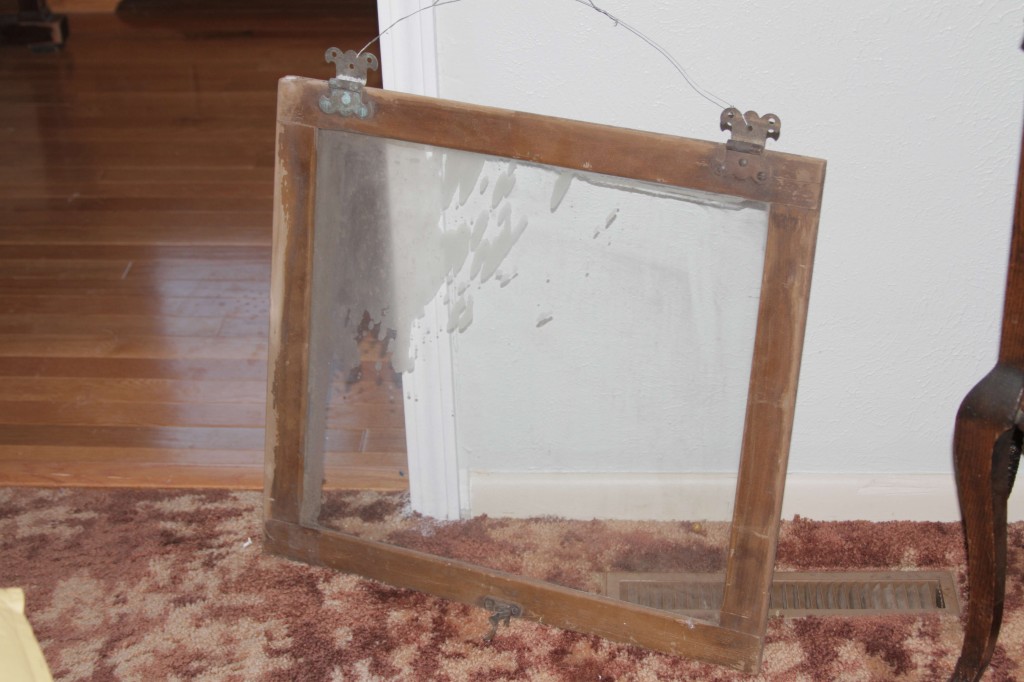
Once I had it home, suddenly I was stumped. And I stayed stumped. For years.
I moved the glass door from Florida to Oklahoma to Louisiana and finally up to North Dakota. By the time we got here Derek was less than pleased that I had dragged this piece of cast off garbage all over the country, only to let it sit in the closet. He even wanted to throw it out. Lucky for me {and the door} I tucked it behind the tool chest when he wasn’t looking.
Then a few weeks ago, I decided if I didn’t use it before Thanksgiving…it would be tossed out. It was beautifully rustic. I didn’t want to mess it up…but it was time to be bold or send it to the curb. So I made a plan and followed through.
I gave the old glass door a coat of custom chalkboard paint that I mixed up right here in my living room in a paper cup, and added a few painted flowers. I wrote a little message, and hung it up in the guest room. And I love it.
Doesn’t it feel good when you mark something off the to-do list that has made it’s home there for years??
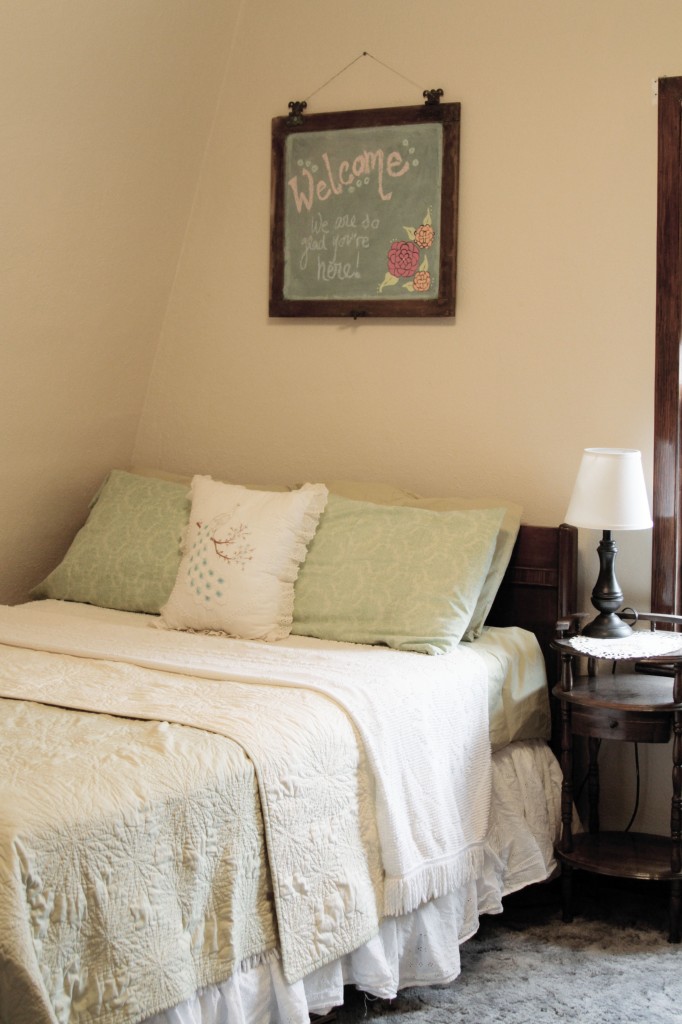
Okay, so I bet you want to know how to make that awesome chalk board paint. It’s easy…but you may need to make a trip to the hardware store.
First prime your surface with a coat of paint. Then mix up your chalkboard paint:
Put 1 TBSP of unsanded grout into a disposable container. Add a couple drops of water and stir until you have a smooth thick substance. Then add 1/2 cup of paint. Stir again until it’s mixed up real good like. Easy, right?
Your mixture will be thick. You can double, triple, quadruple…this recipe for bigger surfaces.
Apply it with a foam brush to get a good even coating without brush strokes. After it’s all dry lightly rub a piece of chalk on its side across the surface to condition it. Wipe the slate clean and use your new board!
Happy Crafting!
Amy
PS…For those of you following along, I was doing this project when I made that tragic oopsie poopsie on my carpet…
This post is partying at Between Naps on the Porch and these other great sites.
by Amy | Nov 26, 2012 | Blog, The Art of Design
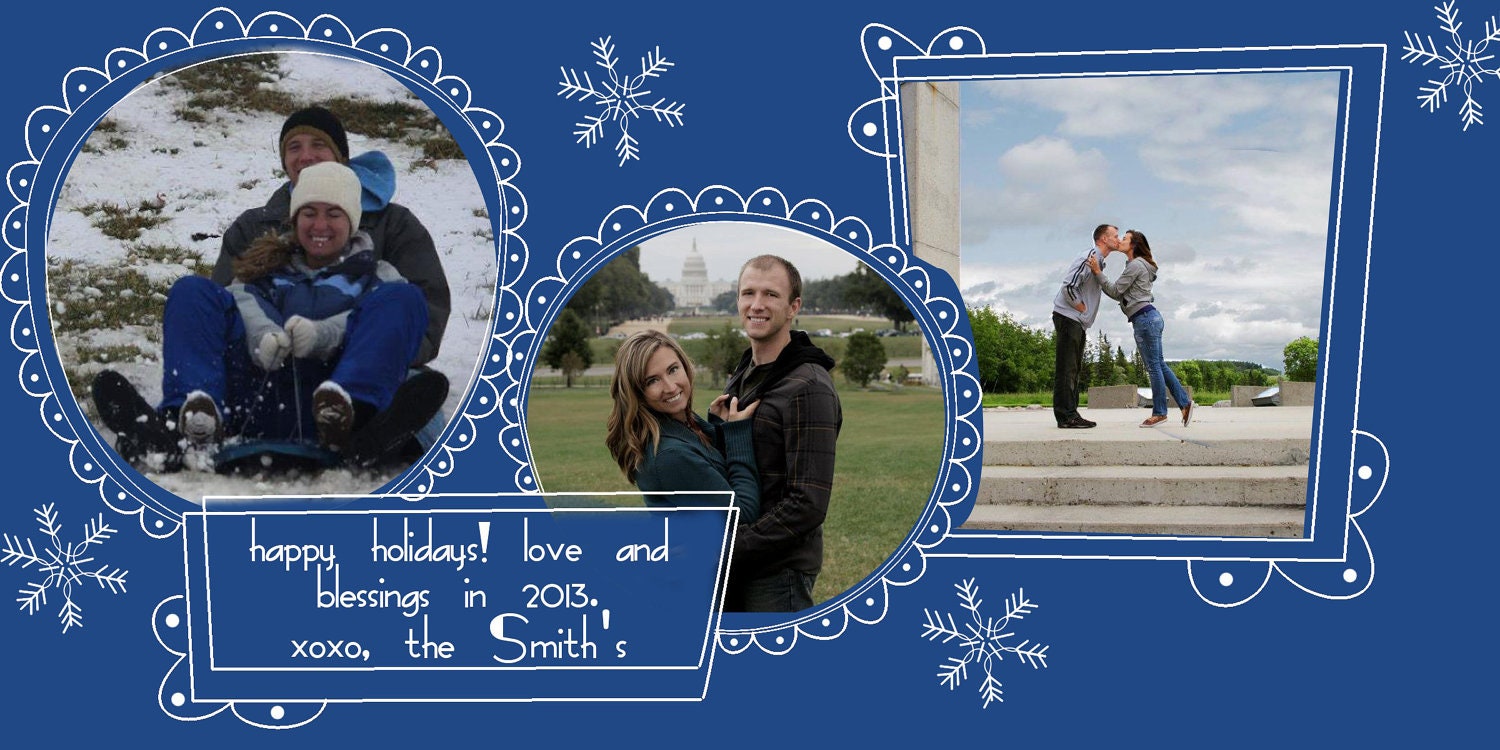
I know I’ve talked a lot about Christmas cards lately. And I promise…after tonight I’ll hush about it. {For a little bit.} But I just had to show you the lovely cards I designed for my Etsy shop. They are cute and totally customizable for you.
The examples show photos of me…but I’m sure your photos will look much better than mine. And for only $10 you get the file and can print as many as you like! {That’s a good deal.} There are seven designs available for you to choose from at my shop, go over to the store to see the rest. So pick your favorite…and get going. Those cards won’t send themselves.



by Amy | Nov 21, 2012 | Blog, The Art of Gathering
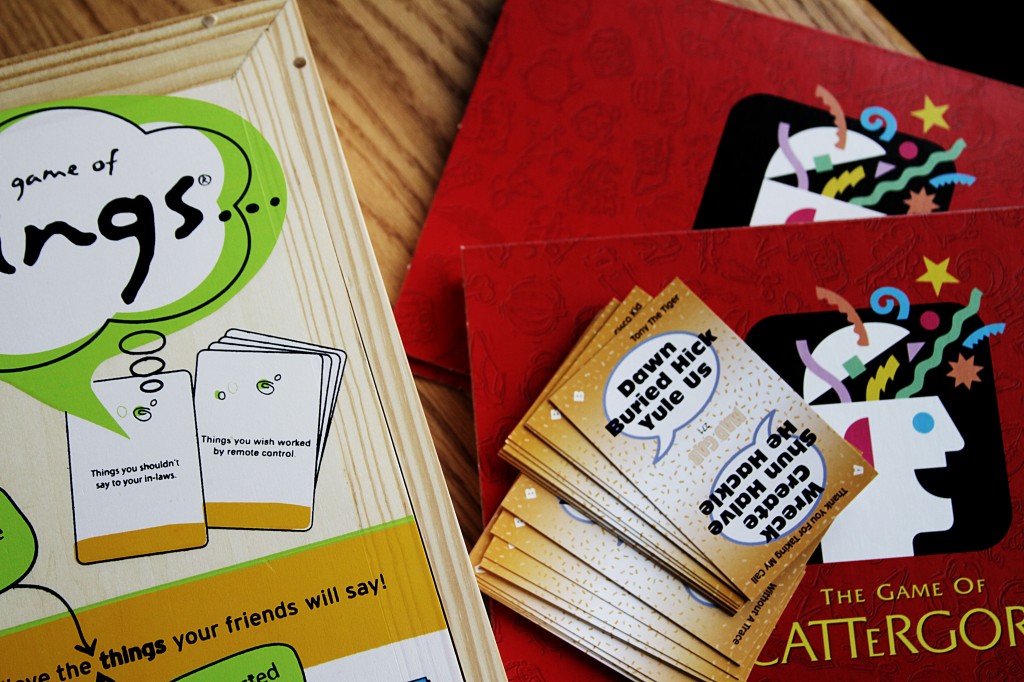
When the turkey has been eaten and the pie has been cut you’ll be left sitting around the house with friends and family. And in my house…that means games. We love games. Games of all kinds. And we have a sick game collection. So I’ve compiled a list of the best games {according to me…} to play this holiday season after the meal.
1. For the vocabulary savvy: Scattergories. This one is a classic. Stretch your brain by coming up with a word that fits into a listed category. The catch is…every word must begin with the same letter {chosen by a lettered dice.}
2. For the vocal: Mad Gab. Perfect for larger groups as it is a team game.
3. For the silly. The Game of Things. Have you played this one? It’s so fun. One person reads a category from a card {ie: Things not to do in a hospital.} Then everyone writes a response {ie: Eat junior mints while observing a surgery.} Players score points by guessing who wrote what. It. Is. Hilarious.
4. For the versatile: Cranium. Another classic. Teams move around the board by completing puzzles, charades and pictionary clues.
5. For the laid back: Skipbo. It’s a card game, good for 4-6 players. A slower pace, no teams, not a lot of ingenuity. Perfect for those feeling a bit sluggard after turkey.
6. For the poker faced: B.S. It stands for what you think it stands for. All you need for this one is a deck of cards and the ability to tell a white lie. Rules here.
7. For the creative: Balderdash. Players write made up definitions for obscure words, people and movies. Score points for tricking other players into believing yours is the real answer. This game never gets old to me.
I hope your Thanksgiving is full of full bellies and lots of quality family time…whether with family, or friends who might-as-well-be-family. I know I’m having a blast. But alas, before I can play games, I must bake the pies.
What is your favorite game to play with family on the holidays? Oh, and if all else fails…you can always pop in Christmas Vacation. After all, once T-giving is over it’s Christmas-time!!
Amy
by Amy | Nov 19, 2012 | Blog, The Art of Gathering, The Art of the Kitchen
It’s only a few days away!
If you don’t know what I’m talking about, you must be reading from another country. Because in America, the only thing we love more than food…is a holiday that celebrates food.
Thanksgiving.
My parents got in last night, and boy am I glad to have them here. I just adore it when folks make the trip to come visit us…wherever we are. But I digress. You saw the title of the post and you want a recipe, darn it.
So here we go. This pumpkin bunt cake is a creation of my own and I’ve been celebrating fall and Thanksgiving with it for years now. {Ever since the recipe came into being.} It takes about 20 minutes to whip together…then about 55 minutes of filling your house with amazing cinnamon-pumpkiny smells.
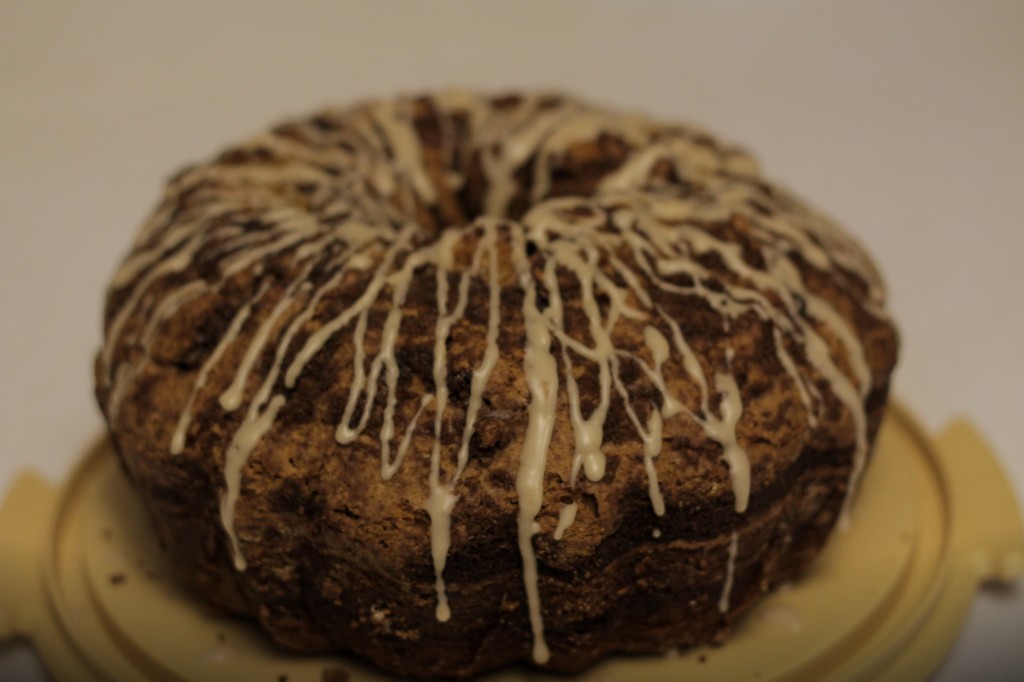
Here’s what you do:
Get out a big bowl.
In that bowl beat together:
3 cups sugar
1/4 cup butter {softened}
1/2 cup vegetable oil
Then…
Add the following ingredients one at a time, mixing after each:
4 eggs
1 tsp vanilla
1/4 tsp salt
1/2 tsp allspice
3/4 tsp cinnamon
2 tsp baking soda
Finally…
Alternate adding the final two ingredients. First some flour, then some pumpkin…until it’s all mixed in.
3 1/2 cups flour
1 – 15 oz can of pureed pumpkin
Pour half of the batter into a greased and floured bundt pan. Sprinkle with 1/3 cup brown sugar and 3/4 tsp cinnamon. Then pour the rest of the batter on top. Sprinkle the top of the batter with more cinnamon and sugar.
Bake at 350 for 50-60 minutes. It’s done when a knife stabbed into the center comes out nice and clean. After it’s cooled for a bit mix up 3/4 cups of powdered sugar with 1/4 cup of milk {more if you want a thinner glaze}. Then use a spoon to drizzle the glaze over the top of the cake.
You’re gonna love this one.
Amy
by Amy | Nov 16, 2012 | Blog, Crafts, The Art of Projects
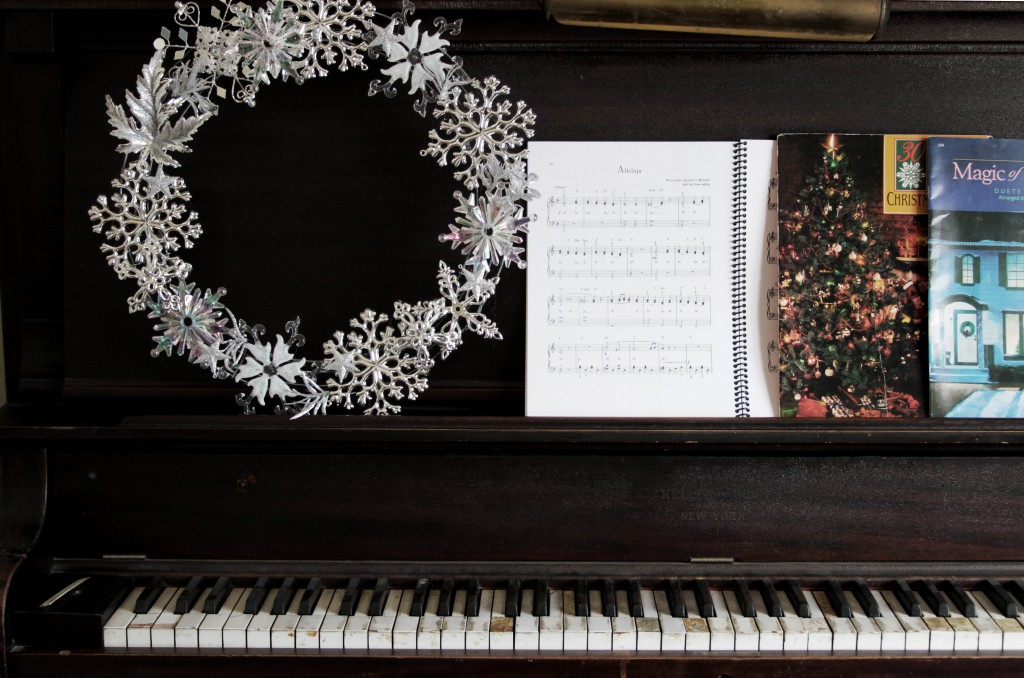
You know what’s pretty? Pottery Barn stuff. All of it. Every season. Every stinking item in the catalog.
You know what I can’t afford? Pottery Barn stuff. Any of it. Any stinking item in the catalog.
But I really want a pretty PB house. I’ve started a board on Pinterest of things I think I can recreate. I’ve started frequenting this amazing site called Copy Cat Crafts. It’s chock full of knock off tutorials.
That’s where I got the inspiration for this wreath. I think it just may be the prettiest wreath I’ve ever made. {And I’ve made a lot of wreaths. Two which were awarded Grand Champion at the Elkhart County 4-H Fair.} Doesn’t it look sharp on the piano? Don’t mind those roughed up keys…It adds to the primitive look.
This is the tutorial that inspired this project. I followed pretty closely, but here is the process I used.
I bought:
1 Wire floral wreath form | A tiny can of silver spray paint | A stack of silver snowflake ornaments {they came in a tube} | An assortment of pretty glittery/silver snowflake ornaments
I used about 15 ornaments total for my 14″ wreath. You may want a few more. I did all my shopping at Hobby Lobby. But Wal-Mart and the Dollar Tree are known to have good sparkly ornaments too! This is one project where a little gaudy can still look classy. The key is to stick with one color {like silver} and motif {the snowflakes.}
Here is what I did:
1. Spray paint a wire wreath form silver.
2. Snip off tags and hooks from ornaments.
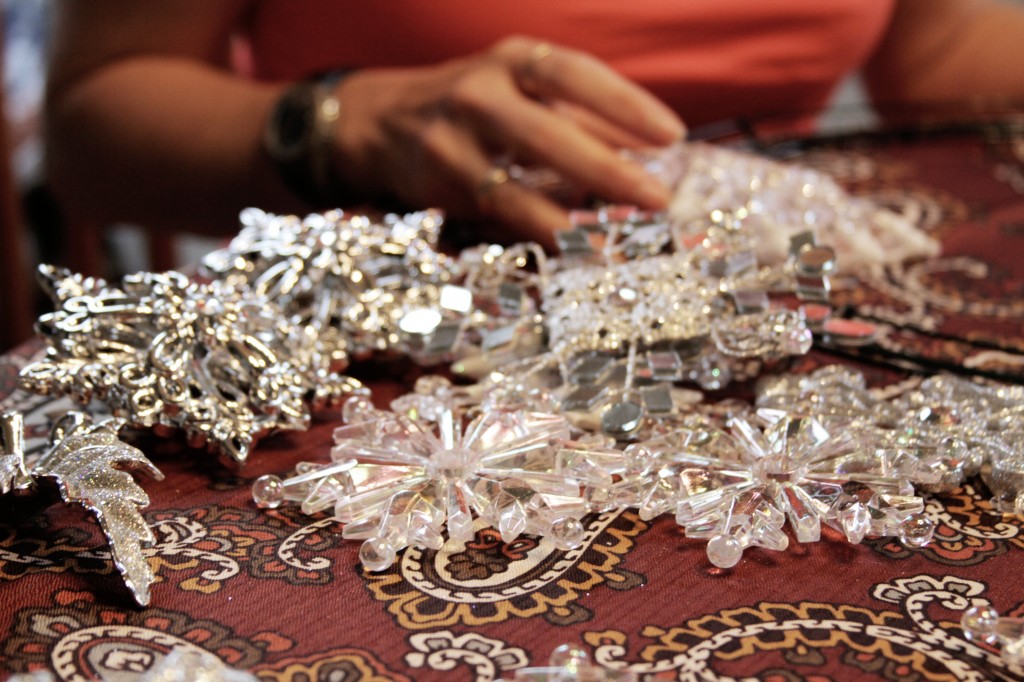
3. Arrange them on the form.
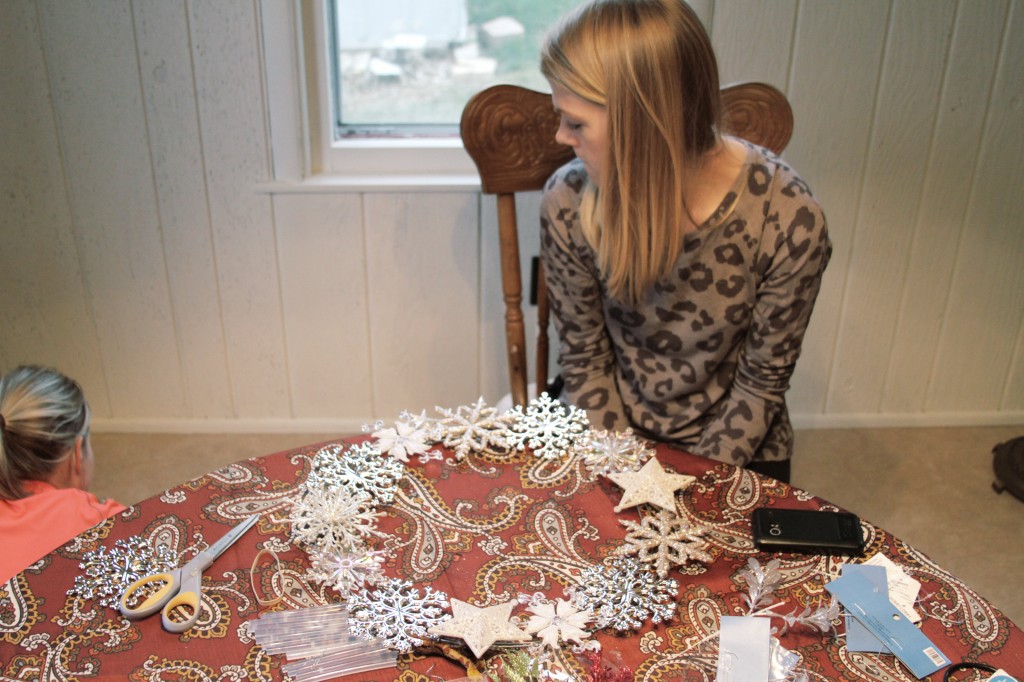
4. Hot glue them in place.
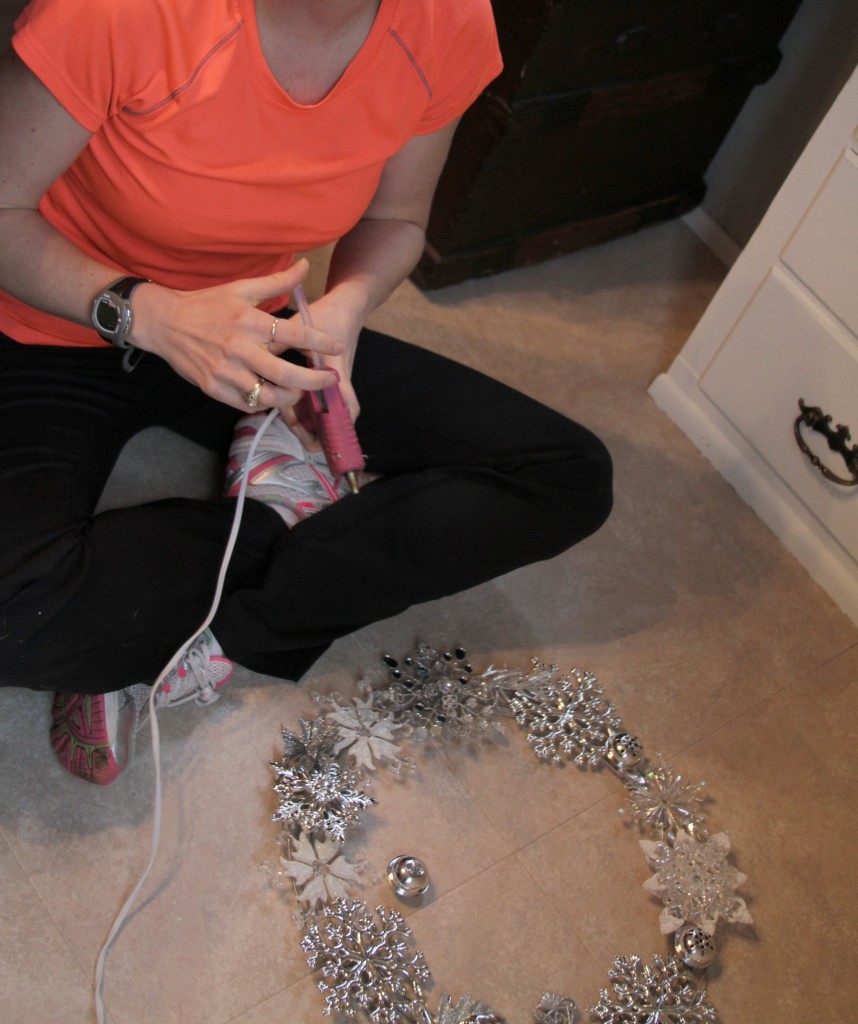
Done. It is so easy…I just couldn’t even believe it. I think it’s a classy wreath. Like snowflakes each one will turn out unique. And I plan to hang it the day after Thanksgiving until January 31.
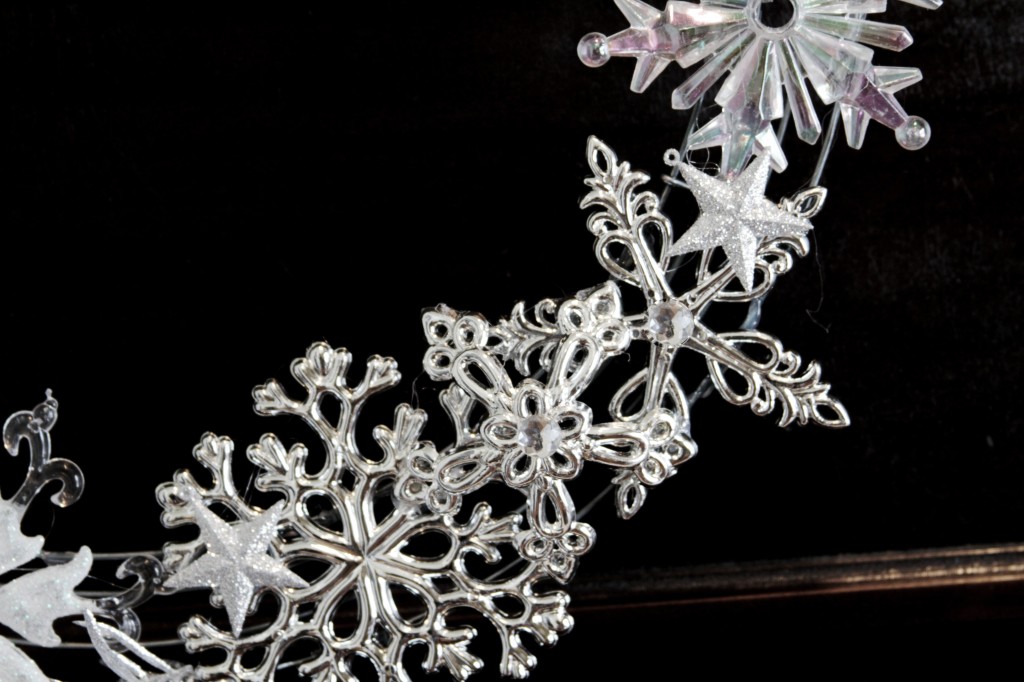
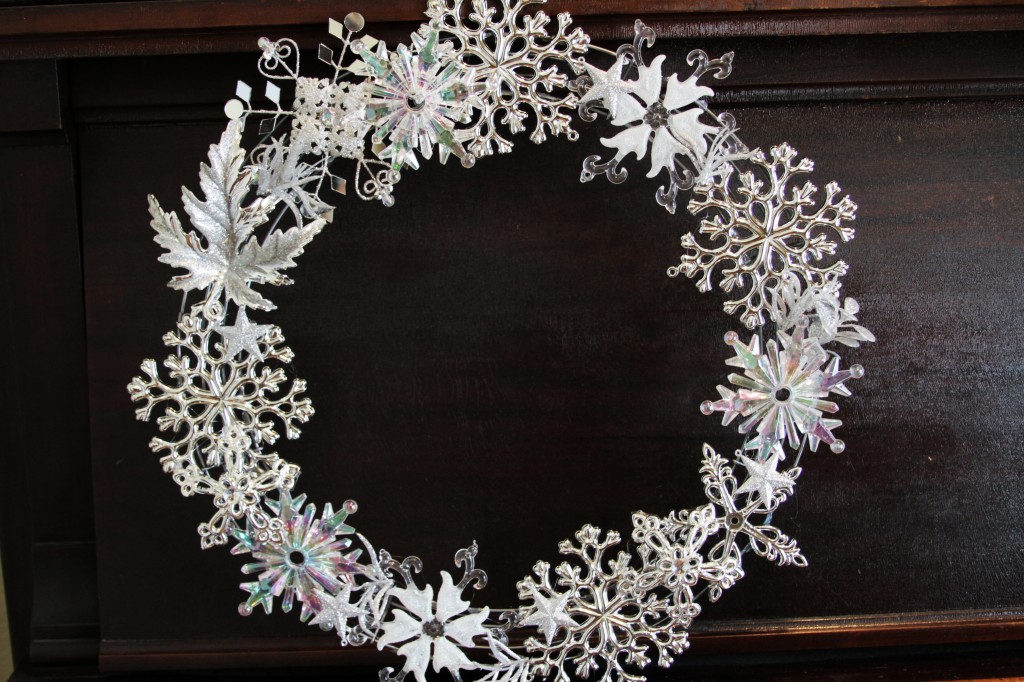
While it is super pretty, I don’t think I’d recommend hanging it outdoors. I think the elements may be a bit too harsh for this dainty project.
The best part? The PB wreath retailed at $70. Mine cost $15! Yeah baby. That’s what I like. Thank you Copy Cat Crafts for being so inspiring!
Happy crafting. And remember, friends don’t let friends craft alone.
Amy


