by Amy | Jul 19, 2013 | Blog, The Art of Adventure
I know I’ve been absent. If I was really a good friend to you, I’d be writing every single day of all the adventures I’ve been having in Indiana. But here’s the thing. I’m having so many, many, many adventures that are lasting late into the night I’m just too pooped to put a full sentence together by the time I’m home for the night.
However, I’m so excited to show off not one…but TWO vacation bro images.
The first comes from my recent visit to Noah’s Ark Water Park {America’s largest water amusement park}. While floating down the lazy river, I discovered that the park offered tubes that were built for two people to share. Perfect for friends. Immediately I began wishing and hoping that I’d see two bros sharing one of these tubes. And…bingo. Right behind us on the river two bros hopped in one tube together.
Just two bros floating down the lazy river.
Now, this first one shows a view from the side. It kind of looks like they are just floating close. Nope. Oh, and don’t mind that creeper in the corner. Katie was smiling so it would look like I was taking a photo of her and not the bro show.
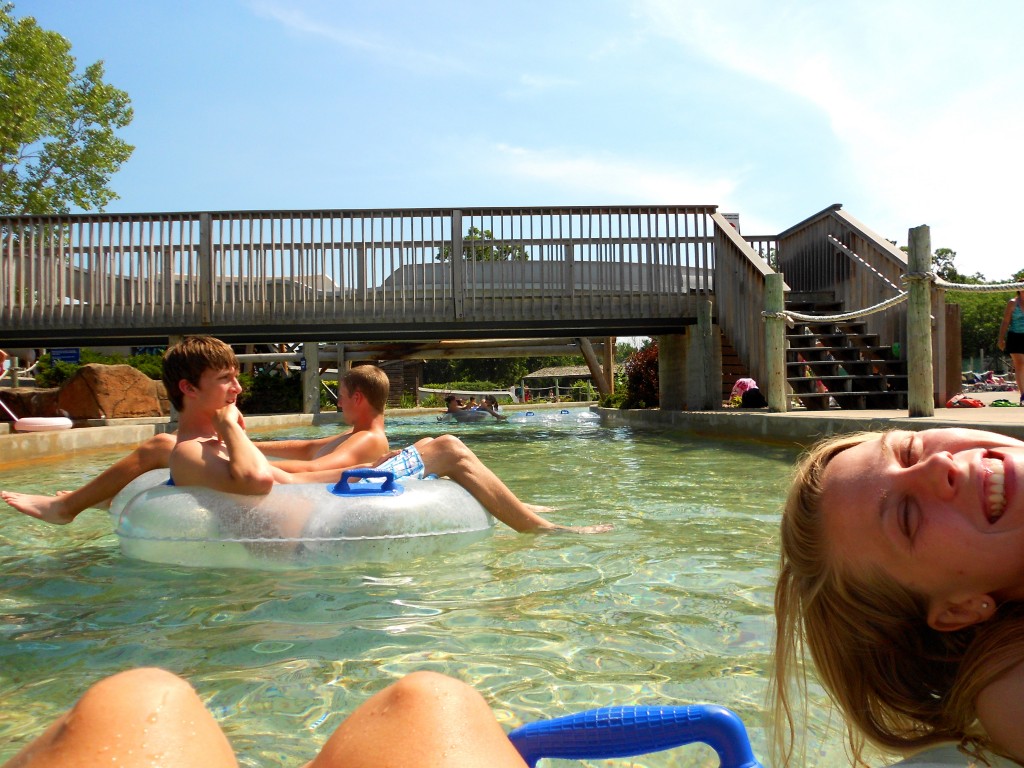
This one really shows off the bro moment that was taking place.

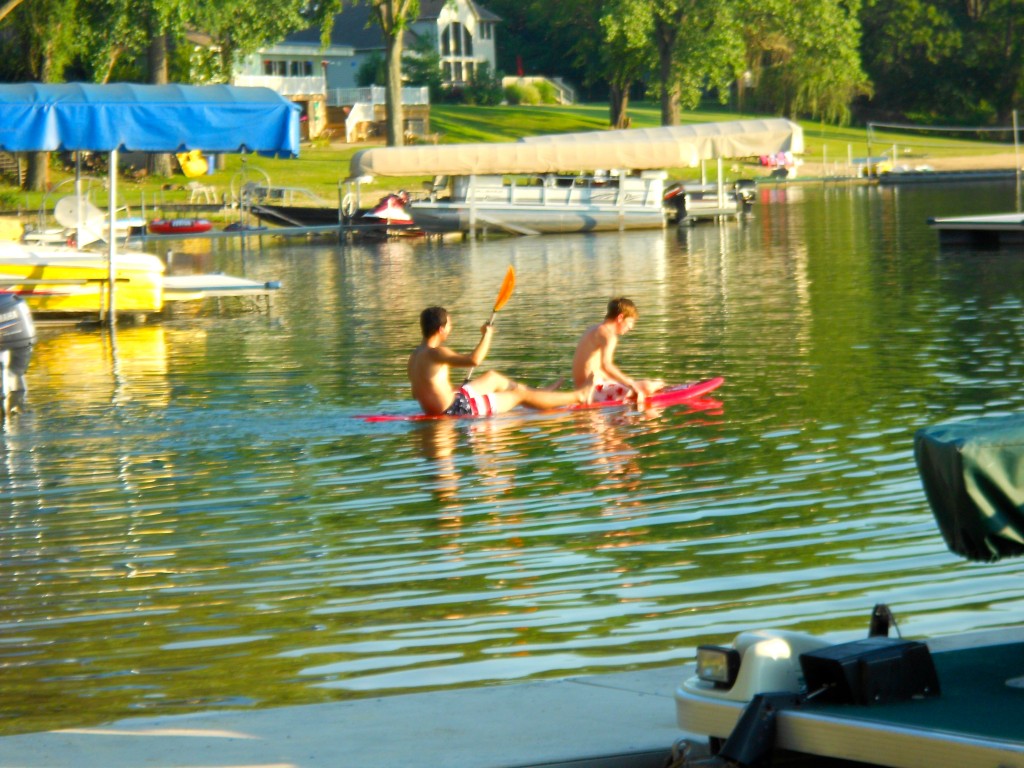
Last night Katie and I ventured up to Baron Lake near Niles, MI where Derek’s family has a cabin. We didn’t expect to see a bro moment take place. But that’s the thing with moments like these. Sometimes they can crop up out of no where. While we were taking turns practicing our dives off the pier we noticed two bros climbing on to a paddle board together. Nice and cozy. The icing on the cake? They literally referred to each other as “bro.” The cherry on top? One was wearing American flag board shorts and the other was sporting Canadian flag shorts. Priceless.
Just two bros doing a little paddle boarding.
by Amy | Jul 11, 2013 | Blog, The Art of Projects, the house
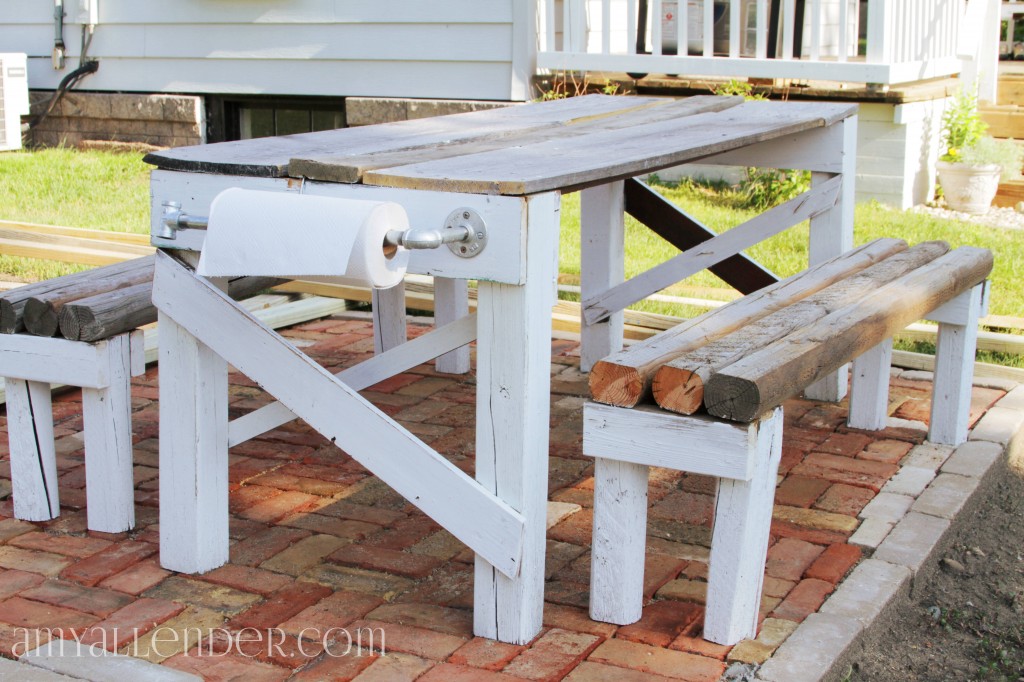
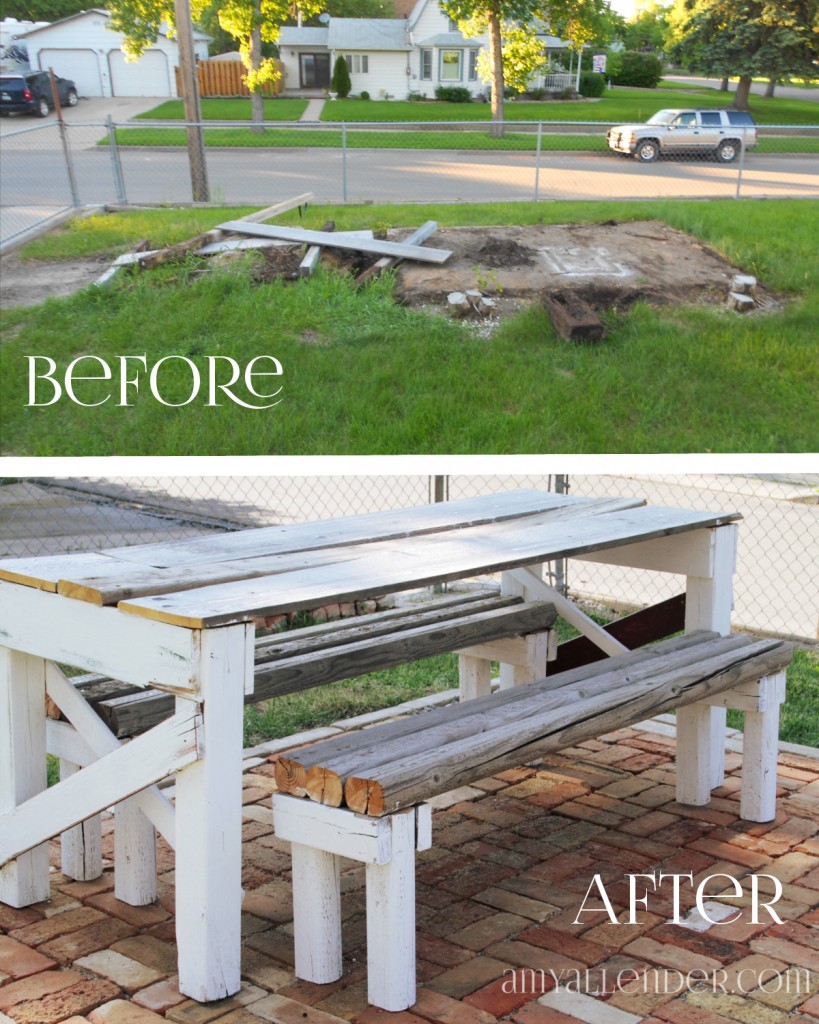
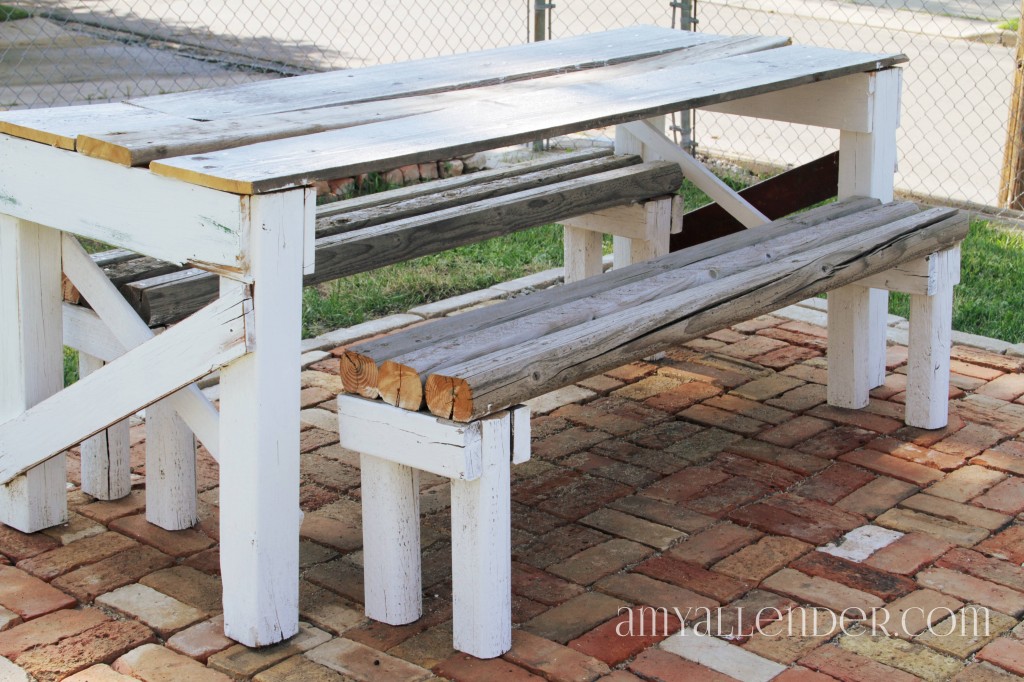
Today I’ll show you how I {yes, me…all by myself} built this table and benches for my patio. Are you impressed, or what?!
I have to say, this is one of my greatest before and afters. After my shed came down from the space that I wanted to lay the patio, I was left with a bit of a mess. Wood from the previous home-owner’s garden frame was left hanging around…then, as I leveled the ground I discovered quite a few landscape timbers lying in the dirt around the space that the shed used to stand on. I knew I wanted a place to sit and eat outside, but even the simplest table and bench combo was going to set me back several hundred dollars.
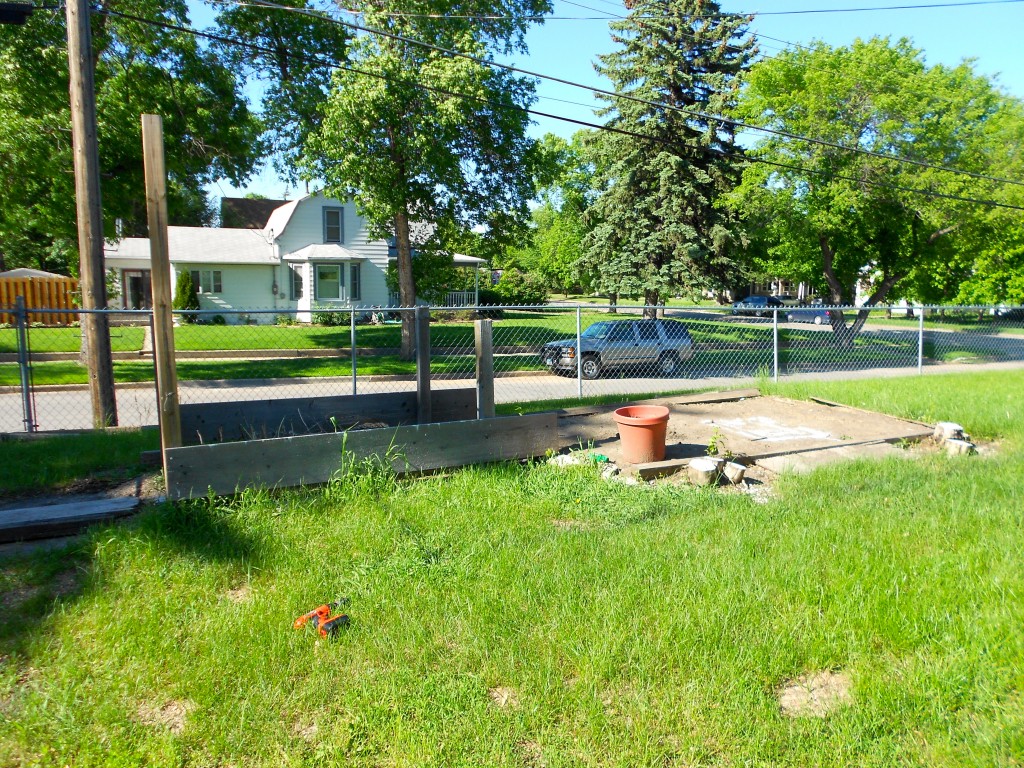
Not happening.
So I got creative, collected the resources I had on hand and got a little gutsy…and I made this happen.
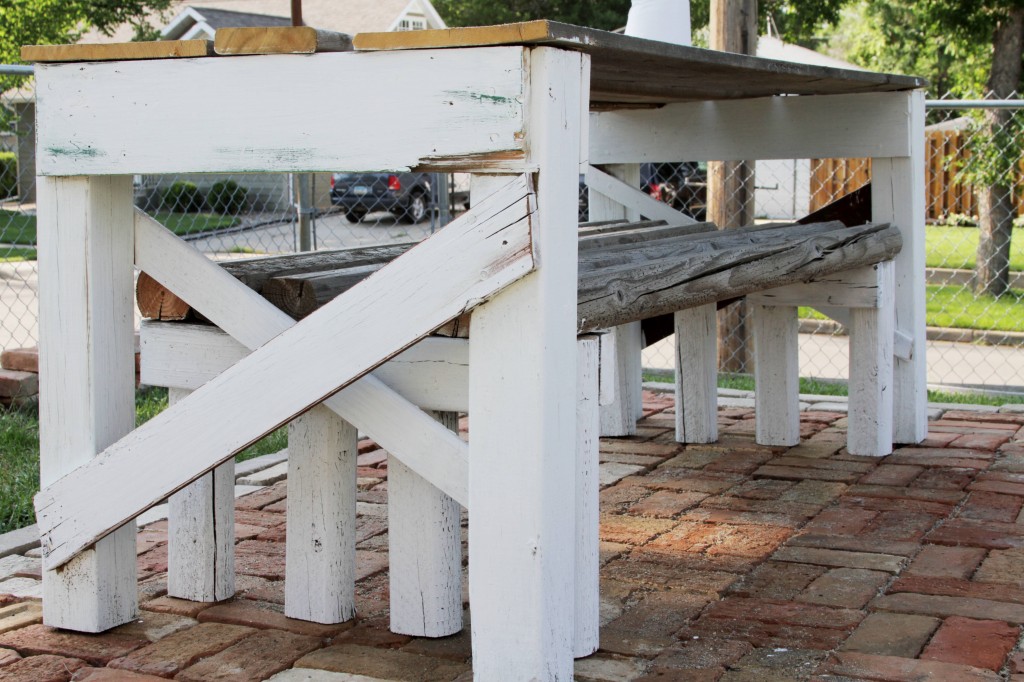
The inspiration for this project really hit me when I visited the Vintage Fair here in Minot a few weeks ago. I had been all over and racking my brain trying to figure out a way to get a table for my new patio without breaking the bank. I had kind of hoped to find something I could use at the Vintage Fair…but no luck. Instead I came across a table that was PERFECT in every way, except for the fact that it wasn’t for sale. Bummer. This is it:
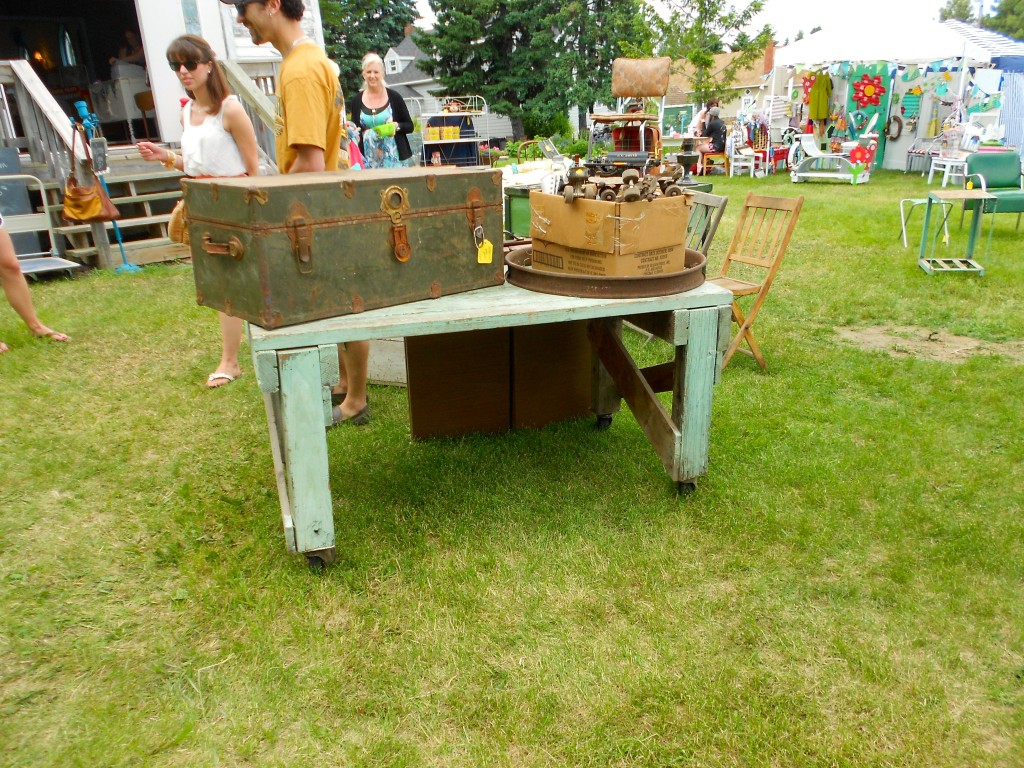
It was apparent that at one time, this table had been made with scrap lumber. Even though I couldn’t go home with it, it sparked an idea. Like a big cartoon thought bubble, my mind was filled with the memory of all that crap wood I pulled out of the yard. Bingo.
I was a little worried, because I’ve never been much of a carpenter. The closest I’ve come is following Jesus…and a couple woodworking projects with my dad when I was a kid. {But let’s face it…I was mostly an innocent bystander for the majority of those shop projects.} But I armed myself with lots of photos of this table, from every angle I could get…and I went home to replicate.
Here goes nothing.
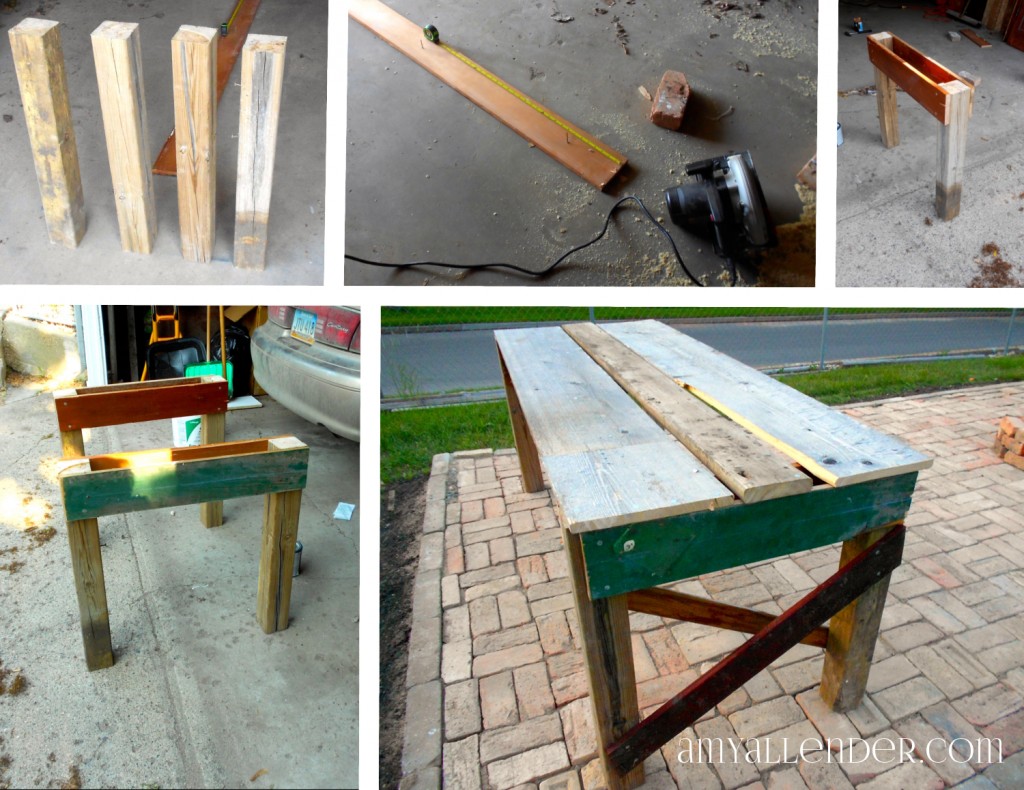
1. First I did a little Googling to figure out how tall a table usually stands. Most plans say 30-31″. I cut up this tall 4×4 to four 30″ lengths.
2. Next I did a little more Googling to find the typical width of a table. I wanted mine on the slender side to conserve space, so I decided on 28″. I cut four pieces to 28″. These will hold the legs in place. For this part I actually used a couple spare baseboards from the bedroom redo.
3. Nail those suckers in place. Make sure the top of your 28″ piece is flush with the legs and that the legs are square. Nail one brace to each side of the 4×4 legs.
4. Repeat that process for the second pair of legs.
5. To lend additional support you’ll need to come up with four more pieces to attach in an X to the legs. I also thing this looks super cute. I found some old fence posts{?} behind the garage. So I used those. You want one end to rest right under the brace. To make measuring easier I laid my leg piece right on top of the piece I wanted to use for the X. Then I drew a line and made my cut. Attach one to each side of your legs.
6. Next decide how long you want your table to be. For my space 6′ was just about perfect. Stand your table legs apart and lay some long planks across the top. I used the two sides from the “garden” and one leftover deck plank. When you’re happy with how it looks nail them in place. Use at least four nails per end, per board. {2 into each brace.}
For this project I used all nails. Partly because that’s what the table at the Fair was made with and I liked the rustic feel of seeing them. Partly because that’s what I had on hand.
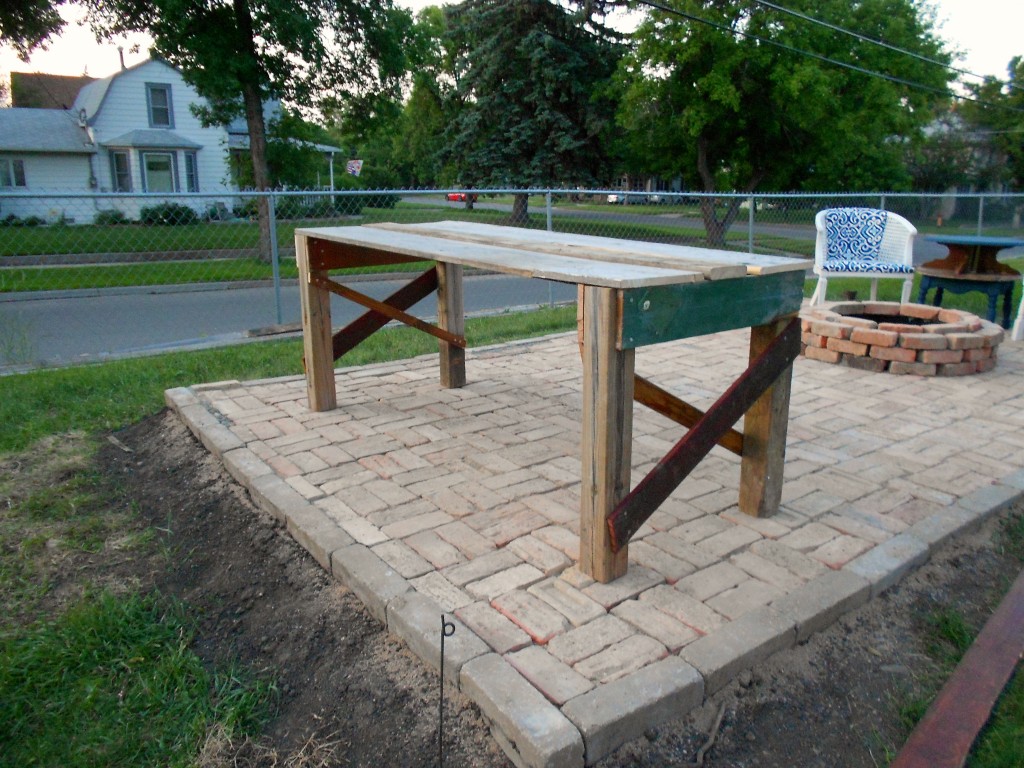
I so wanted to be happy with it just like that. All rustic and mis-matchy. But…you know me. Nothing is complete without a little white paint. I felt like it would really unify the table with the rest of the patio {ahem…my awesome chairs} if I painted it. I painted the legs and left the top alone. I love its weathered gray tones.
Now on to the benches. Those were so easy! They are like mini tables, so once you’ve done the big part these will be a breeze.
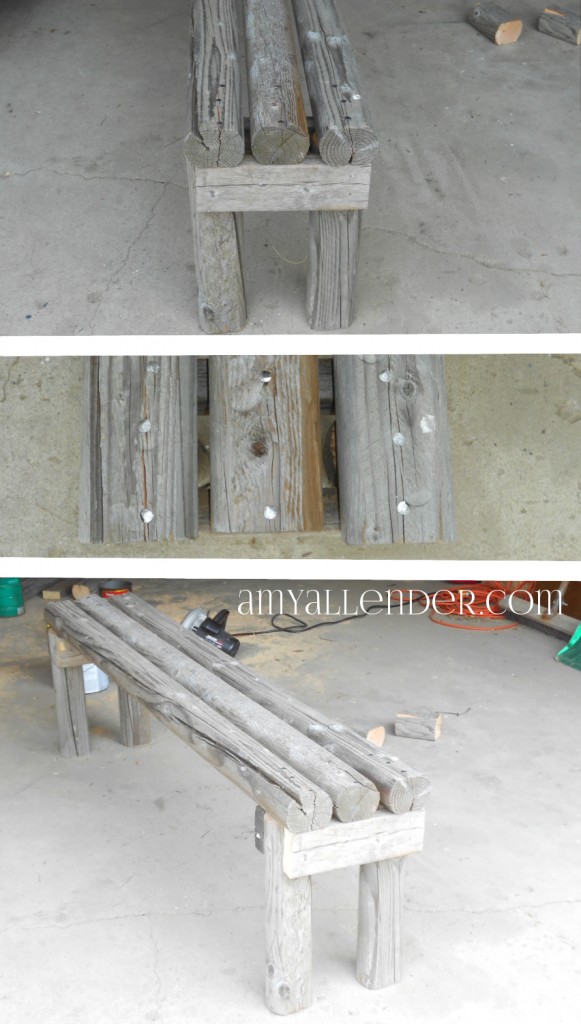
First build your legs. Google told me the bench should be about 18″ tall, so I had to do a little math. The landscape timbers are 3″ thick, so I cut my legs to be 15″ tall.
Next decide on your seat width. I made mine on the narrow side so I could store them under the table together. These are 10.5 inches wide. Cut your braces and attach them. One to each side of each set of lets.
Then nail your long timbers across the top. My benches are 54″ long. Again, so they could be stored under the table. Since these timbers are so thick I had to make a run to the hardware store for extra long nails. This was my only expense in the whole ordeal…$4.59. I’d say that’s a pretty good deal for a table and two benches. And as an added bonus I don’t have so much junk lumber laying around my yard.
Just like with the chairs yesterday, if you want this to last you’ll need to use products made for being outside. All this lumber is pressure treated or cedar {with the exception of those two baseboards} so I know it’ll hold up. The paint I used is more of that white deck stain from last summer’s Deck Redo.
And, for real…if I can make this, so can you.
Amy
by Amy | Jul 10, 2013 | Blog, The Art of Projects, the house
Let me start by telling you that…the patio is done! It’s been done for about a week…but things have been pretty busy around here so I haven’t had the time to sit down and really show it off to you the right way. I even had my very first dinner gathering on it on Sunday. Pretty darn exciting! It’s still missing the lighting, but besides that I’ll call it good. The lighting will just have to wait until I return from a visit home to Indiana next week. But more on that later.
If you have a patio or a deck…or are looking at putting one in you’ve probably noticed that, well, outdoor stuff is pretty pricey. I hate pricey. I like affordable, eclectic and thrifty. If there is one thing that the Allender clan is good at {but let’s be honest, we’re pretty savvy at lots of things} it’s coming up with solutions. We are brainstormers willing and able to see a creative use for a mundane item. So that’s exactly what I did. I got creative and thrifty when furnishing my new ODR {outdoor room, folks.} Today I’m thrilled to show you the first part of of my conversation area…take a look.
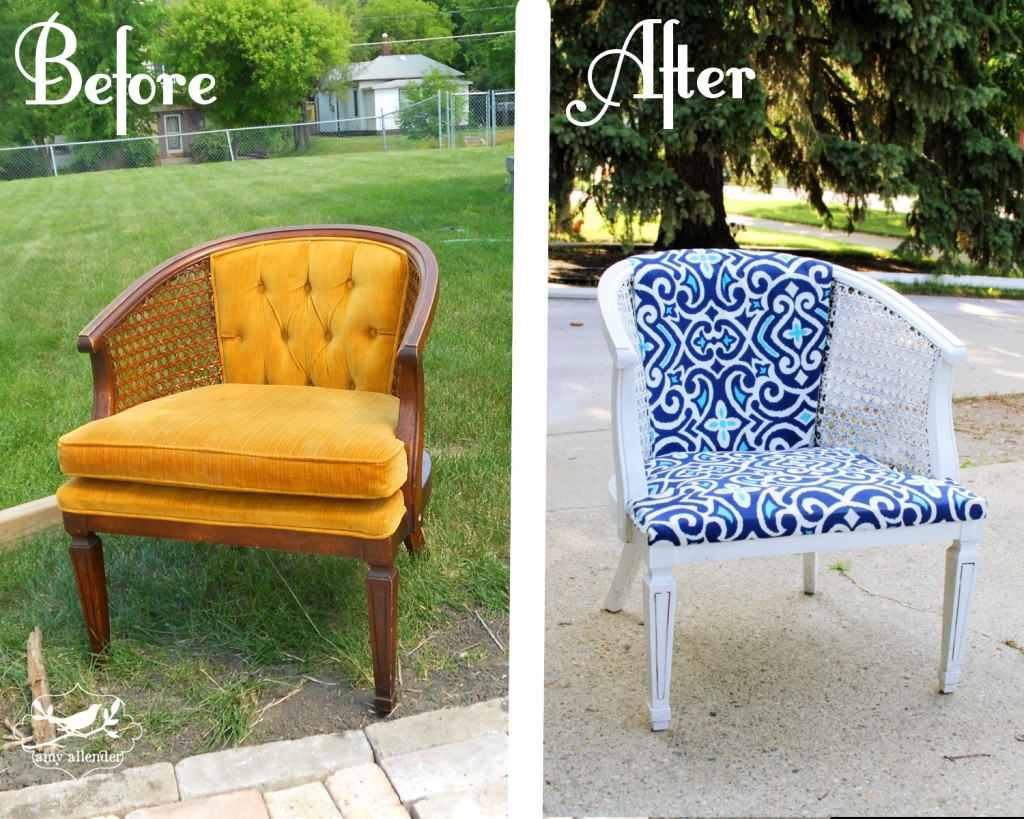
Big difference, right? I bought two of those yellow upholstered chairs at the Salvation Army Thrift Shop for $15 each. When I laid my eyes on them, I knew that if I put a weather resistant fabric and some white paint on there…they’d be perfect.
Here’s what I did. Really, it was so easy, I know you can do this. When I got these chairs they smelled super bad. Like mothballs and musty closets. When I proudly showed these gems to my friends in the garage, the first thing they noticed was not the cool lines or the potential. It was the smell.
So my first order of business was ridding them of anything that could capture the odor inside. I tossed the cushion and ripped off the fabric and all the padding underneath. Then I scuffed up the glossy finish on the exposed wood with some sand paper and added two coats of exterior grade paint. {Leftovers from last year’s deck redo.}
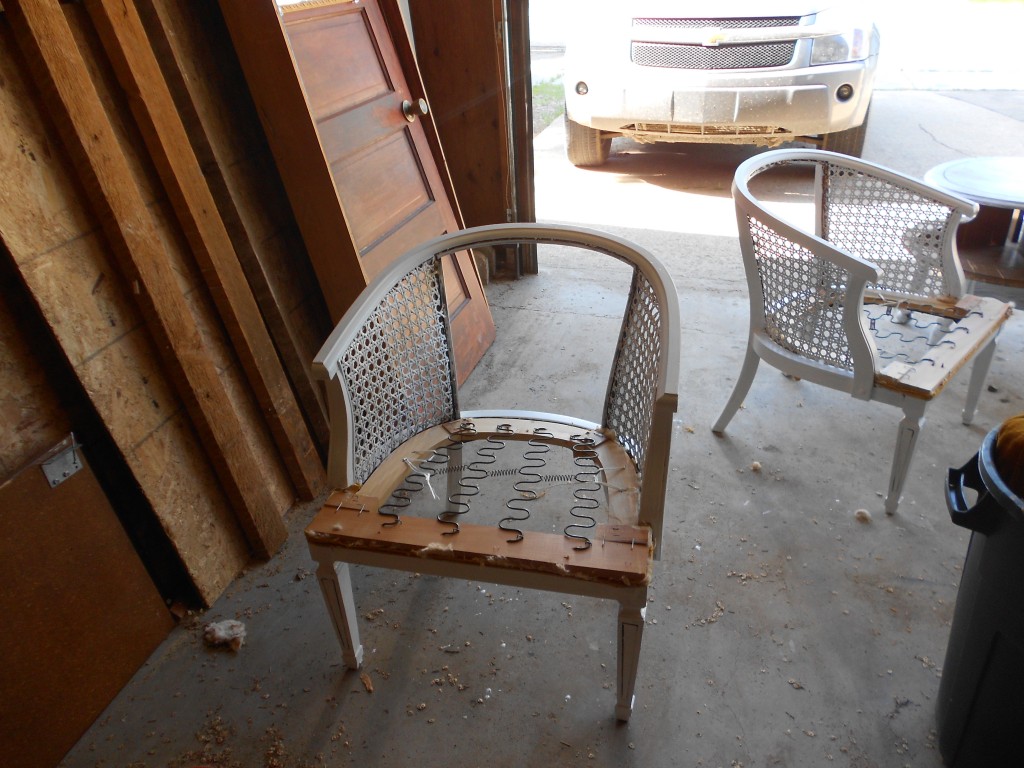
Once the paint was dry and all the stuffing was safely in the trash it was time for new cushioning and upholstery. I went down to my ever loyal JoAnn Fabrics. I picked up two yards of outdoor fabric and outdoor cushions. If you are making over a piece of furniture that you plan to keep outside, it is pertinent that you use things made for the open air…fabric, padding, paint, everything.
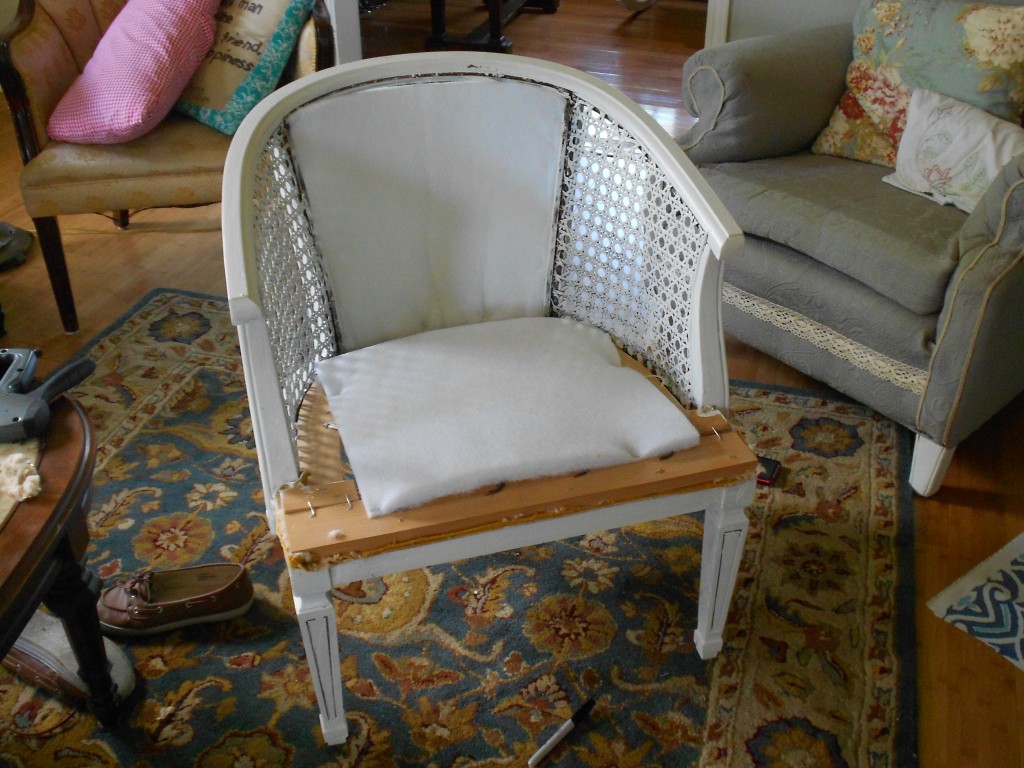
Now, the way I did the upholstery is a little janky. I put one cushion on the seat {as you can see one a size bigger might have been a better option, but this is still okay because it covers the springs.} The other cushion a put in the back of the chair. I took the staple gun to them to hold them in place. Then it was time for fabric.
I measured the size of the seat and added about 2″ to the whole perimeter. Then I did the same thing for the back of the chair. I whipped out my high-heat glue gun and started attaching it to the chair frame. Starting on the bottom {or back of the seat} I glued it in place, then pulled it tight in the opposite direction. You want it really good and taut. In the places that the seam shows, fold the fabric under to make a “finished” edge. As you go, trim off any excess that gets in your way.
Just to make things easier on myself, I wrapped the fabric all the way over the to of the chair and attached it to the back.
It’s not perfect by any stretch of the imagination, but it looks {and smells} lots better. And the total cost with all the supplies, came out to about $50 for the two chairs. And while these are weather resistant, I don’t recommend leaving them out in a downpour if you know it’s coming. Taking them in, or covering them with a plastic drop cloth will prolong their life.
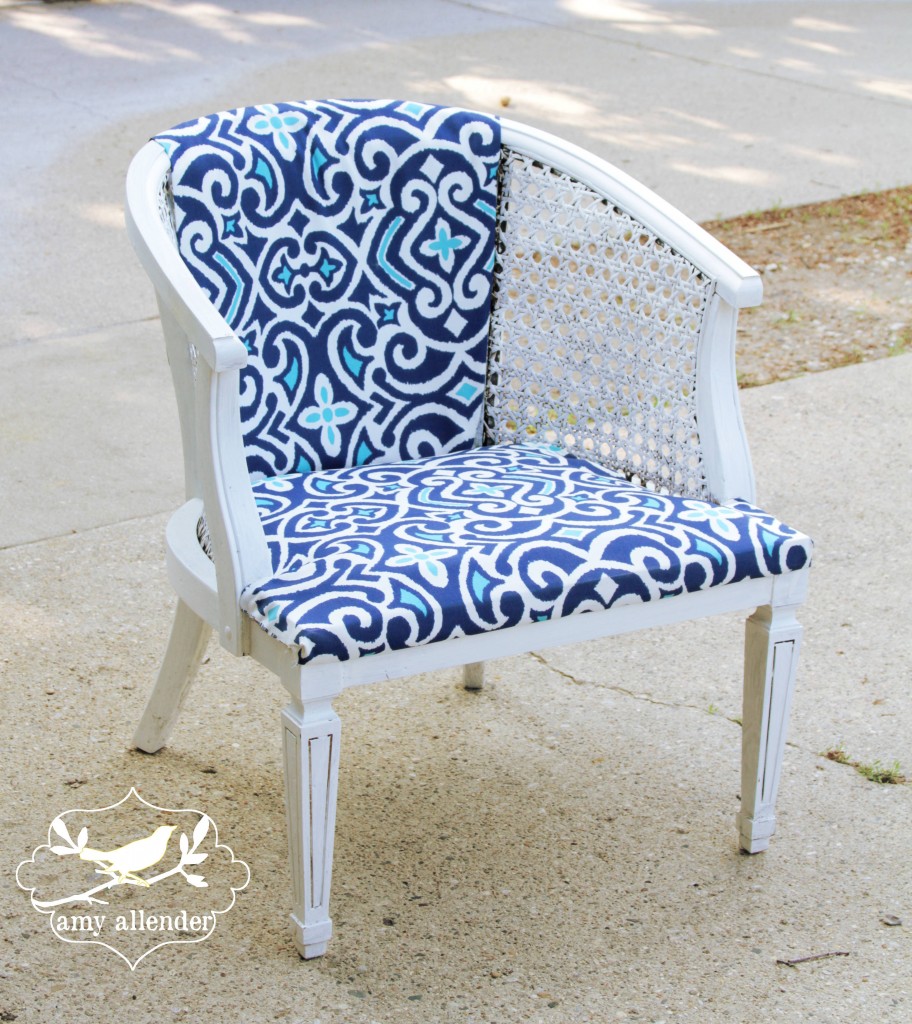
Come back tomorrow and I’ll show you my new patio table. That I made. For FREE! Yep, free. Okay, if we are getting picky, it cost $4.59 for nails. Give a girl a break.
Amy
by Amy | Jul 9, 2013 | Blog, The Art of Faith, The Art of the Moment

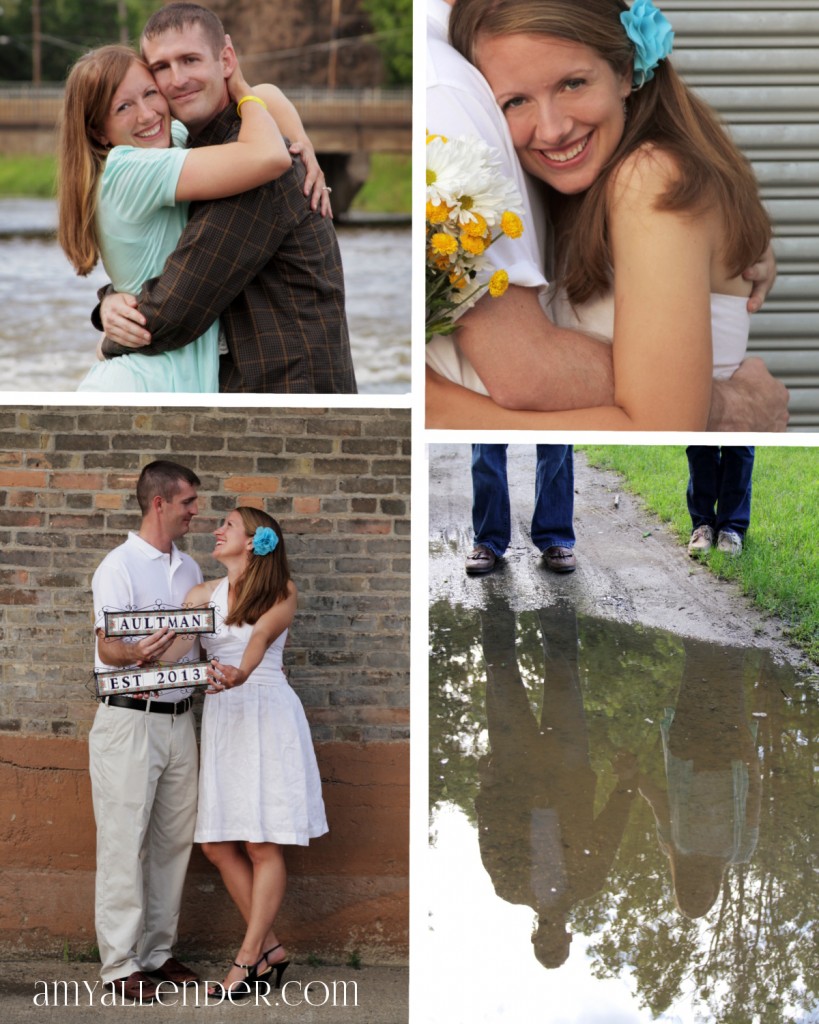
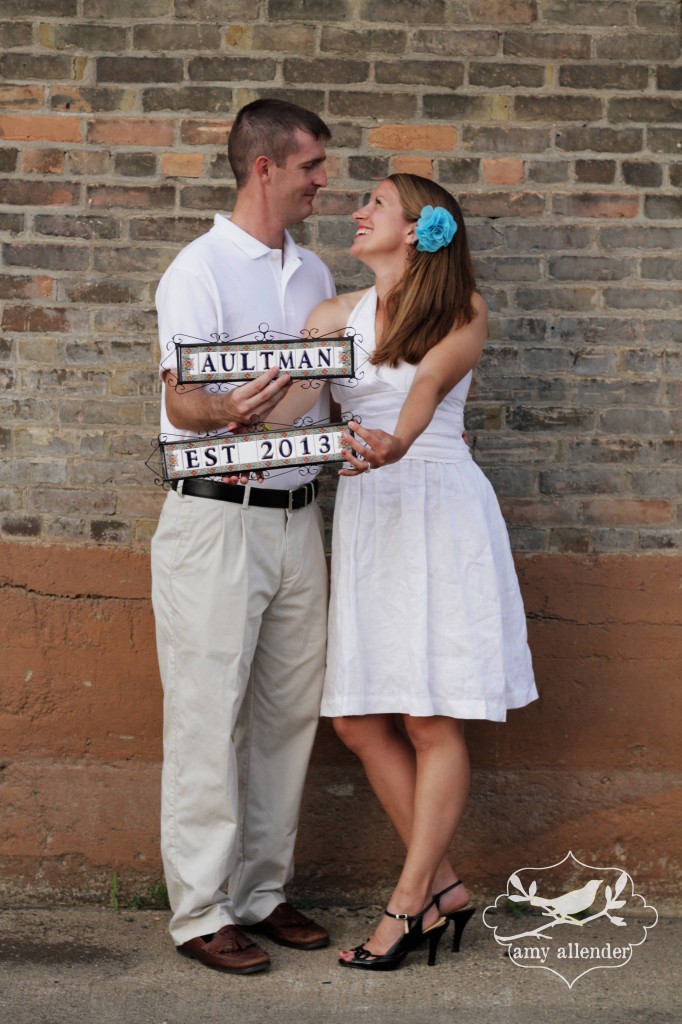
This is Kate and Jacob. Aren’t they precious? They are getting married in October and I am so very excited for them!! Kate and I have gotten to know each other over the past year through our women’s Bible study at church. This is what marriage is about people…two people, committed to loving each other and glorifying God through their union. It’s awesome.
Now, I must say, this was one of the most adventurous sessions I’ve ever shot. We started our session in a local park. But that didn’t last long because the mosquitoes chased us away. They were so bad I couldn’t even stand still to take a single shot. They were flocking to my fingers, my legs, my hair. They looked like clouds of gnats…so gross!
So we ditched that idea and headed to a sandy bank by the river. I laid out some plastic and a quilt for the happy couple to sit on. When I was finished laying out the quilt I about pooped my pants when I saw a special visitor right next to us…
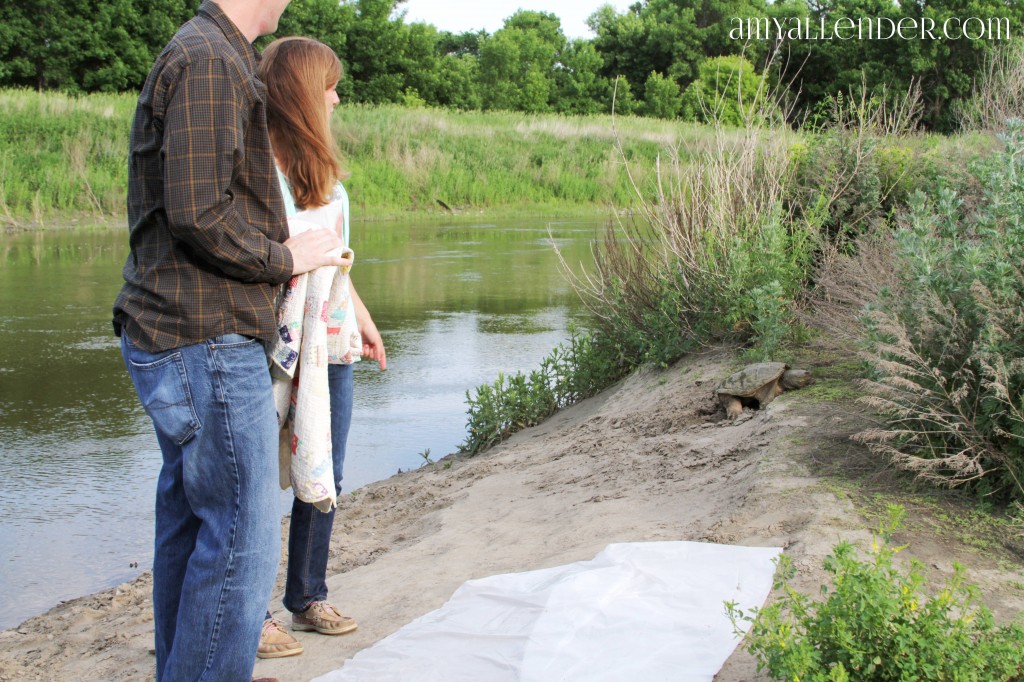
YIKES! It’s a GIANT snapping turtle! So scary. {I’m a whip, okay?}

So again, we took just a few and left. But first we picked up a couple cans of bug spray.
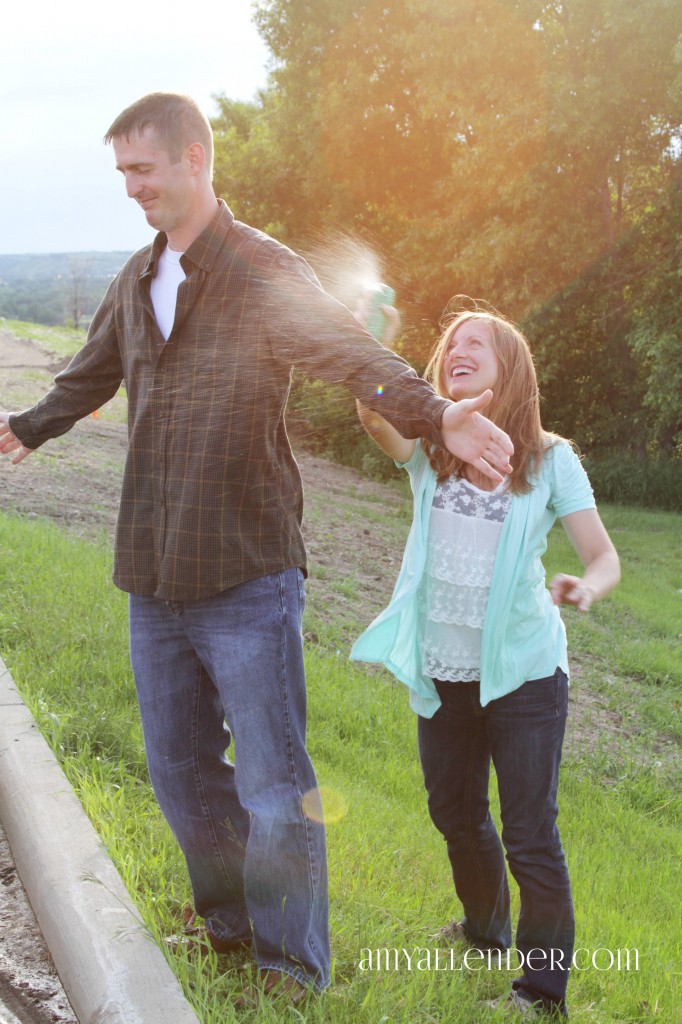
We smelled bad, but at least we didn’t get any more bites. Okay, now to the real stuff.

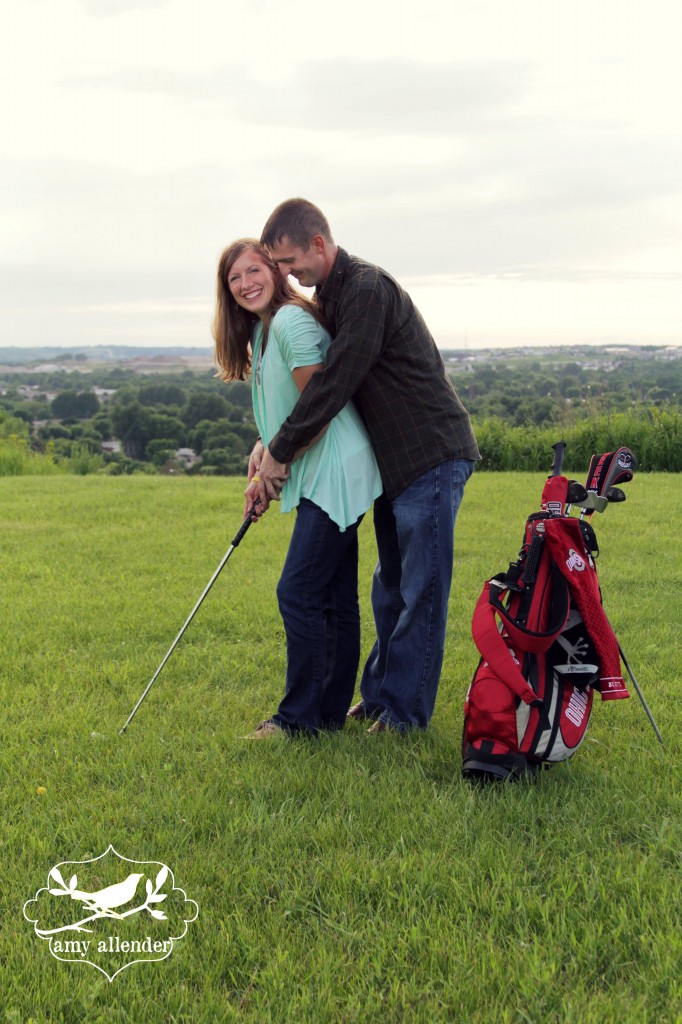
Jacob is a golfer and soon, they will be taking up golf together. In fact, the couple is so enthused, that Jacob actually hid Kate’s engagement ring in a set of clubs he bought for her birthday. Adorable.

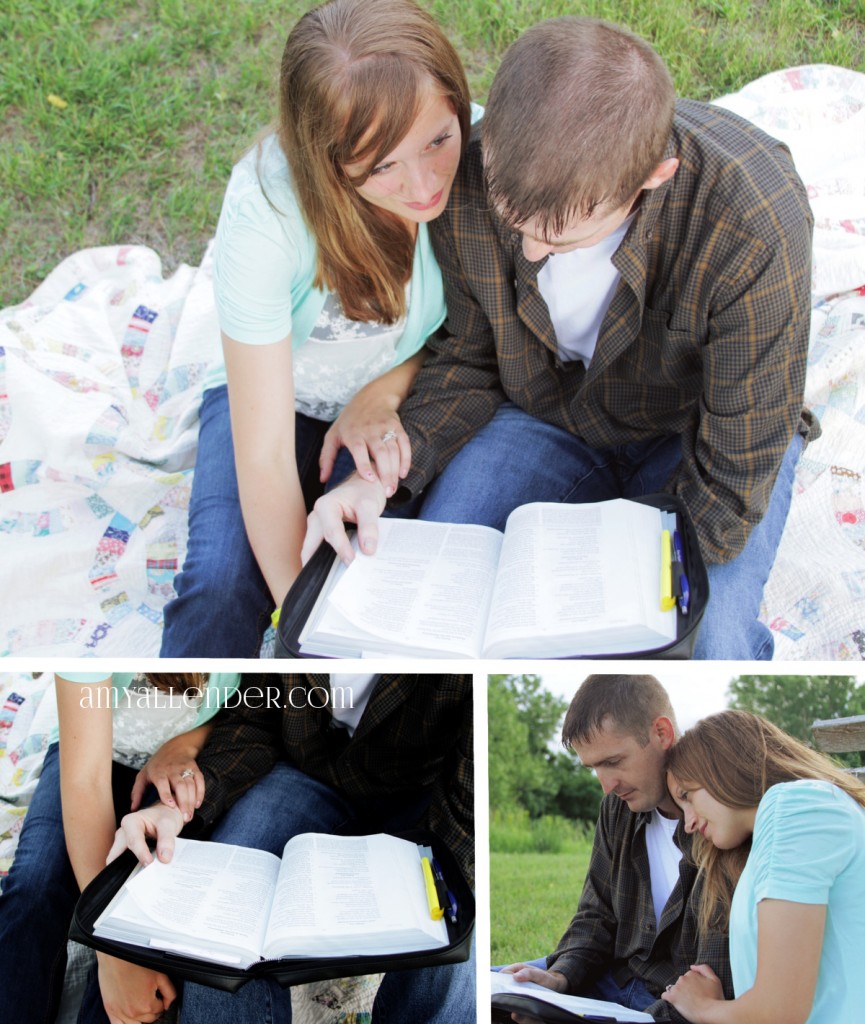
As I alluded to earlier, one of my favorite things about this couple is their deeply rooted faith. I can tell you from experience, a couple who lives in the Word will grow to have a strong marriage. When their wedding was 150 days away Kate and Jacob began reading one Psalm each day together. On the day of their session they chose to do their daily study in front of the camera.
You can see more from this adorable session tomorrow on the Facebook page!
Amy
by Amy | Jul 6, 2013 | Blog, Crafts, The Art of Adventure, The Art of Projects
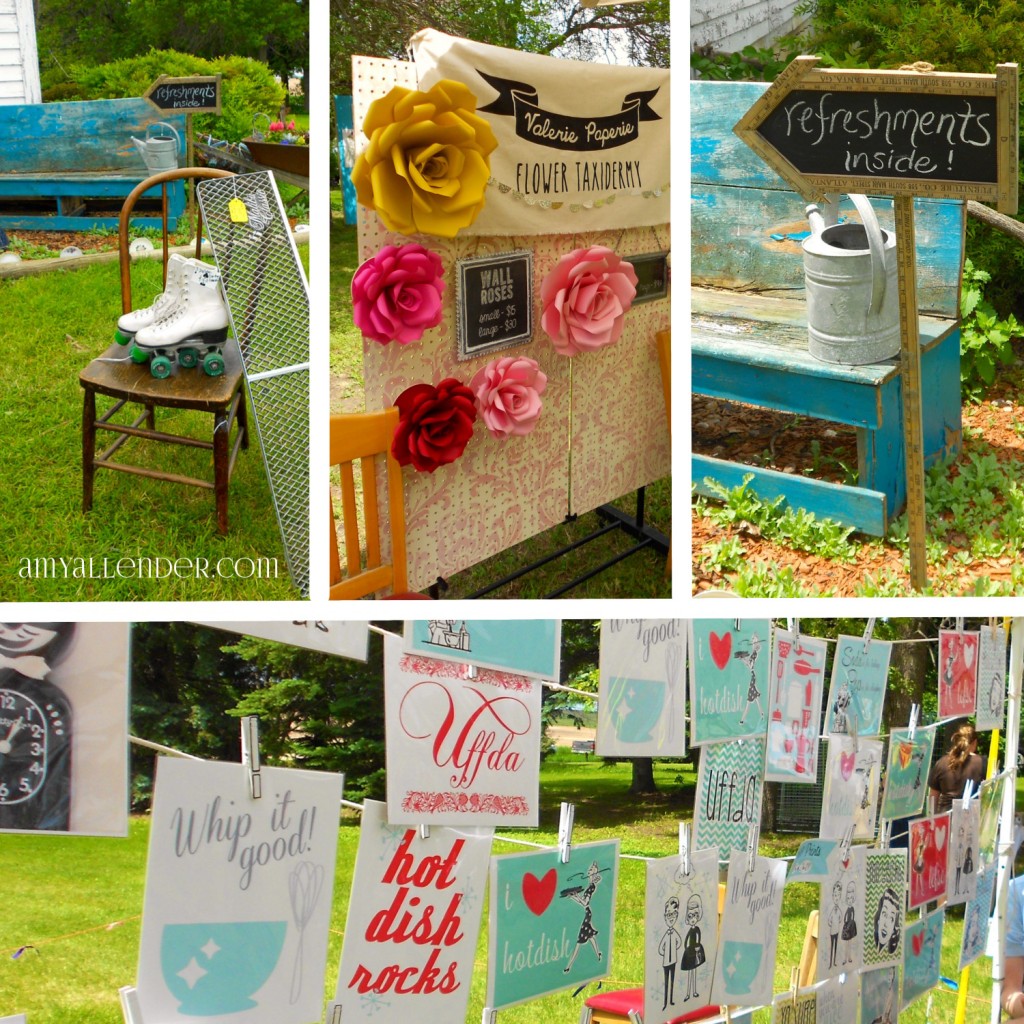
I was incredibly and pleasantly surprised recently when I attended Minot’s second annual Vintage Fair. When I heard it advertised I was excited, but I never expected it to be such a wonderful and inspiring event. When I drove up to the rustic family farm on which it was held I felt like I stepped out of my Chevy Equinox and into an issue of Country Living Magazine. Seriously, all, it was that wonderful.
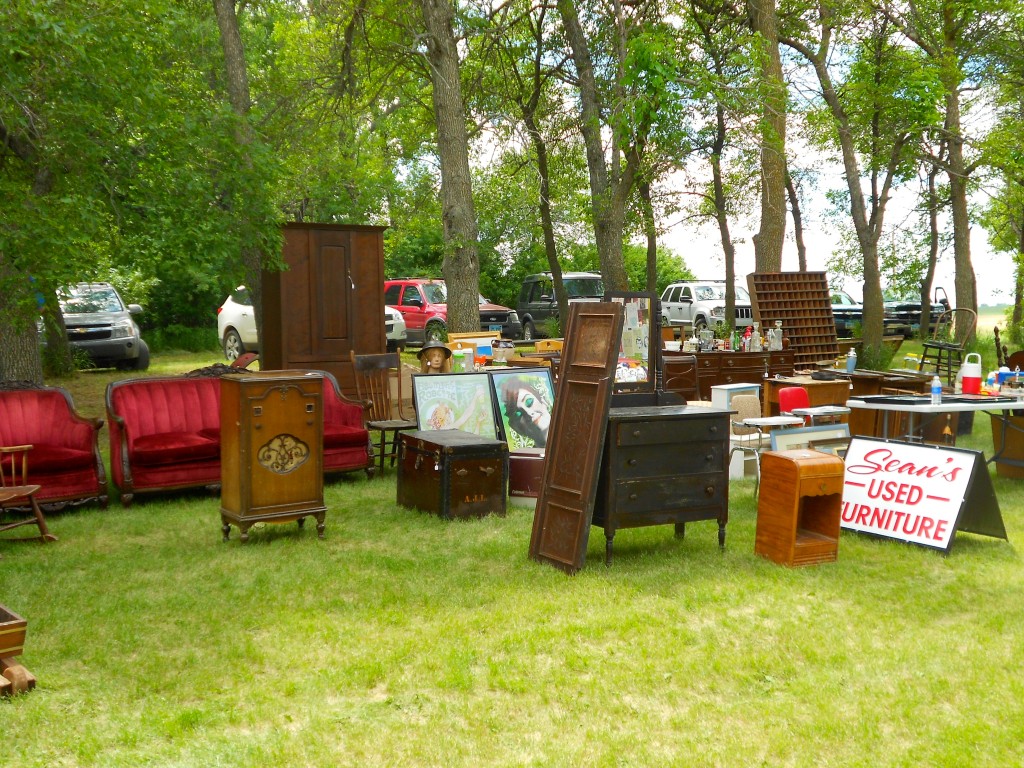
Furniture, antiques and vintage inspired artisan goods littered the open air market. Booths of venders lined up with goods repurposed from nostalgic wares. I’ll call it a junker’s/upcycler’s/collecter’s/thrifter’s paradise. Cast aside cupboards, doors and windows waited anxiously to be snatched up by an inspired fair goer. Things forgotten were seen in a new light under lots and lots of creative eyes.
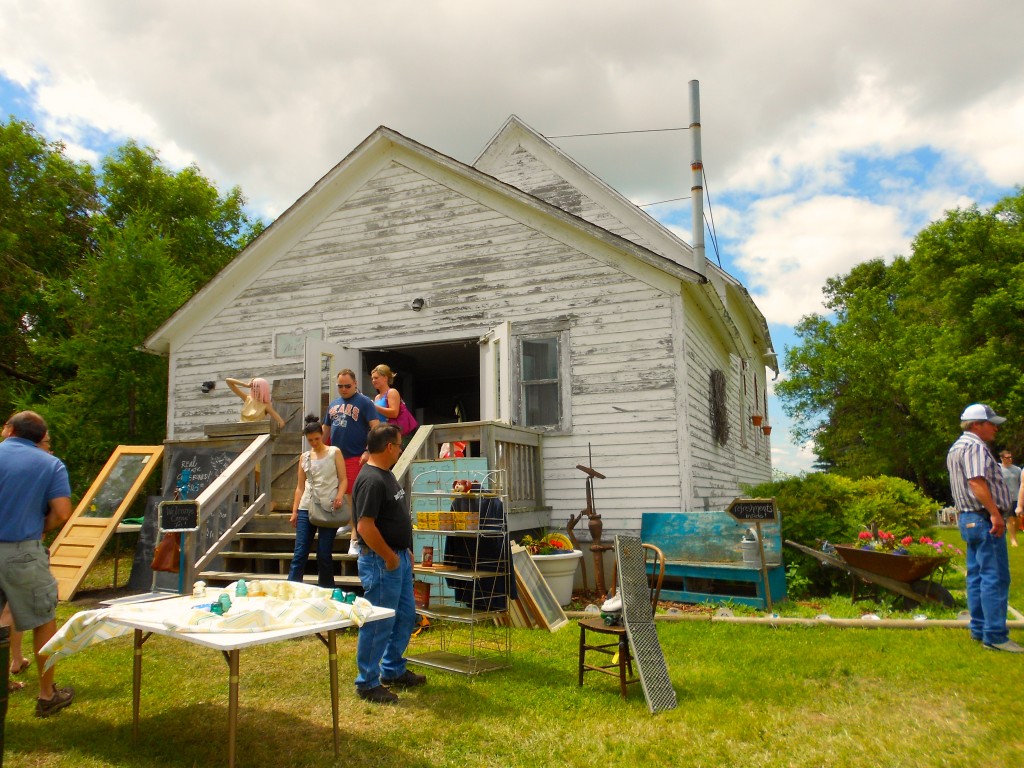
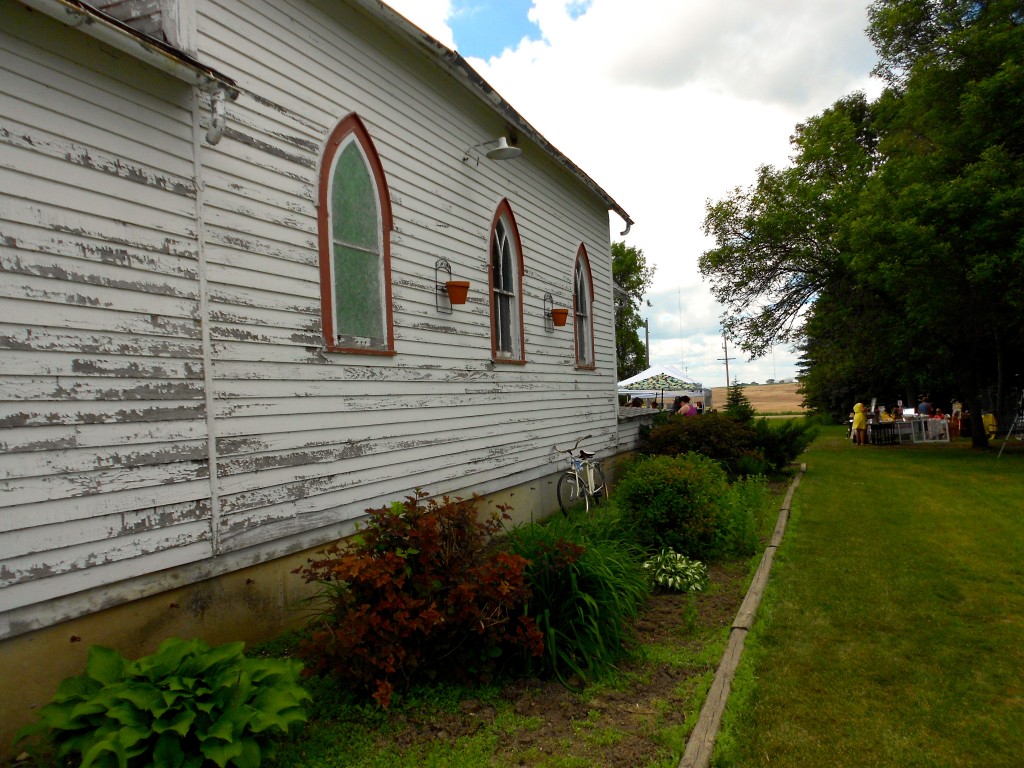
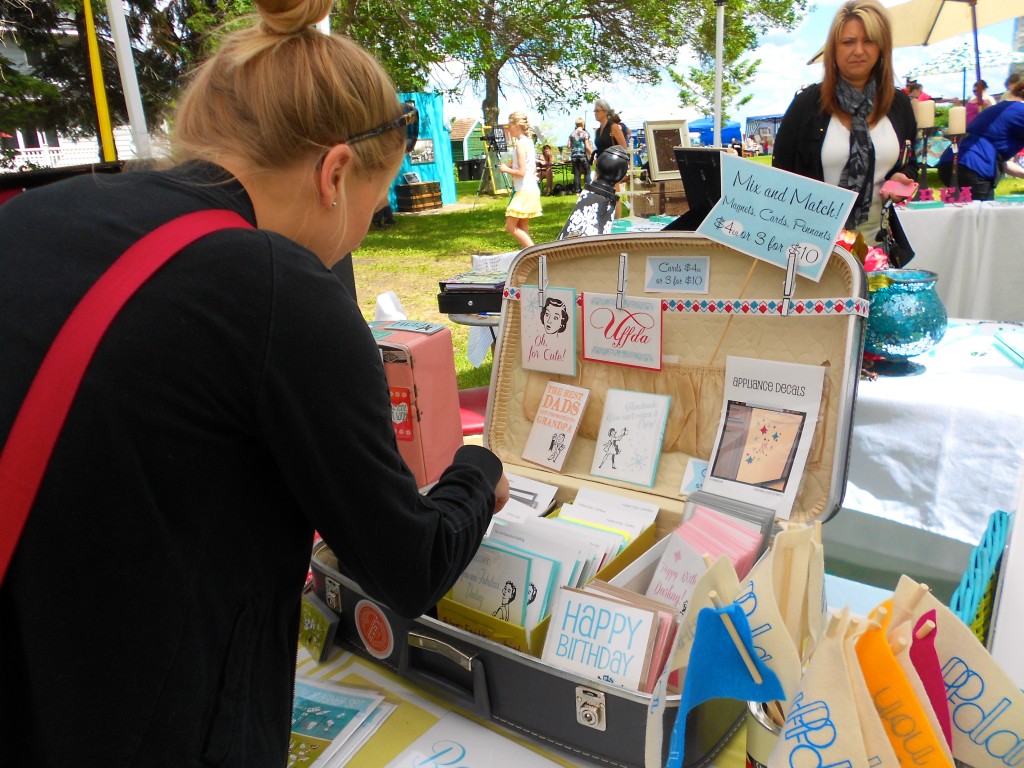
Minot’s very own Darling Stewardess brought everything-but-the-kitchen-sink from their downtown shop and set up in this adorably rustic church. Lots of venders were local to Minot, but a good number flocked in from all over the state. The only requirement is that you sell vintage or vintage inspired items. Seriously, can you imagine a better place to spend and afternoon? One of my favorite venders sold North Dakota inspired greeting cards with sayings like, “Uffda,” “Oh you betcha,” and “Oh for cute.” They really say those things up here.
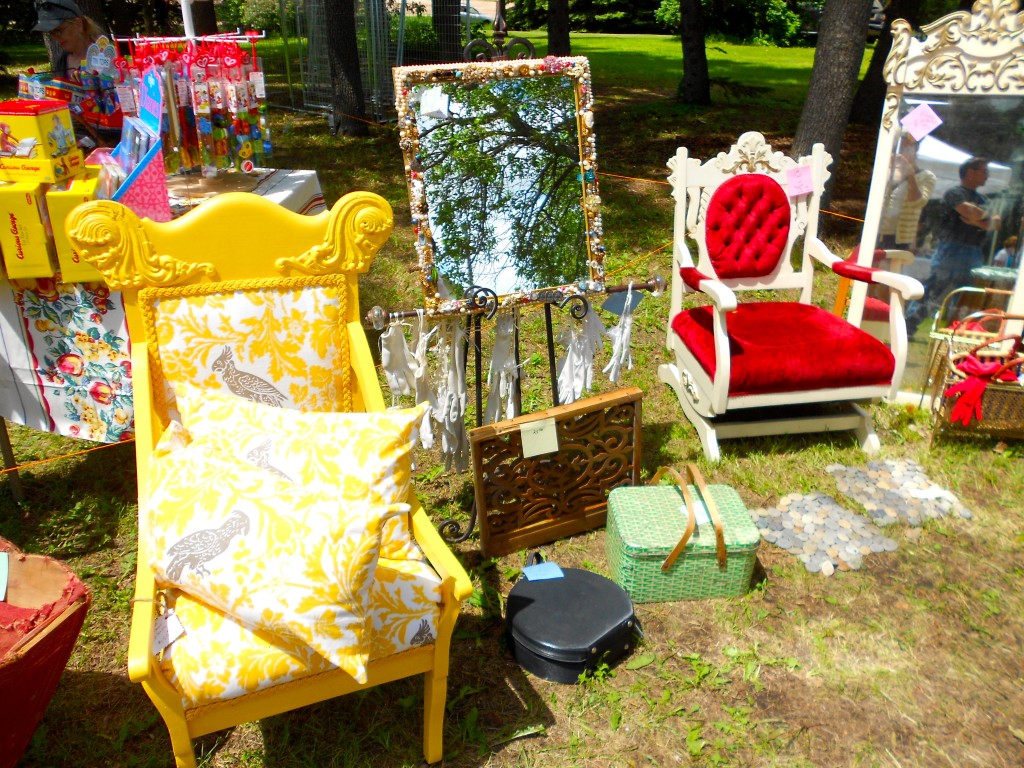
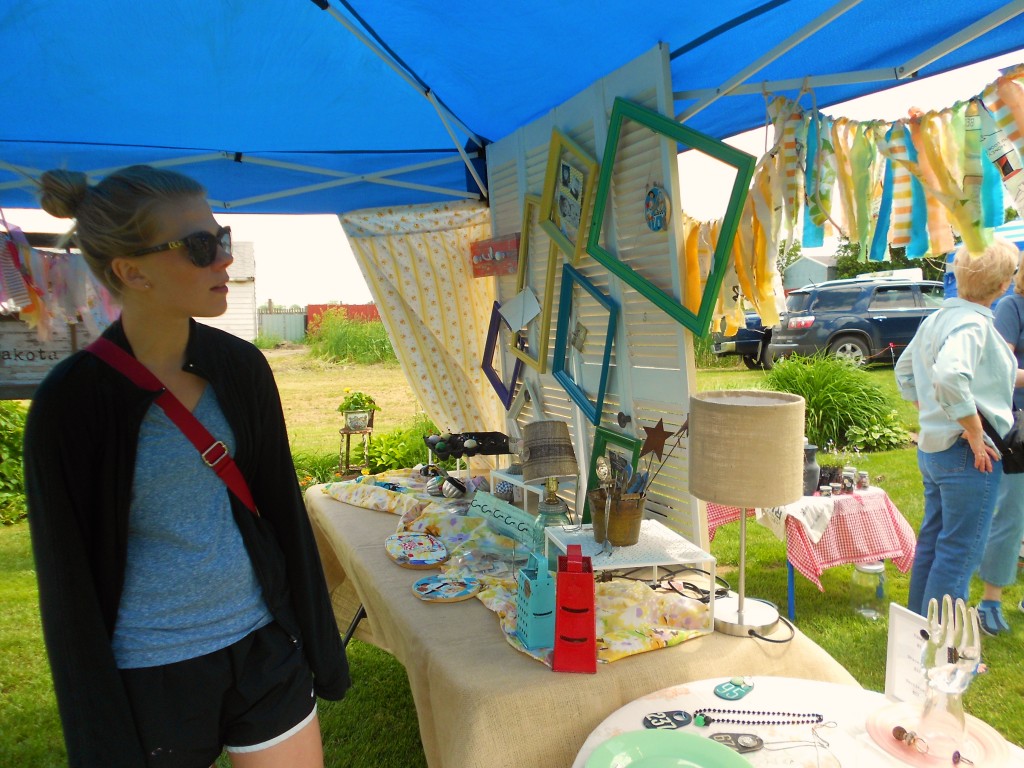
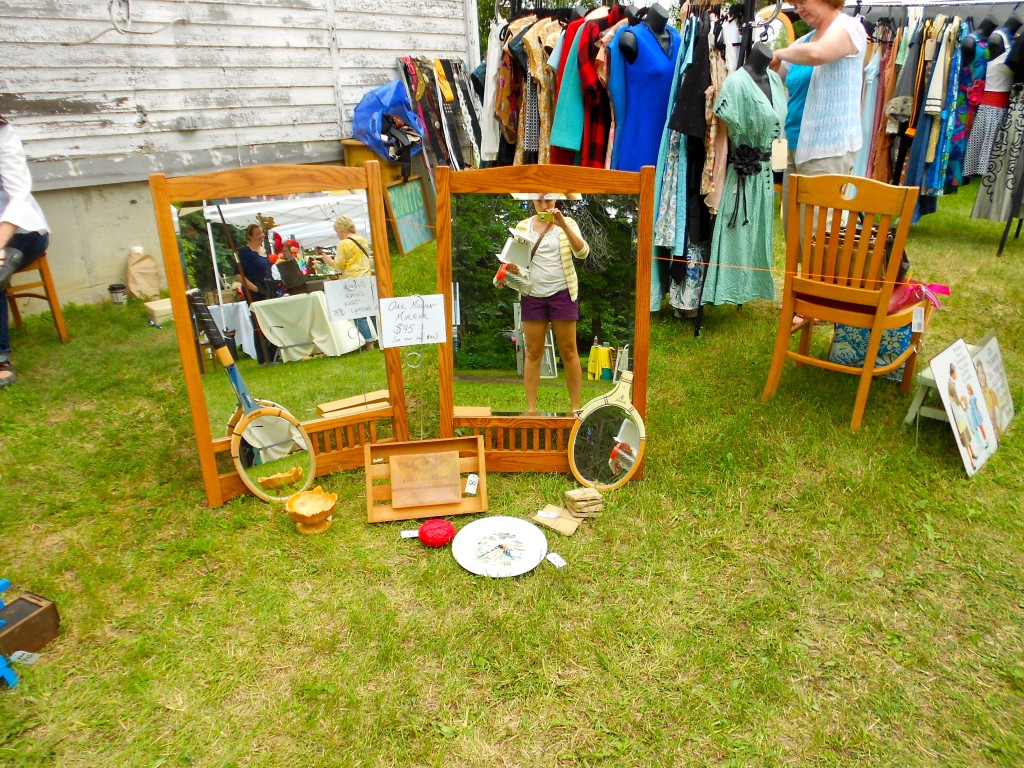
I walked away with just a few items…but a lot of inspiration. My new goal is to participate next year with my very own booth. I walked away from Minot’s Vintage fair knowing, just knowing that I’ve got to get in with this crowd. If you didn’t go this year, you’ve gotta check it out next year. And if you aren’t lucky enough to spent your summers in Practically Canada…at least find a flea market or swap meet to hit up this season.
Amy
by Amy | Jul 2, 2013 | Blog, The Art of the Moment
I’m so glad I was invited to capture a homecoming. Photographing this magical event was my honor and privilege.

There is really no way to describe what it’s like to see husbands and wives; kids and parents reunited after months of separation.


So happy Fourth everybody. I truly pray that God continues to bless America.


by Amy | Jun 28, 2013 | Blog, The Art of the Moment
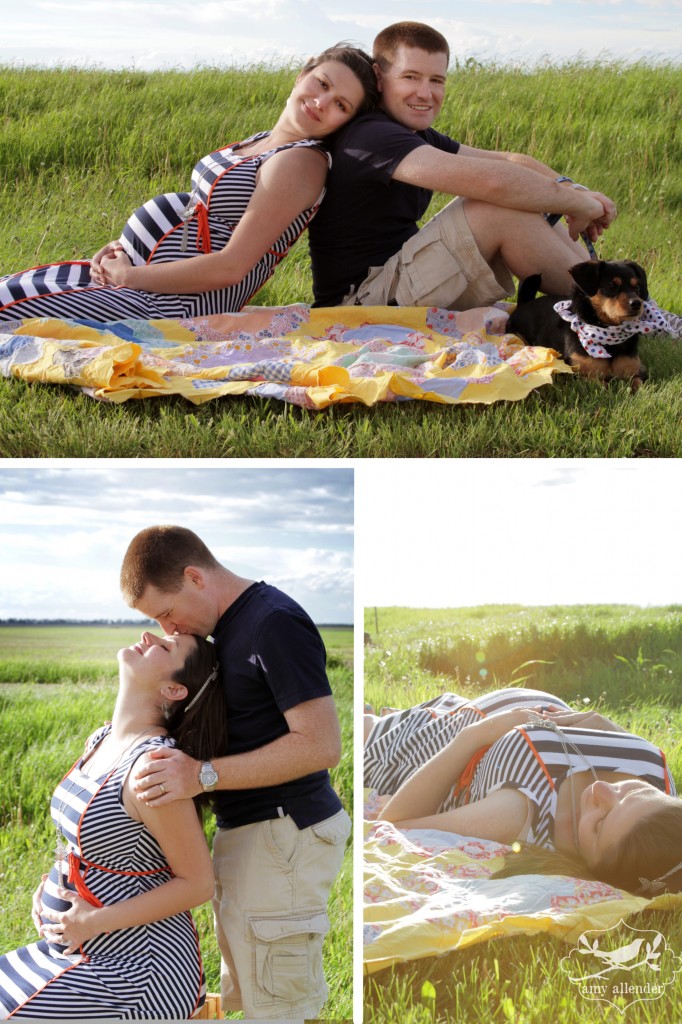
The first time I met Lauren and Ricky I knew we’d get along. They are avid DIY-ers who love a good yard sale, auction or thrifting expedition. We chatted at length about their knack for picking {yep, like “American Pickers”} and all the treasured they have rehabbed. These are my kind of people. They are expecting their first child and I cannot wait to see photos of their adorable DIY nursery. From what I’ve heard, it’s just exploding with cuteness!
Just over a week ago this fun, photogenic couple invited me to capture the excitement of the upcoming arrival with a maternity session in the open air of Minot, ND. Did I mention that this is a super fun couple?



by Amy | Jun 28, 2013 | Blog, Devotional, The Art of Faith, The Art of Living
When I was in elementary school we had a weird school counselor. Things about her are a little blurry. So for all I know she really wasn’t that weird. But at the time she seemed like an odd duck. I don’t remember much about her, not even her name. There are four instances I remember clear as day. She’d come into my first grade classroom on occasion and here’s what stands out to me.
She had some video about a girl and some magical horses that she made us watch. The horses were white and locked up somewhere and only her confidence and self esteem could unlock them. I hated it and thought it was super lame.
One day as an ice breaker she asked us to go around the room and name our favorite show. Every single member of my class said “Full House.” Every. Single. One. {In fairness it was 1993.}
Whenever she left the room she had us wave goodbye by wiggling our index finger at her. Like it was quieter than a regular wave or something. Again, I–the first grade critic–thought it was lame.
The last thing I remember about her is the “Glass Half Full” lesson. It was probably on one of the days she was showing a segment of that magic horse movie, because I clearly remember that she had a half glass of water sitting on top of the VCR on the TV cart.
She pointed to the glass and asked how we would describe the glass. She called on a few people. I was one of them. Now, I was a bright, if cynical, seven year old…so naturally I answered that the glass was half empty. The others said the same thing. She was pulling teeth trying to get someone to answer that the glass could be “half full” instead. It was awkward to watch…
“Now, can anyone think of another way to describe the glass? Anyone?”
Eventually some genius did come up with the idea that it could also be seen as half full. And on went a lesson on positivity and magic horses. After the answer was discovered I just remember thinking that we should have just called it “half a glass of water.” None of this full or empty business. That was lame.
Anyway, as my experiences with the school counselor allude to the fact that I can be a “glass half empty” type of person. I don’t tend to think of myself as a pessimist exactly. As the years have gone on I’m become pretty savvy at seeing the sunny side. Tonight, though I want to tell you about a glass in my life that is half empty.
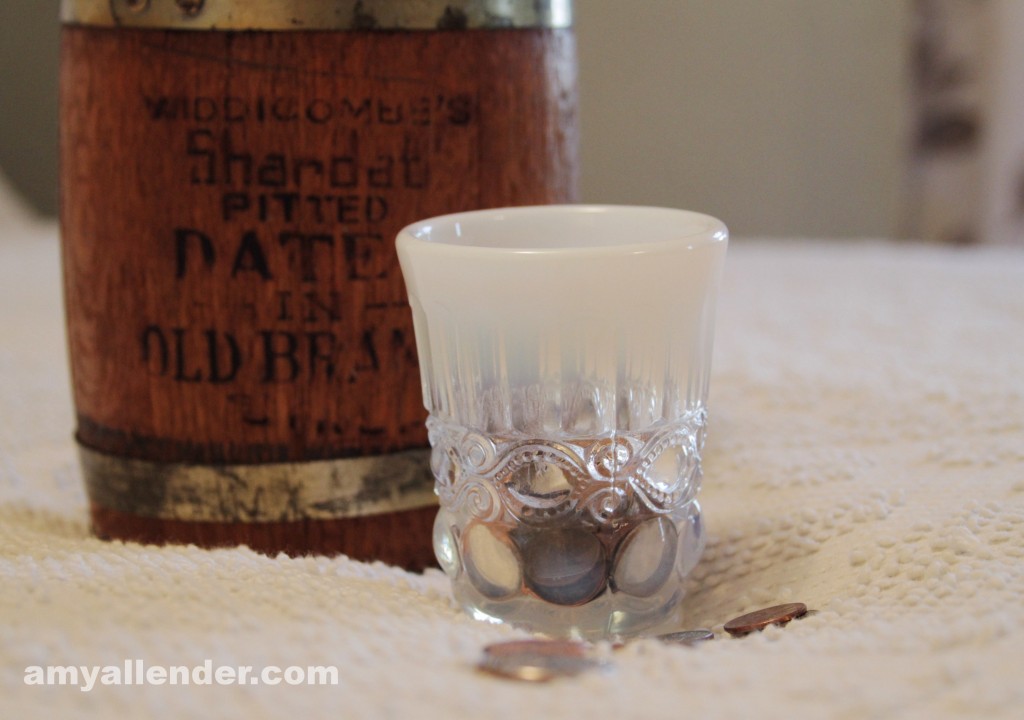
The first night after Derek left, I sat on the bed and counted out some change. One coin for each day that he’d be gone. Give or take a couple. I just had to see the days in some tangible form, silly as that sounds. I scooped them all up and put them in my prettiest glass…an opalescent depression glass my mom bought for me at an antique shop. At the time this mandatory separation thing seemed really ugly, so I wanted to house it in something beautiful to remind me that even the darkest situations can turn into blessings if we continually praise God in all situations.
Anyway, each night before bed I take a coin out and put it back in my change jar. That first night was so hard. The glass was full, but boy did it seem “half empty.” Even the first week, I could barely see a drop in the level. One by one. Logically, I knew eventually the glass would have to empty down to the very last penny. But it seemed like every night it was as full as the day before.
Then. Finally I started to see a difference.
Now, that glass is more than half empty. But my glass has never felt more full. This deployment is more than halfway over and God has used this time to bless me tremendously and allow my heart to grow in ways I didn’t even know possible. Not only am I not miserable, I’m joyful.
Just proof from a cynical kid that “half full” isn’t always the best.
Amy


