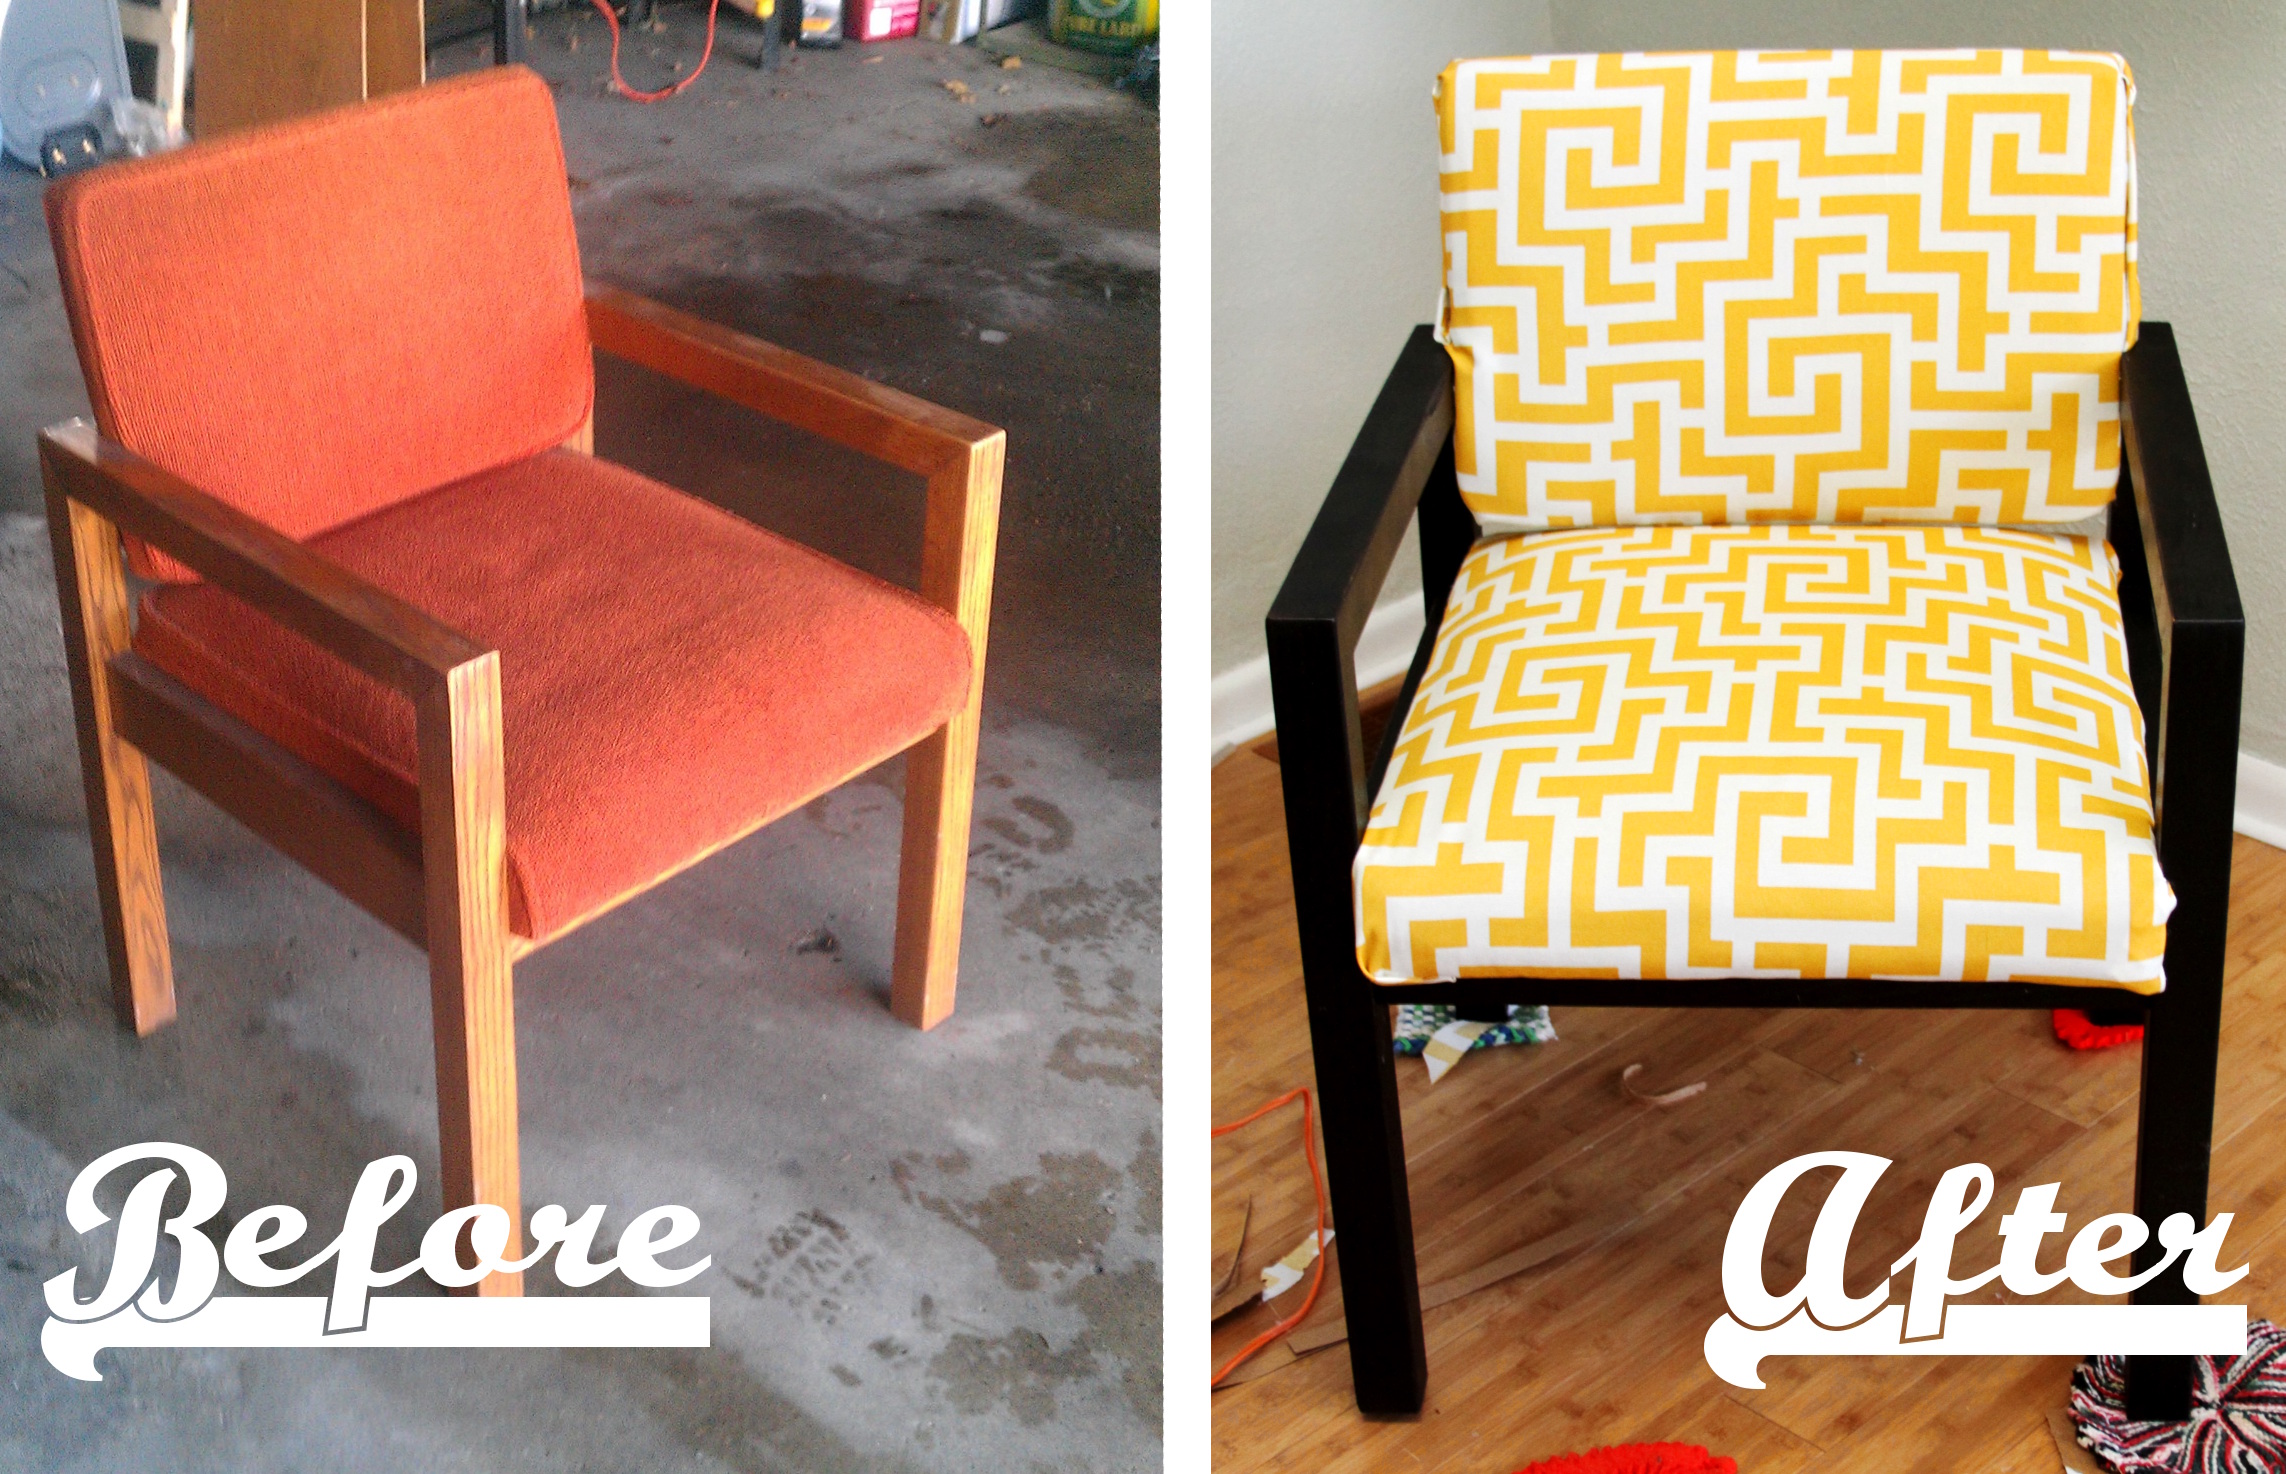
If you follow along on Facebook {which I hope you do…} you may remember a while back when I posted a photo of this chair on the left. Well, tonight on our very first “Art of Projects” post, I’ll be showing you how I did it.
And let me add this. When it was all done and moved into the office I created it for, a youth pastor’s work space…one of our church’s teens came in and said, “You got that at Target, didn’t you?”
Nope.
See, he works at Target, and could have sworn he saw a chair just like it in stock. Jokes on him. I bought a pair of matching {ugly} orange office chairs and gave them a giant-botox-apporoved facelift. The chairs cost $15 each from a second hand furniture shop {Sean’s Used Furniture, for those of you up here in Practically Canada.} The fabric is outdoor grade {read: durable and wipeable} that I picked up at JoAnn’s. The whole makeover took about an hour per chair, not including dry time for the paint.
Now, before I show you how I did it, let me say that I get asked all the time, “How do you do it?” Or, “How do you learn to do those things?” The answer is simple. I try them. What’s the worst that will happen? I’ll end up with a chair uglier than what I started with? Not likely. So just try. Start with something easy, like this chair. It’s an easy recover because it has a nice boxy shape and a sturdy frame. Something similar will be a great first project for you. And really, at the root of it all…recovering furniture is no more difficult than wrapping a gift. But you get to use nails and glue, so it can look a lot neater. Okay, so let’s get started:
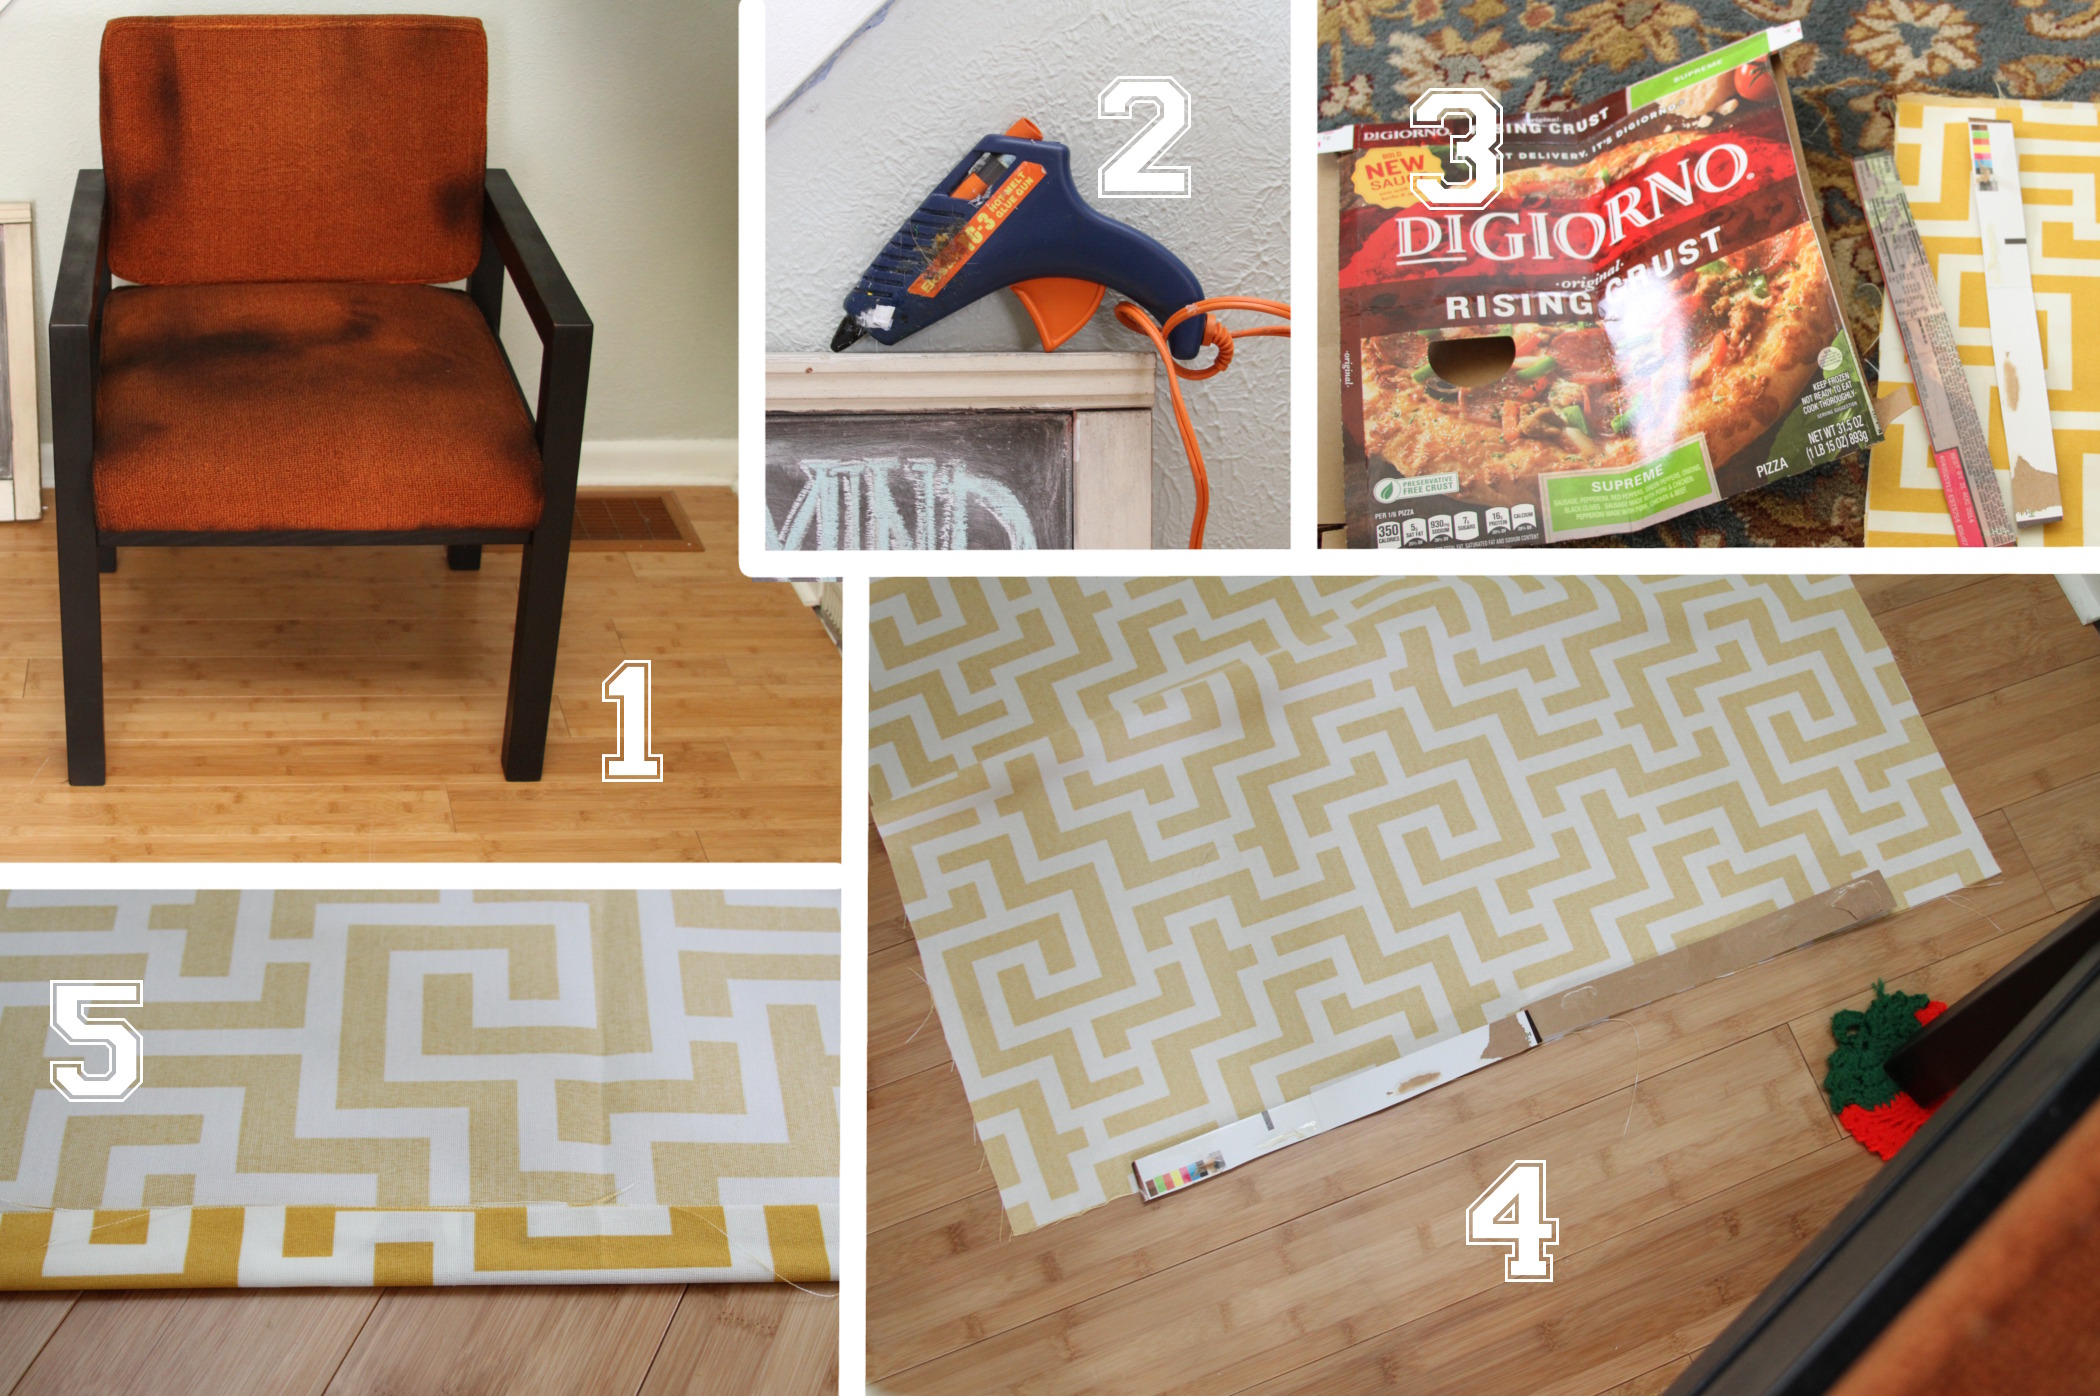
1. I spray painted the arms and legs of the chair black. I used a matte finish paint that was created to be pretty durable.
2. Get your glue gun out. This one is a “high heat” gun for heavy duty projects. If you have more of a “craft” glue gun, you should also invest in some upholstery tacks. Nail a few in in addition to adding the glue. It’ll ensure your hard work lasts.
3. In the fancy world you might buy what’s called “tacking strip” for this next part. At my house, I cut up an old frozen pizza box. Really any thin cardstock/cardboard will do. Cut a few strips, about 1/2″ thick.
4. Next I draped the fabric over the top half of my chair and cut enough that it would wrap around. Lay your fabric out on the floor, and glue a couple of your cardboard strips in place. You want the strips to be the width of the chair, but not the sides. You’ll get the idea in a minute.
5. Then, fold the strip up, so fabric is completely covering it and glue that in place.

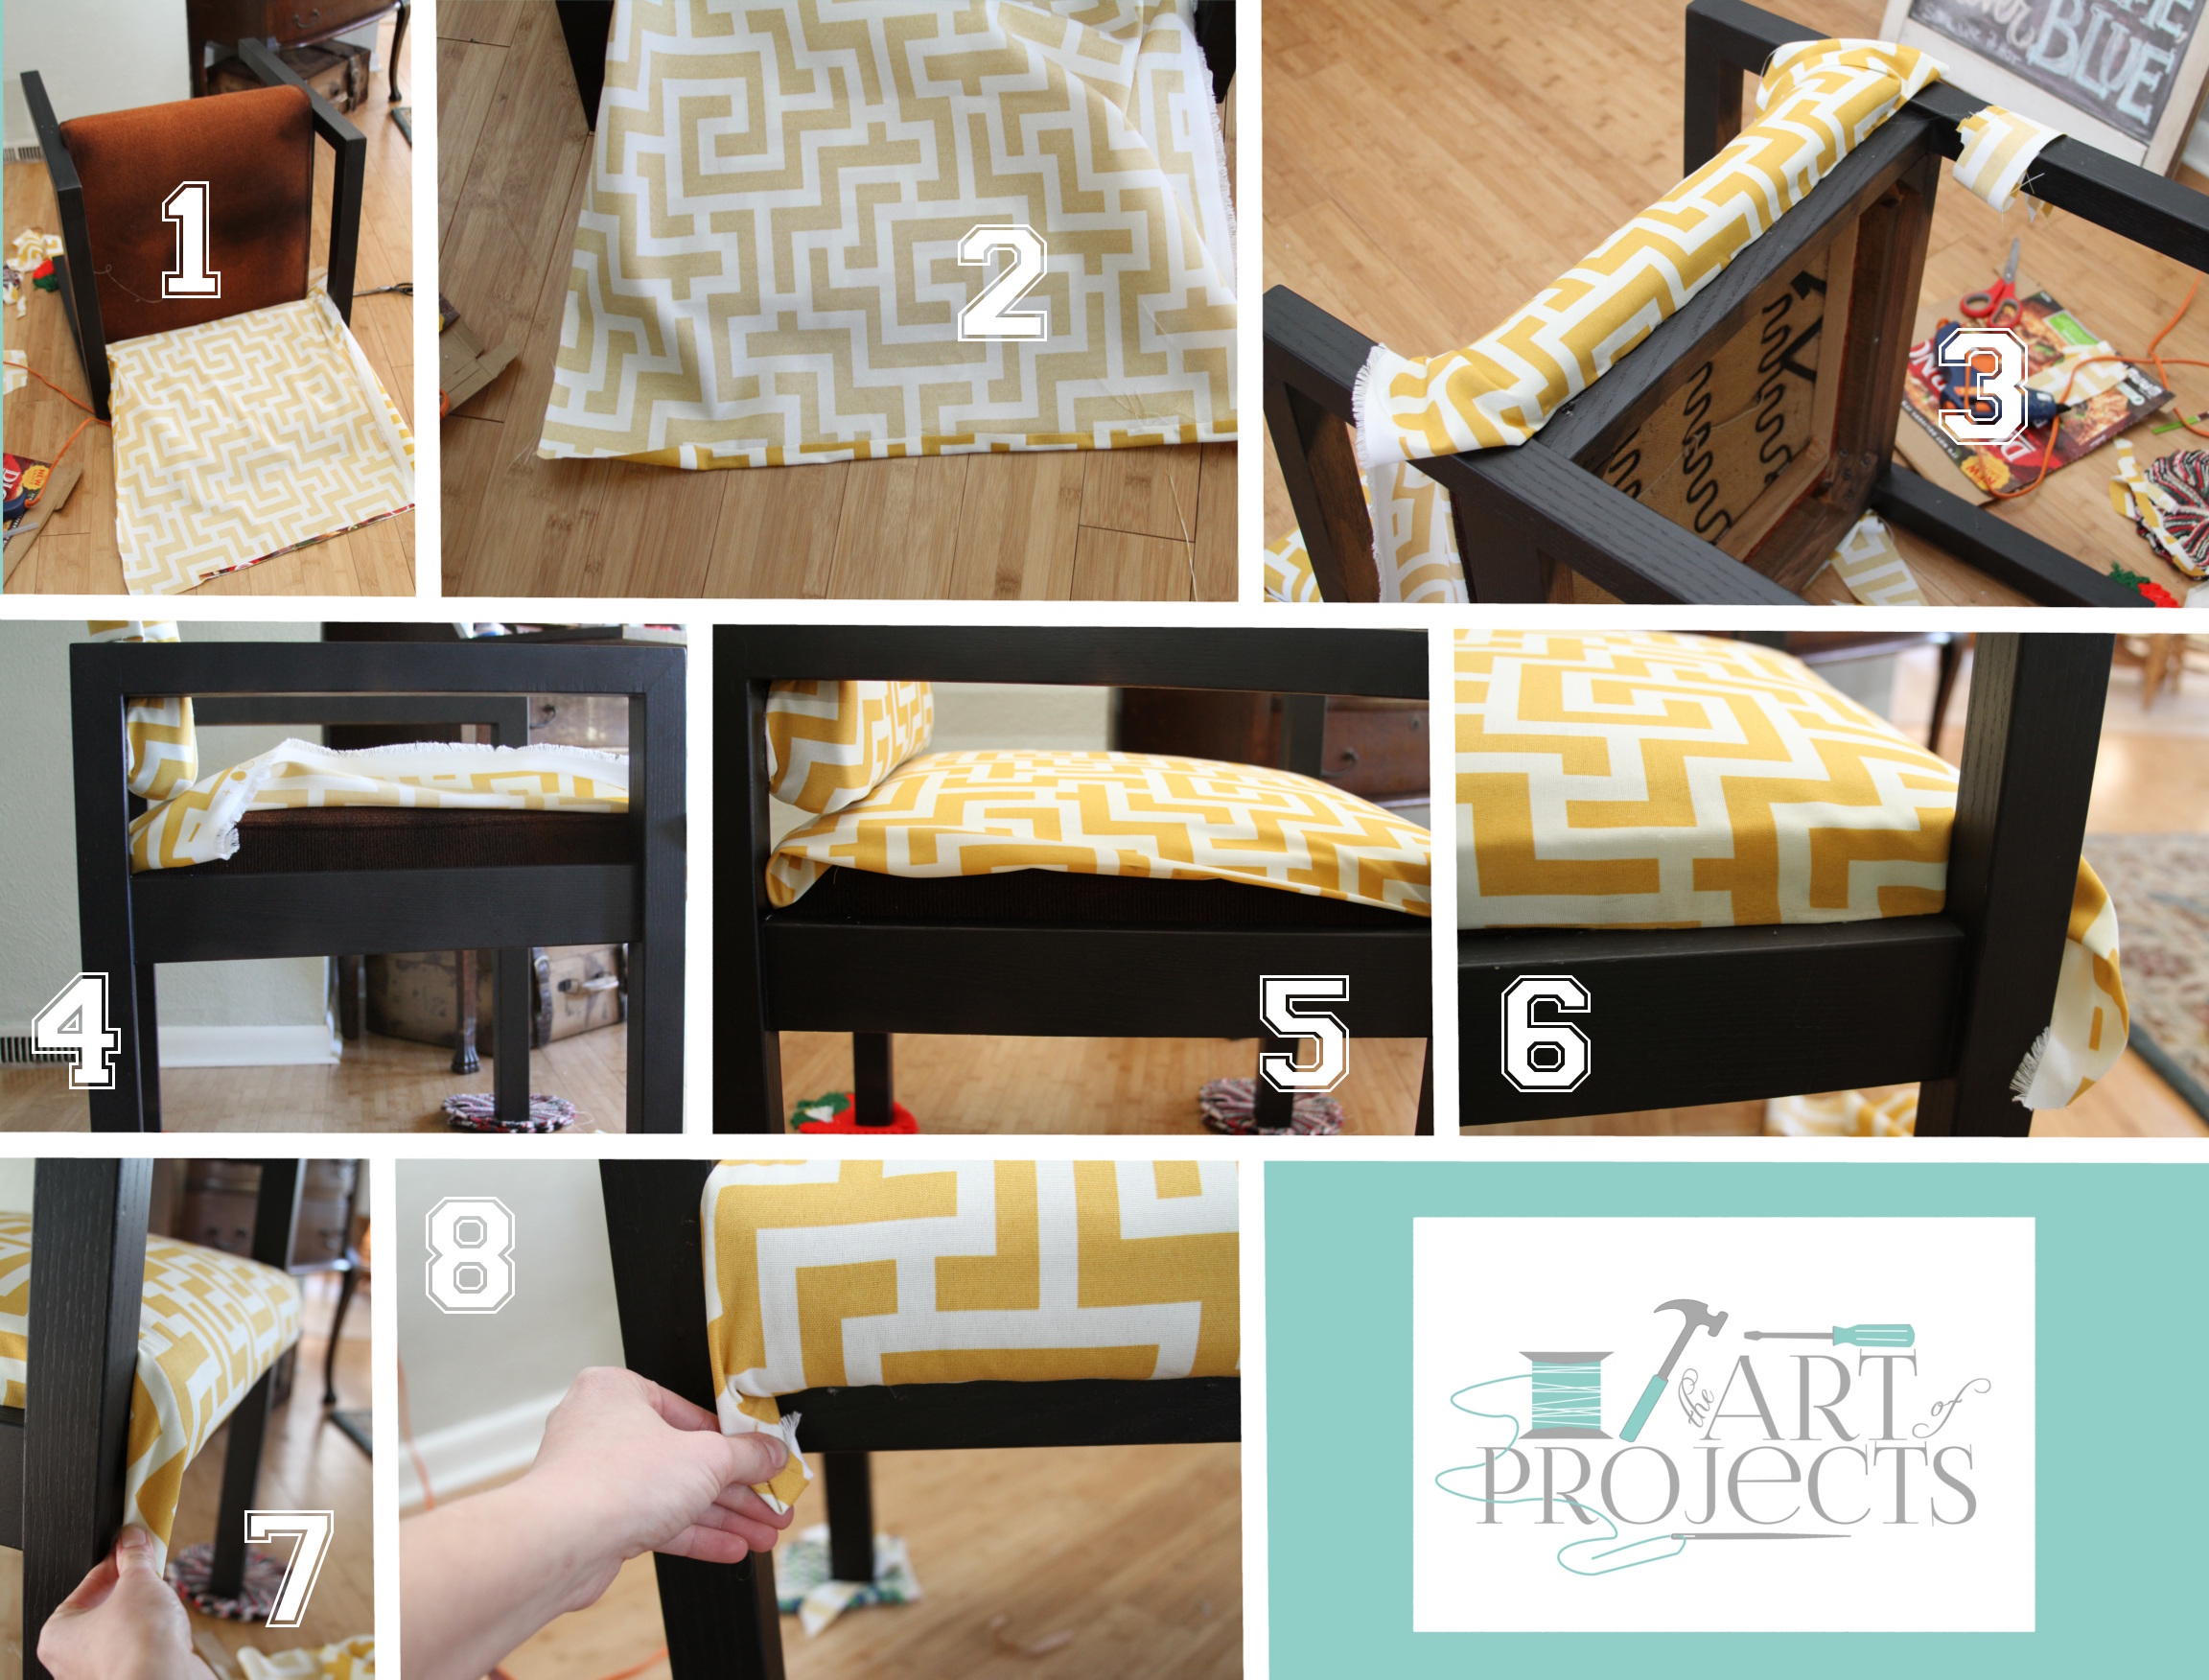
1. Once your “tacking strip” is set up, drape the fabric over the top of the chair. Glue/tack the straight, hard edge of the fabric in place, right along the frame.
2. Pull the fabric through, under the backrest of the chair. Pull it really, really tight. Glue/tack that edge to the wooden frame.
3. Now the sides. Trim any excess fabric from the sides. You need enough to cover the edges, plus about 1.5″.
4. Trimmed up!
5. Now it’s pretty much like gift wrapping. Pull the front fabric toward the back of the chair. Glue/tack it in place below the armrest first.
6. Repeat above the arm rest.
7. Put a tacking strip in place at the edge of what is left sticking out from the back side of the chair.
8. Fold the top down {like when you wrap a box.}
9. Fold the fabric in around the tacking strip and glue/tack in place.
If you mess up, or it’s not looking neat, just try again. The key is to pull everything super tight. The tighter it is, the neater it’ll look.
1. Now the bottom. Cut a piece big enough to cover the chair seat. Lay the chair on its back. Tuck one end between the seat and back rest.
2. Make a tack strip the width of the chair seat, just like you did for the back rest.
3. Glue/tack it in place under the seat, right to the chair frame.
4. Repeat in the back. Remember…get it tight! Then fold the fabric near the back rest forward and glue it to the frame.
5. Fold the raw edge of the fabric under, back up against the original covering.
6. Glue the folded edge to the chair frame.
7. Now you’ll probably have a weird little piece left over.
8. Trim it down, and glue/tack it anywhere that’s hidden and out of the way. Because, that’s how not-legit your upholstery skills have to be.
Okay, fans. One more look. In the near future, I’ll show you a full before and after of the youth office that these chairs now call home. But for now, we are still waiting on new carpet, so we’ll have to wait on the full reveal.
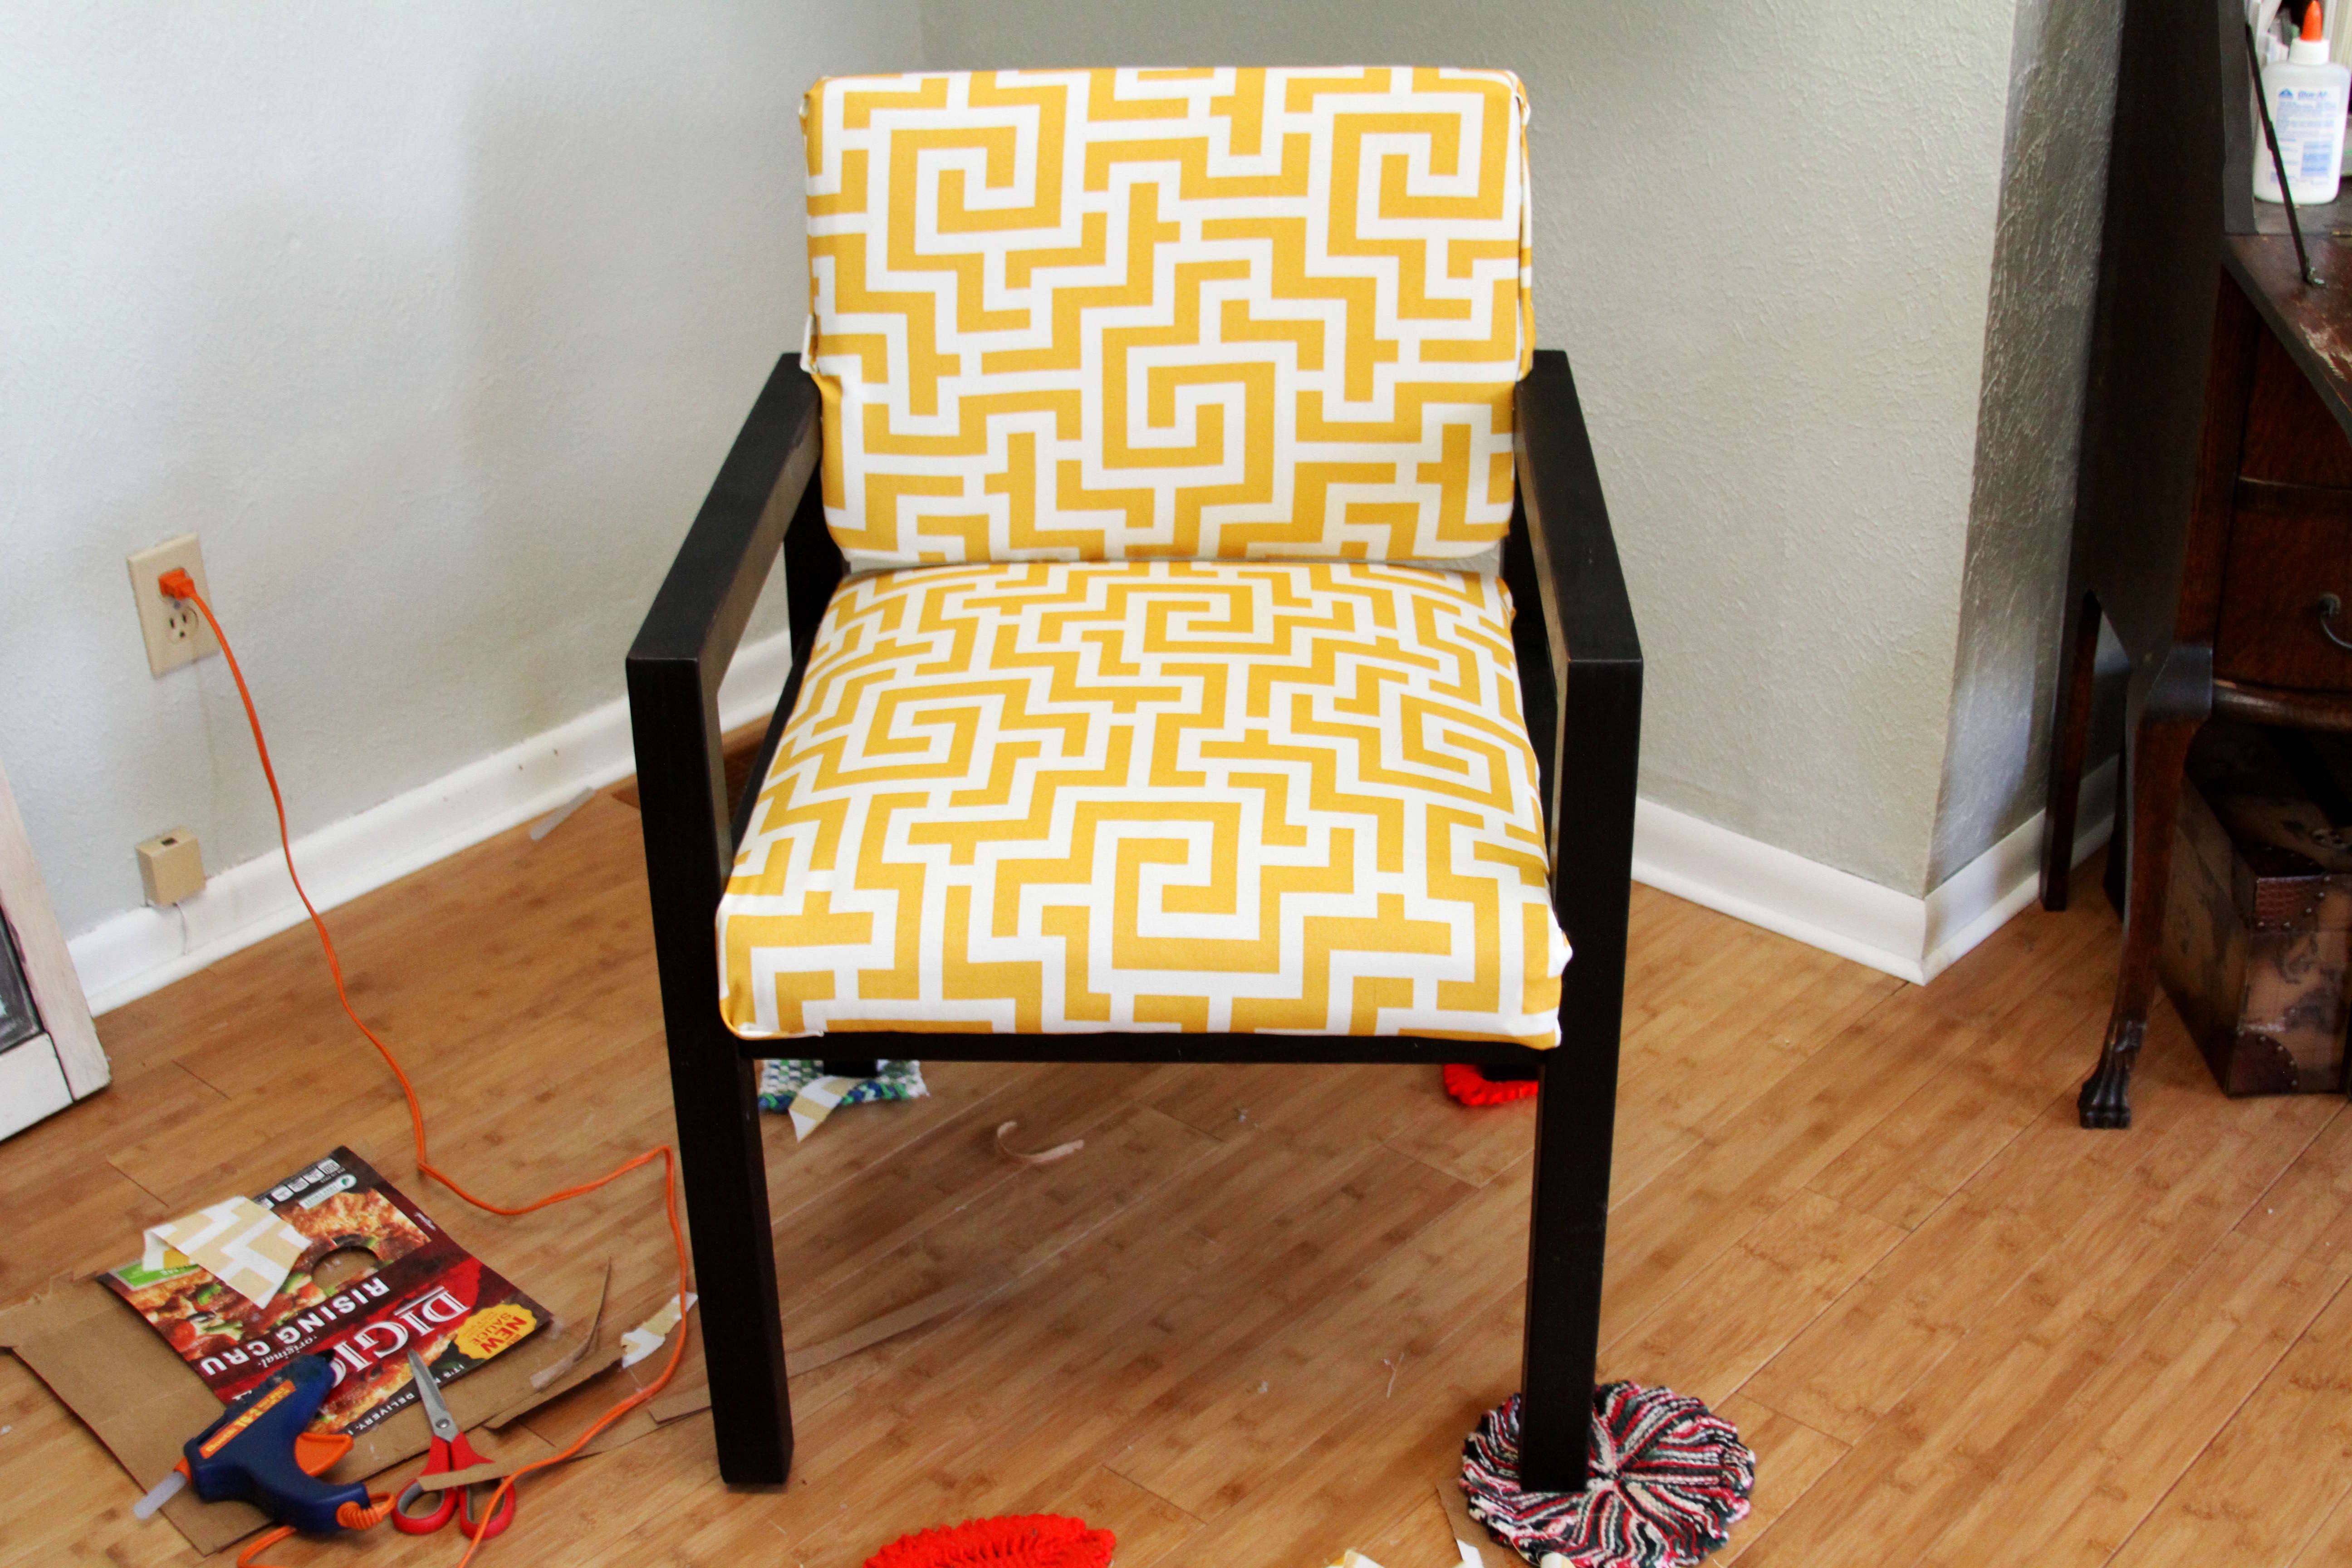

xoxo Amy


