Minot Monday is made possible through a partnership with BeLOCAL Minot. It’s an awesome guide to living like a local and loving life in Minot. If you haven’t checked it out yet, you totally should. All thoughts in this post are my own.
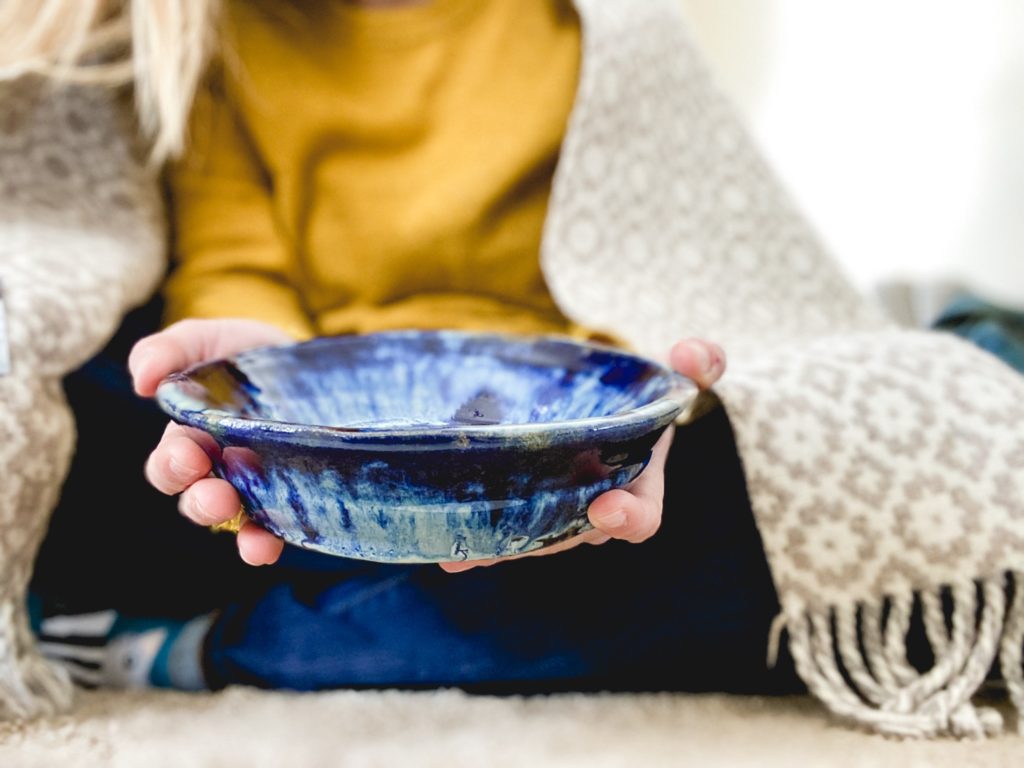
Derek always gets me the best gifts. I guess that’s what happens when you have lived with someone a long while and been best friends a long while before that. He knows my favorite gifts don’t come in jewelry boxes or in the form of the latest technology. To date my favorite gifts from him have included: a wall-mounted pencil sharpener, new headphones for listening to audio books, a two-player bocce ball set, and (most recently) a wheel thrown pottery class from the Minot Adult Learning Center.
In high school I took all the art classes our small school system offered. Each year I excelled at drawing, multi-media, art history and painting. But when the annual pottery unit rolled around I really started to struggle. The whole thing was very frustrating–because ceramics was what I most wanted to be good at. When it was time to put clay on the wheel things literally fell apart for me.
In my entire high school career I only ever got one piece successfully off the wheel. Ever since, I have wanted a second chance. I’ve longed for renewed instruction, and another chance to spin up a bowl or a mug.
But finding an open community class has been much harder than it seemed at first. We’ve lived in six different communities during our ten-year marriage and never has a wheel thrown ceramics class lined up with our schedule (or been available to me.)
Ceramics Through the Minot Adult Learning Center
I’d all but given up when Derek revealed that this year for my birthday he had enrolled me into a wheel class offered through the Minot Adult Learning Center.
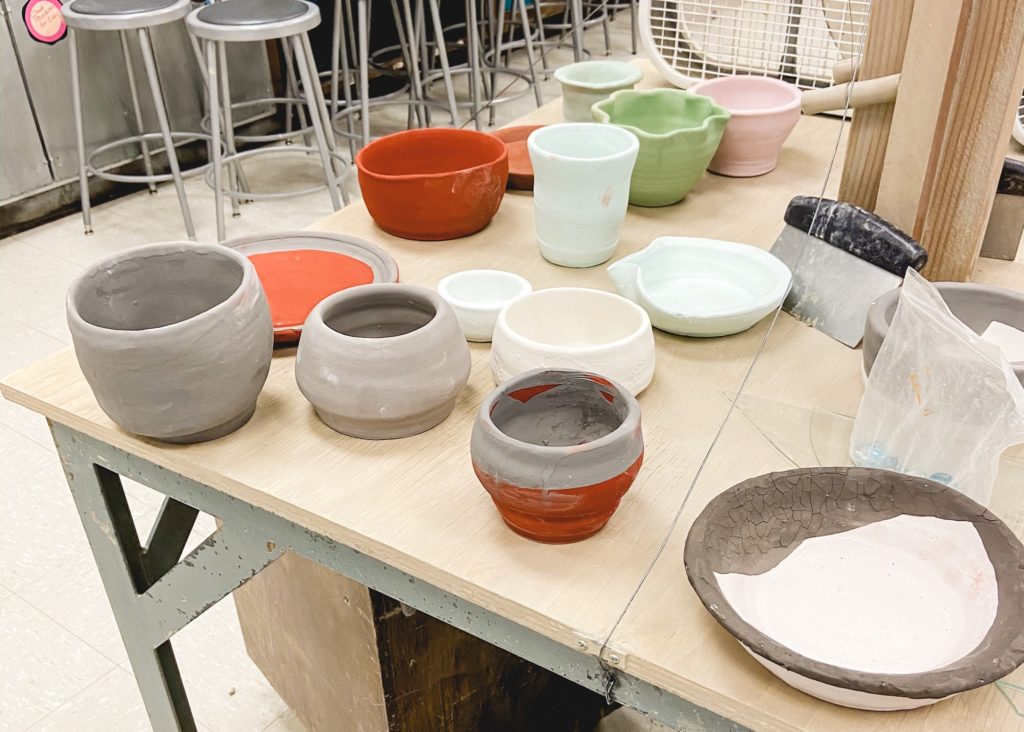
The class I took was offered in five courses. Three nights were spent learning technique and building. The last two nights were spent prepping our pieces for the kiln and glazing.
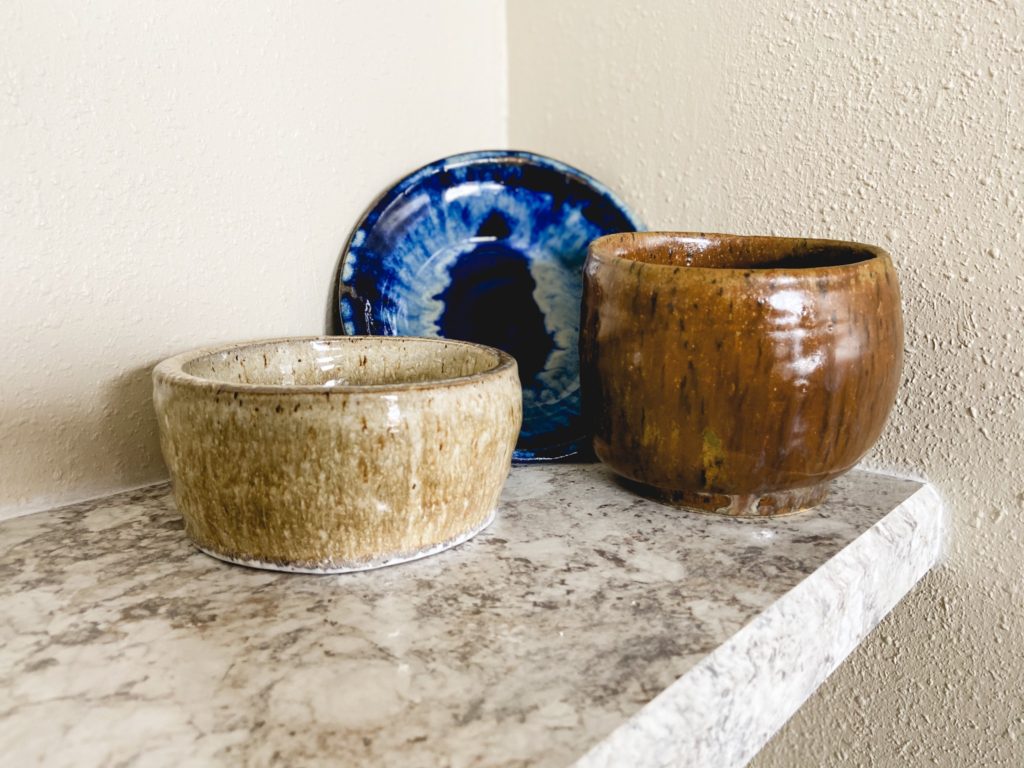
While the pieces I made are not worthy of high praise, the instruction was phenomenal, the other participants were a joy to be around and I had a lot of fun. And I learned a lot too!
Each night of building focused on a different technique (I excelled most at making plates…even though I wanted to make a good bowl more than anything in the world.) After a time of set up and instruction, participants were free to practice building as many pieces as time would allow. I typically only turned out 2ish pieces per class, but others (some who had taken the class before) could turn out many more in a single night.
I loved that supplies were unlimited for use and that the class size was small enough to allow questions to be thoroughly answered and one-on-one help from the instructor when needed.
This was my first time taking a course from the Minot Adult Learning Center and it was a wonderful experience. If you are thinking about taking a class (or teaching–they’re always looking for good instructors!) here are some things to know.
Get the Course Flyer Early
New classes start in the fall, winter and spring. Get the course offerings early from their website so you can check your schedule well in advance.
Sign Up Promptly
Some classes fill up fast. (The wheel thrown pottery course always sells out.) If you know what you want to take sign up early. Don’t risk losing your place. For example, Derek signed me up the day registration opened through the Minot Adult Learning Center. Within two days the class was full.
There Are All Kinds of Classes
Classes aren’t just limited to arts and crafts. The community education program offeres courses in technology, art, wellness, and community enrichment. Their technology courses include classes in PhotoShop, Canva, and using Google apps. Art classes include drawing, painting, ceramics, and rosemaling. Wellness courses include all kinds of fitness classes (including Zumba and aqua aerobics.) And community enrichment includes things like retirement planning, book clubs and drawing social security.
In addition to these classes the Minot Adult Learning Center also offers GED prep, English courses and college/career prep.
Most Classes Have a Fee
Most classes have a fee to cover instruction and supplies. I think the cost is reasonable (especially for the fitness classes–they usually end up being about $4/class!!) However, some offerings are free and open. Check their website and schedule for details.
If you are looking to get out and try something new, I hope you’ll keep the Minot Adult Learning Center on your radar. For more on places to take classes here in Minot check out this post. And be sure to check out BeLOCAL’s listings of places to volunteer, get involved in sports/fitness and take in the arts around town.
**Please note: At the time of writing classes at the Minot Adult Learning Center have been temporarily suspended following a recommendation by Governor Burgum. Updates as to when classes will resume will be available on their website and social channels.**
Holy cow. There are a lot of unbelievable things going on right now. First, I can scarcely believe it’s November. Really?! Second, I cannot believe that the temps in Practically Canada are still on the balmy side. This is the longest, nicest fall I’ve experienced here. It’s glorious. I also can’t believe Halloween is over. It seems like I’ve been eating, sleeping and breathing Halloween for months now. Yikes.
I’ve been so consumed with the creepy I’ve hardly done anything else. {Okay, you know me…I’ve been doing plenty of other things.} But this year Halloween really took up a good chunk of my time. And if I was one of those bloggers who is actually really good at blogging…I would have kept you up to date on the whole thing. But, let’s face it. I’m just not that good. So here’s a recap.
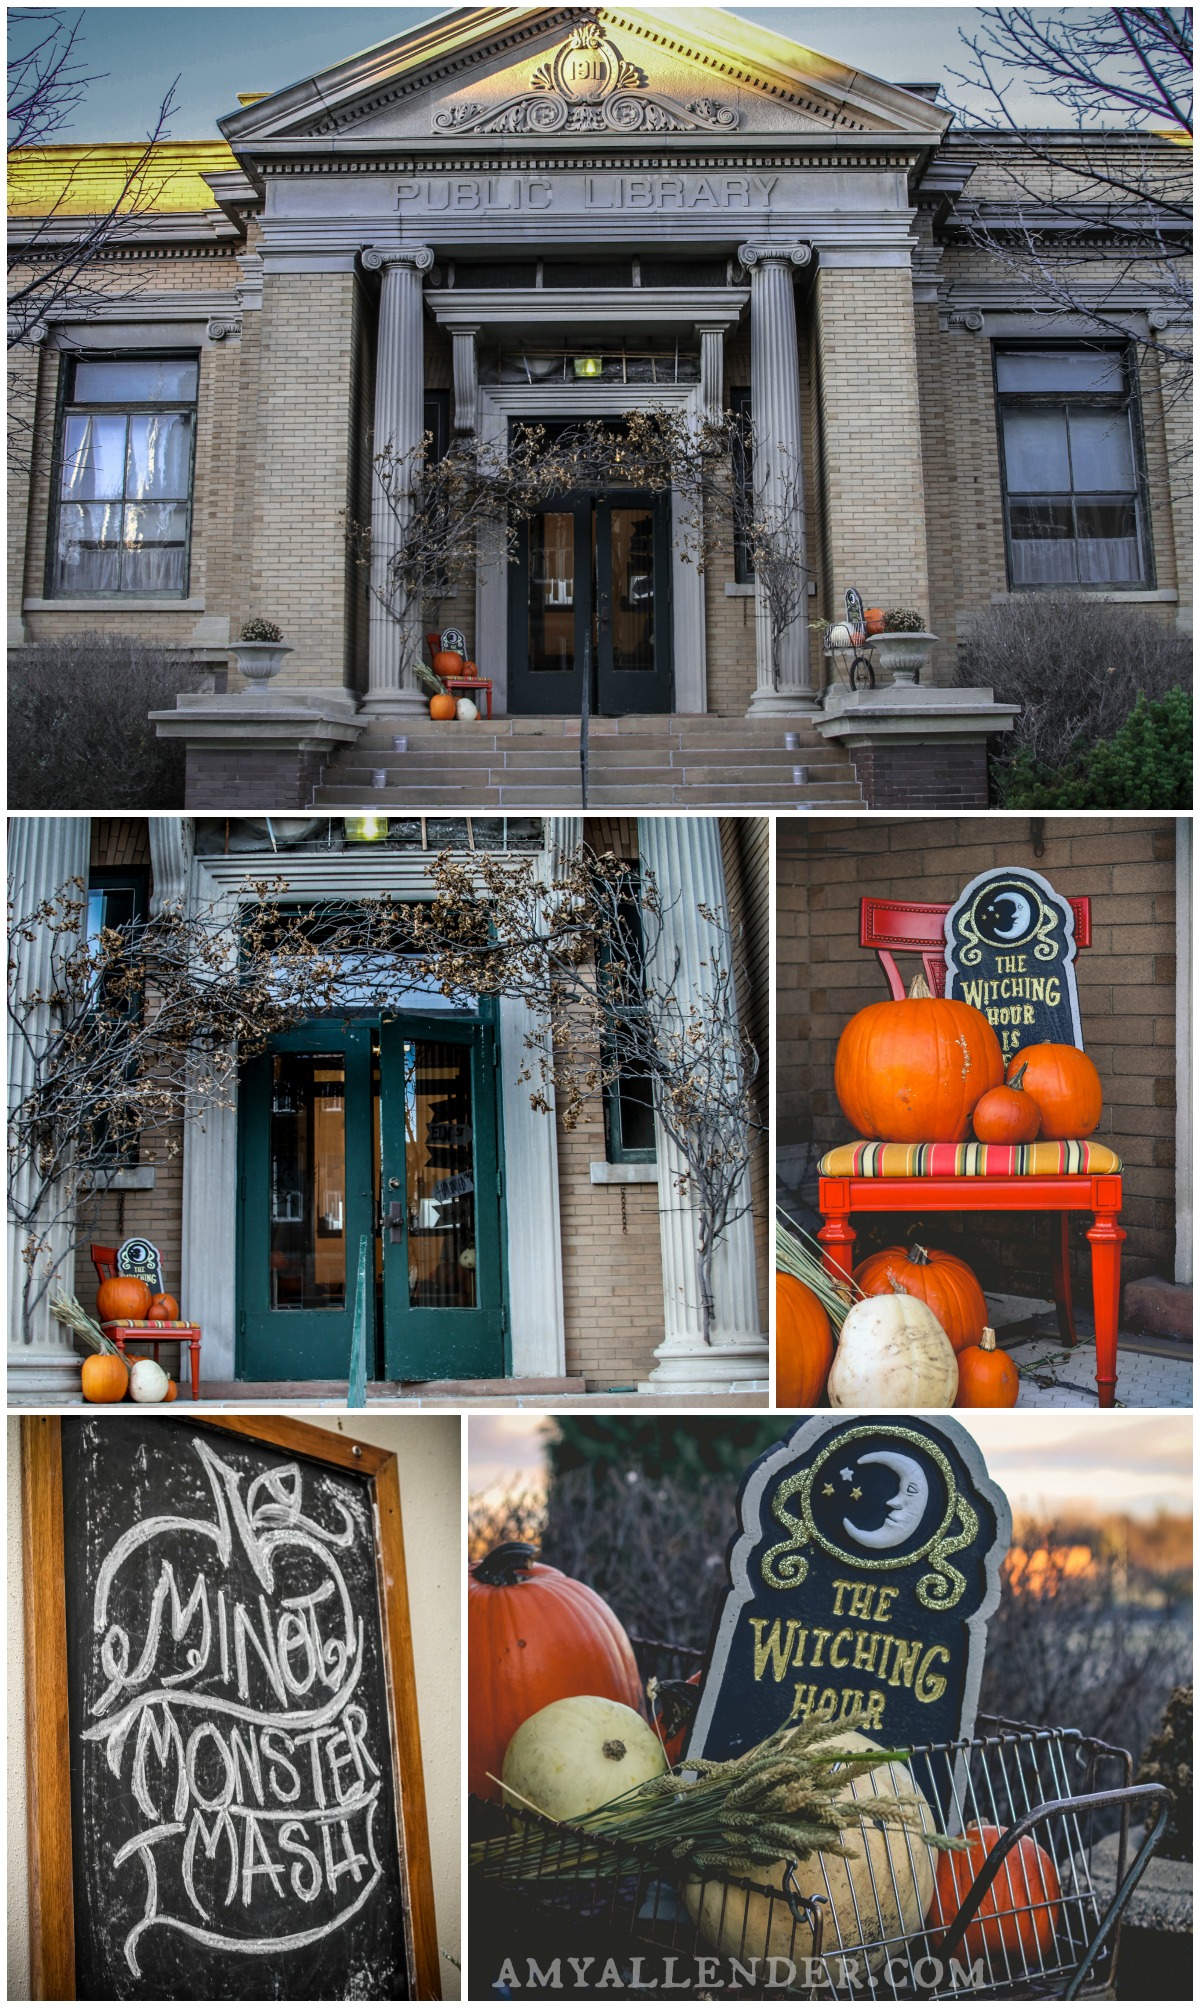
I’m on the executive committee on the Minot Area Council of the Arts. A while back {like in March} we brainstormed some ideas for fundraisers. We collectively decided a Halloween party would be a good idea. And it was. After I found out we’d be staying here through Halloween, I volunteered to coordinate said event–and thus began a very fun, informative, stressful, time consuming, rewarding, endeavor. And so the Minot Monster Mash was born.
When I dug in to planning the Monster Mash, I started thinking about what kind of party I’d pay money to go to. If I would be promoting the event, I wanted it to be something I could honestly convince people to come to with my integrity intact. It needed more than just music, food and costumes. But since there were few people available to help, the scope had to be narrow and concrete enough to carry out. In the end, the driving force behind the Monster Mash is my deep loathing for the phrase, “There’s nothing to do in Minot.” I didn’t just want the Mash to be a night of “something to do” I wanted to teach a man to fish for things to do all winter long.
With that mission in mind I started seeking sponsors who offer things to do and entertainment more people should know about. I sought prizes that offered guests things to do. In the end, we gave away $800 in prizes that included everything from hockey tickets and skate rentals to wine and theater tickets. Our swag bags had information on wine tasting classes, cooking classes, fitness, theater, symphony, art and free ballroom classes. Oh–and don’t for a single second get the idea that I did this all alone. I had fantastic help–amazing graphic designers lent their talent, folks called sponsors, picked up gifts, met to get the details in order, promoted on Facebook, volunteered at the event, moved furniture, offered ideas, and just plain helped wherever they were needed. I owe lots of thank you’s to lots of people.
And now…without any more delays. Let’s relive the Mash.
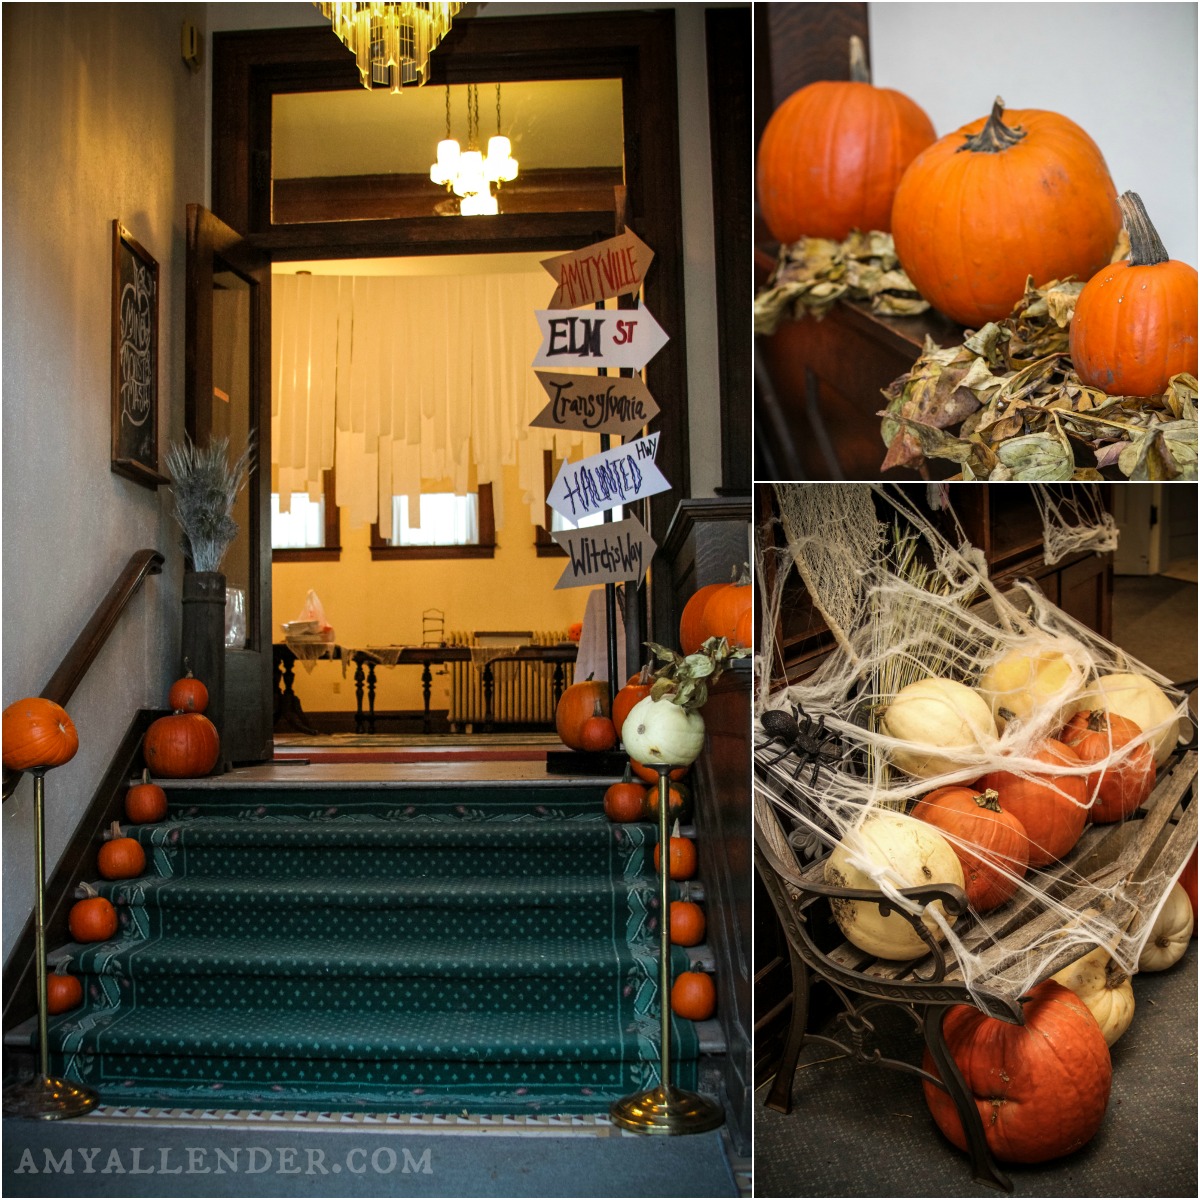
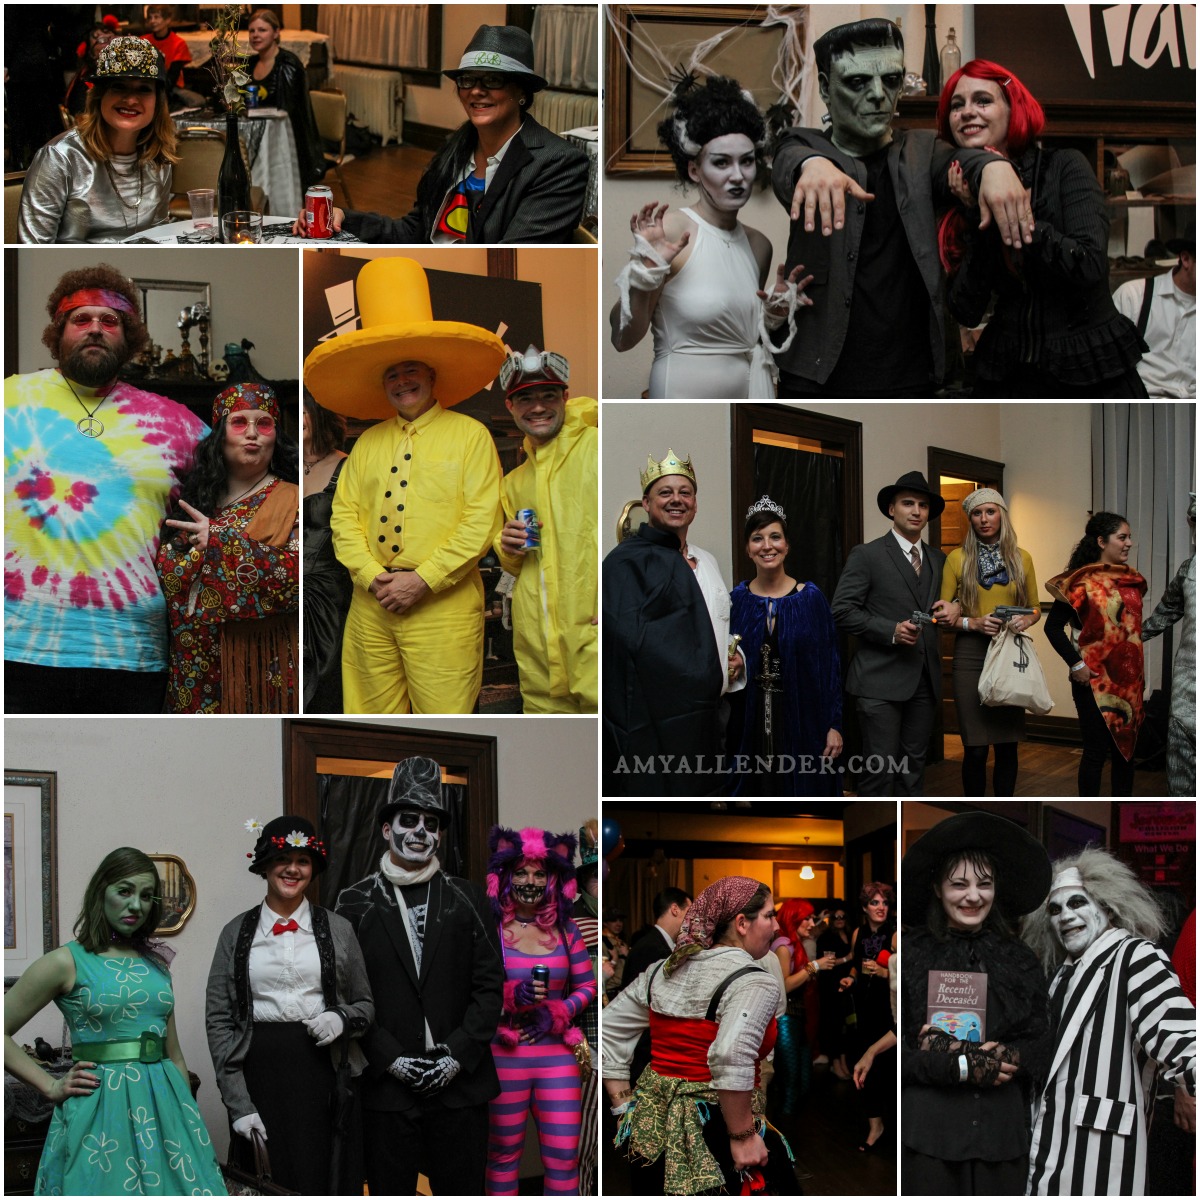
The Monster Mash was held in the Minot Carnegie Center–originally a Carnegie Library built in 1911. The inside is gorgeous, weird, spooky and eccentric. The closets are filled with the old and odd. It was the perfect place for a grownup Halloween party. Spooky, yet refined.
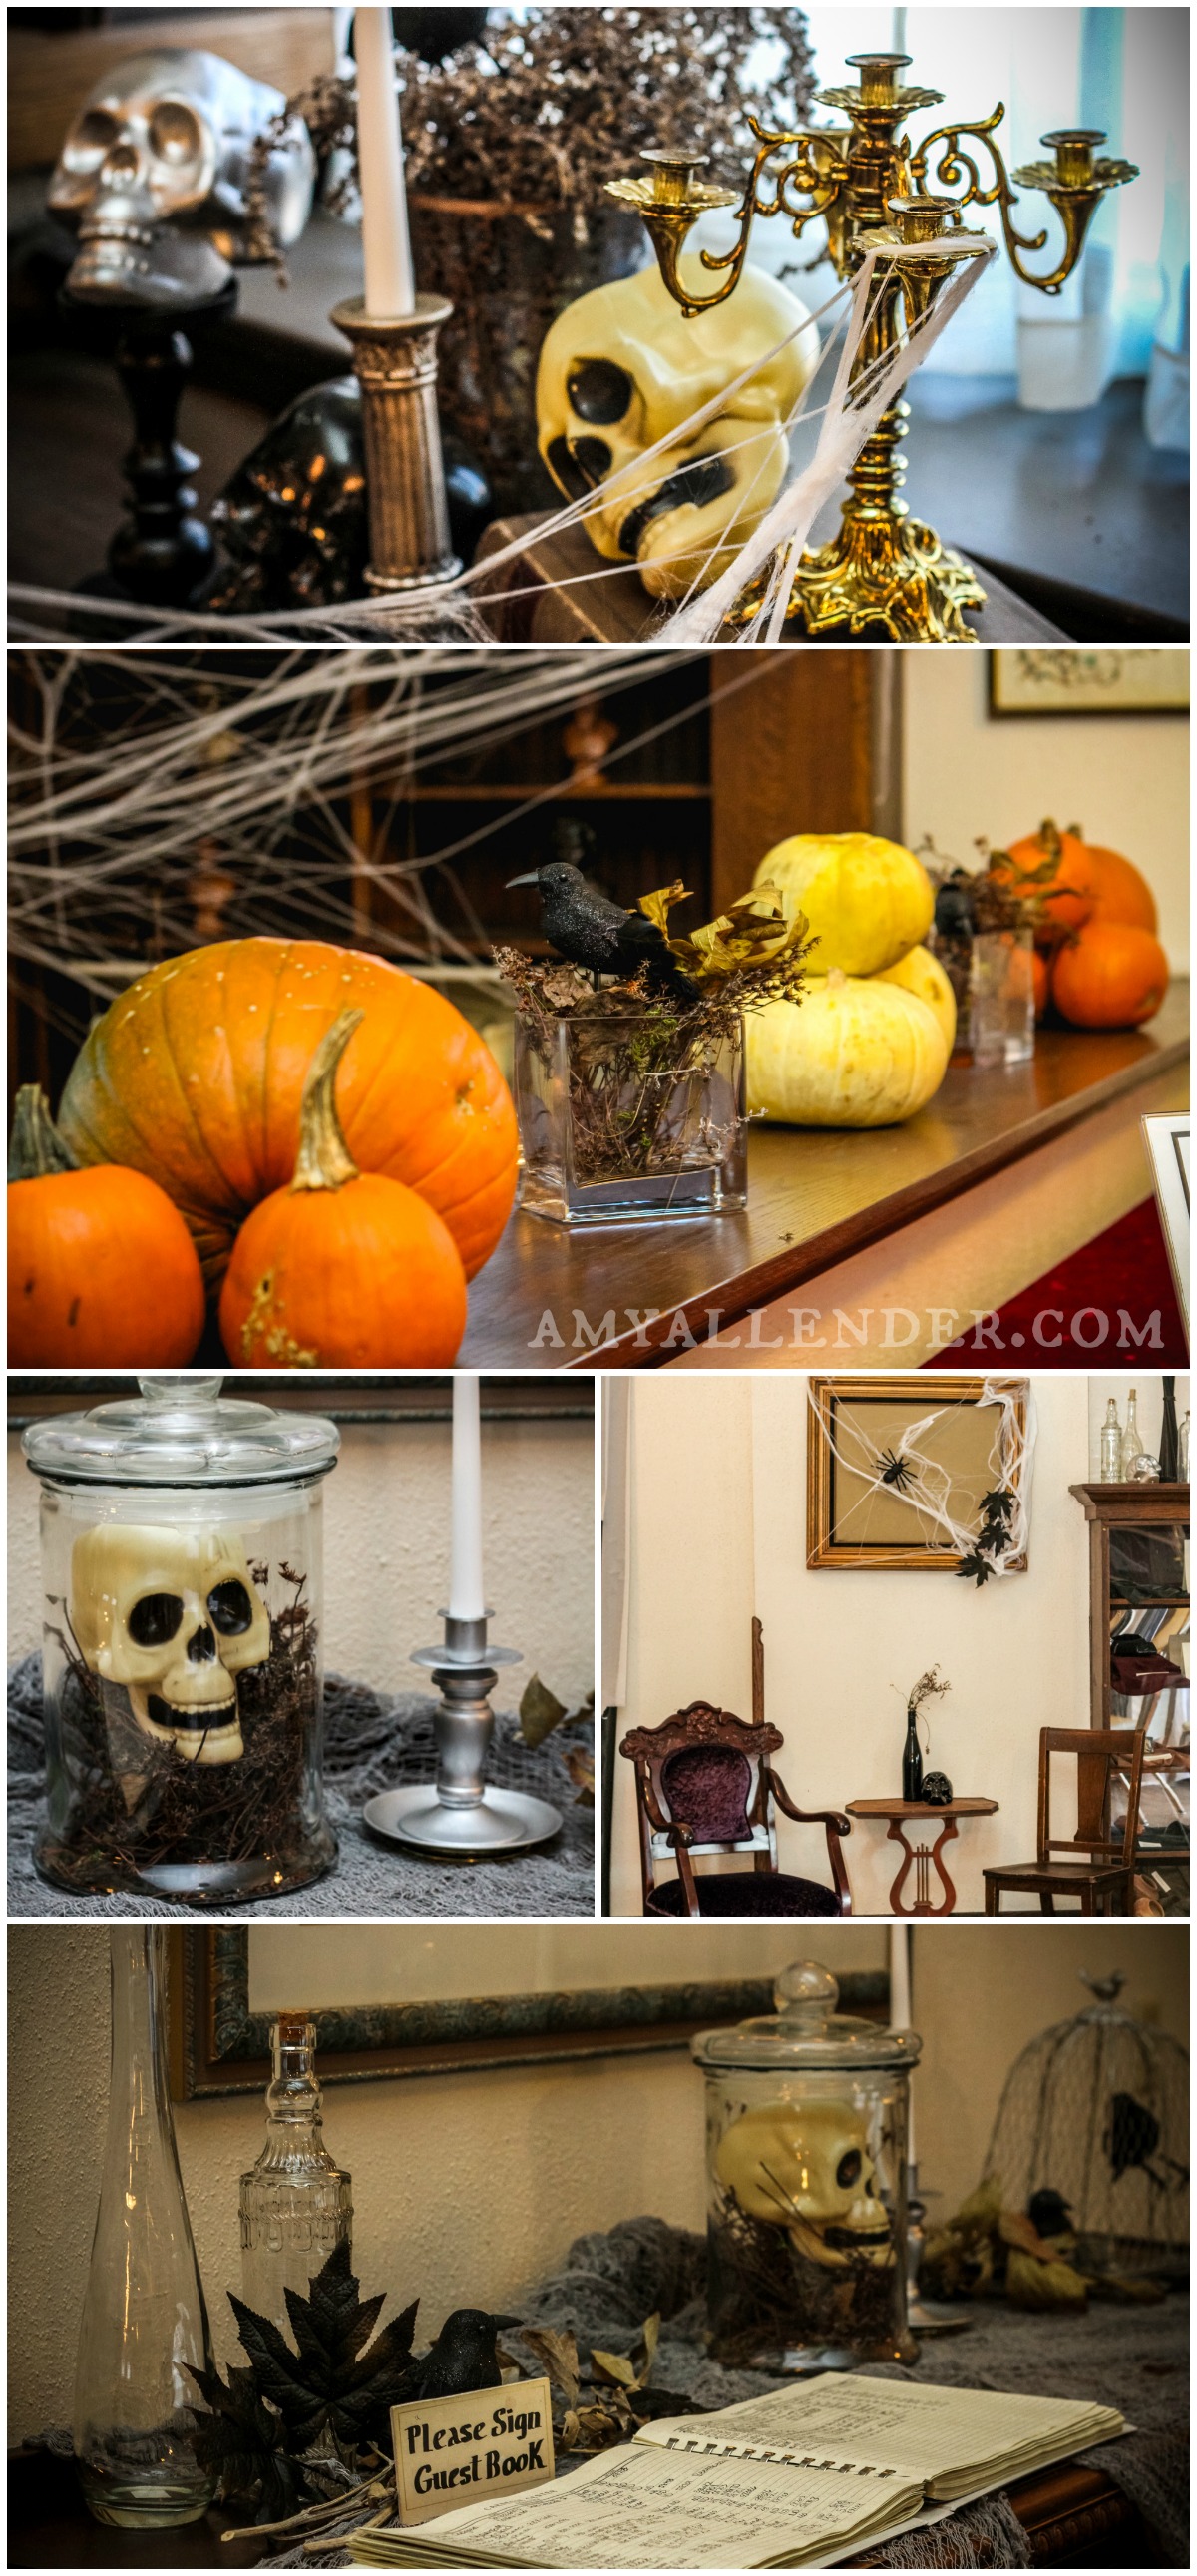
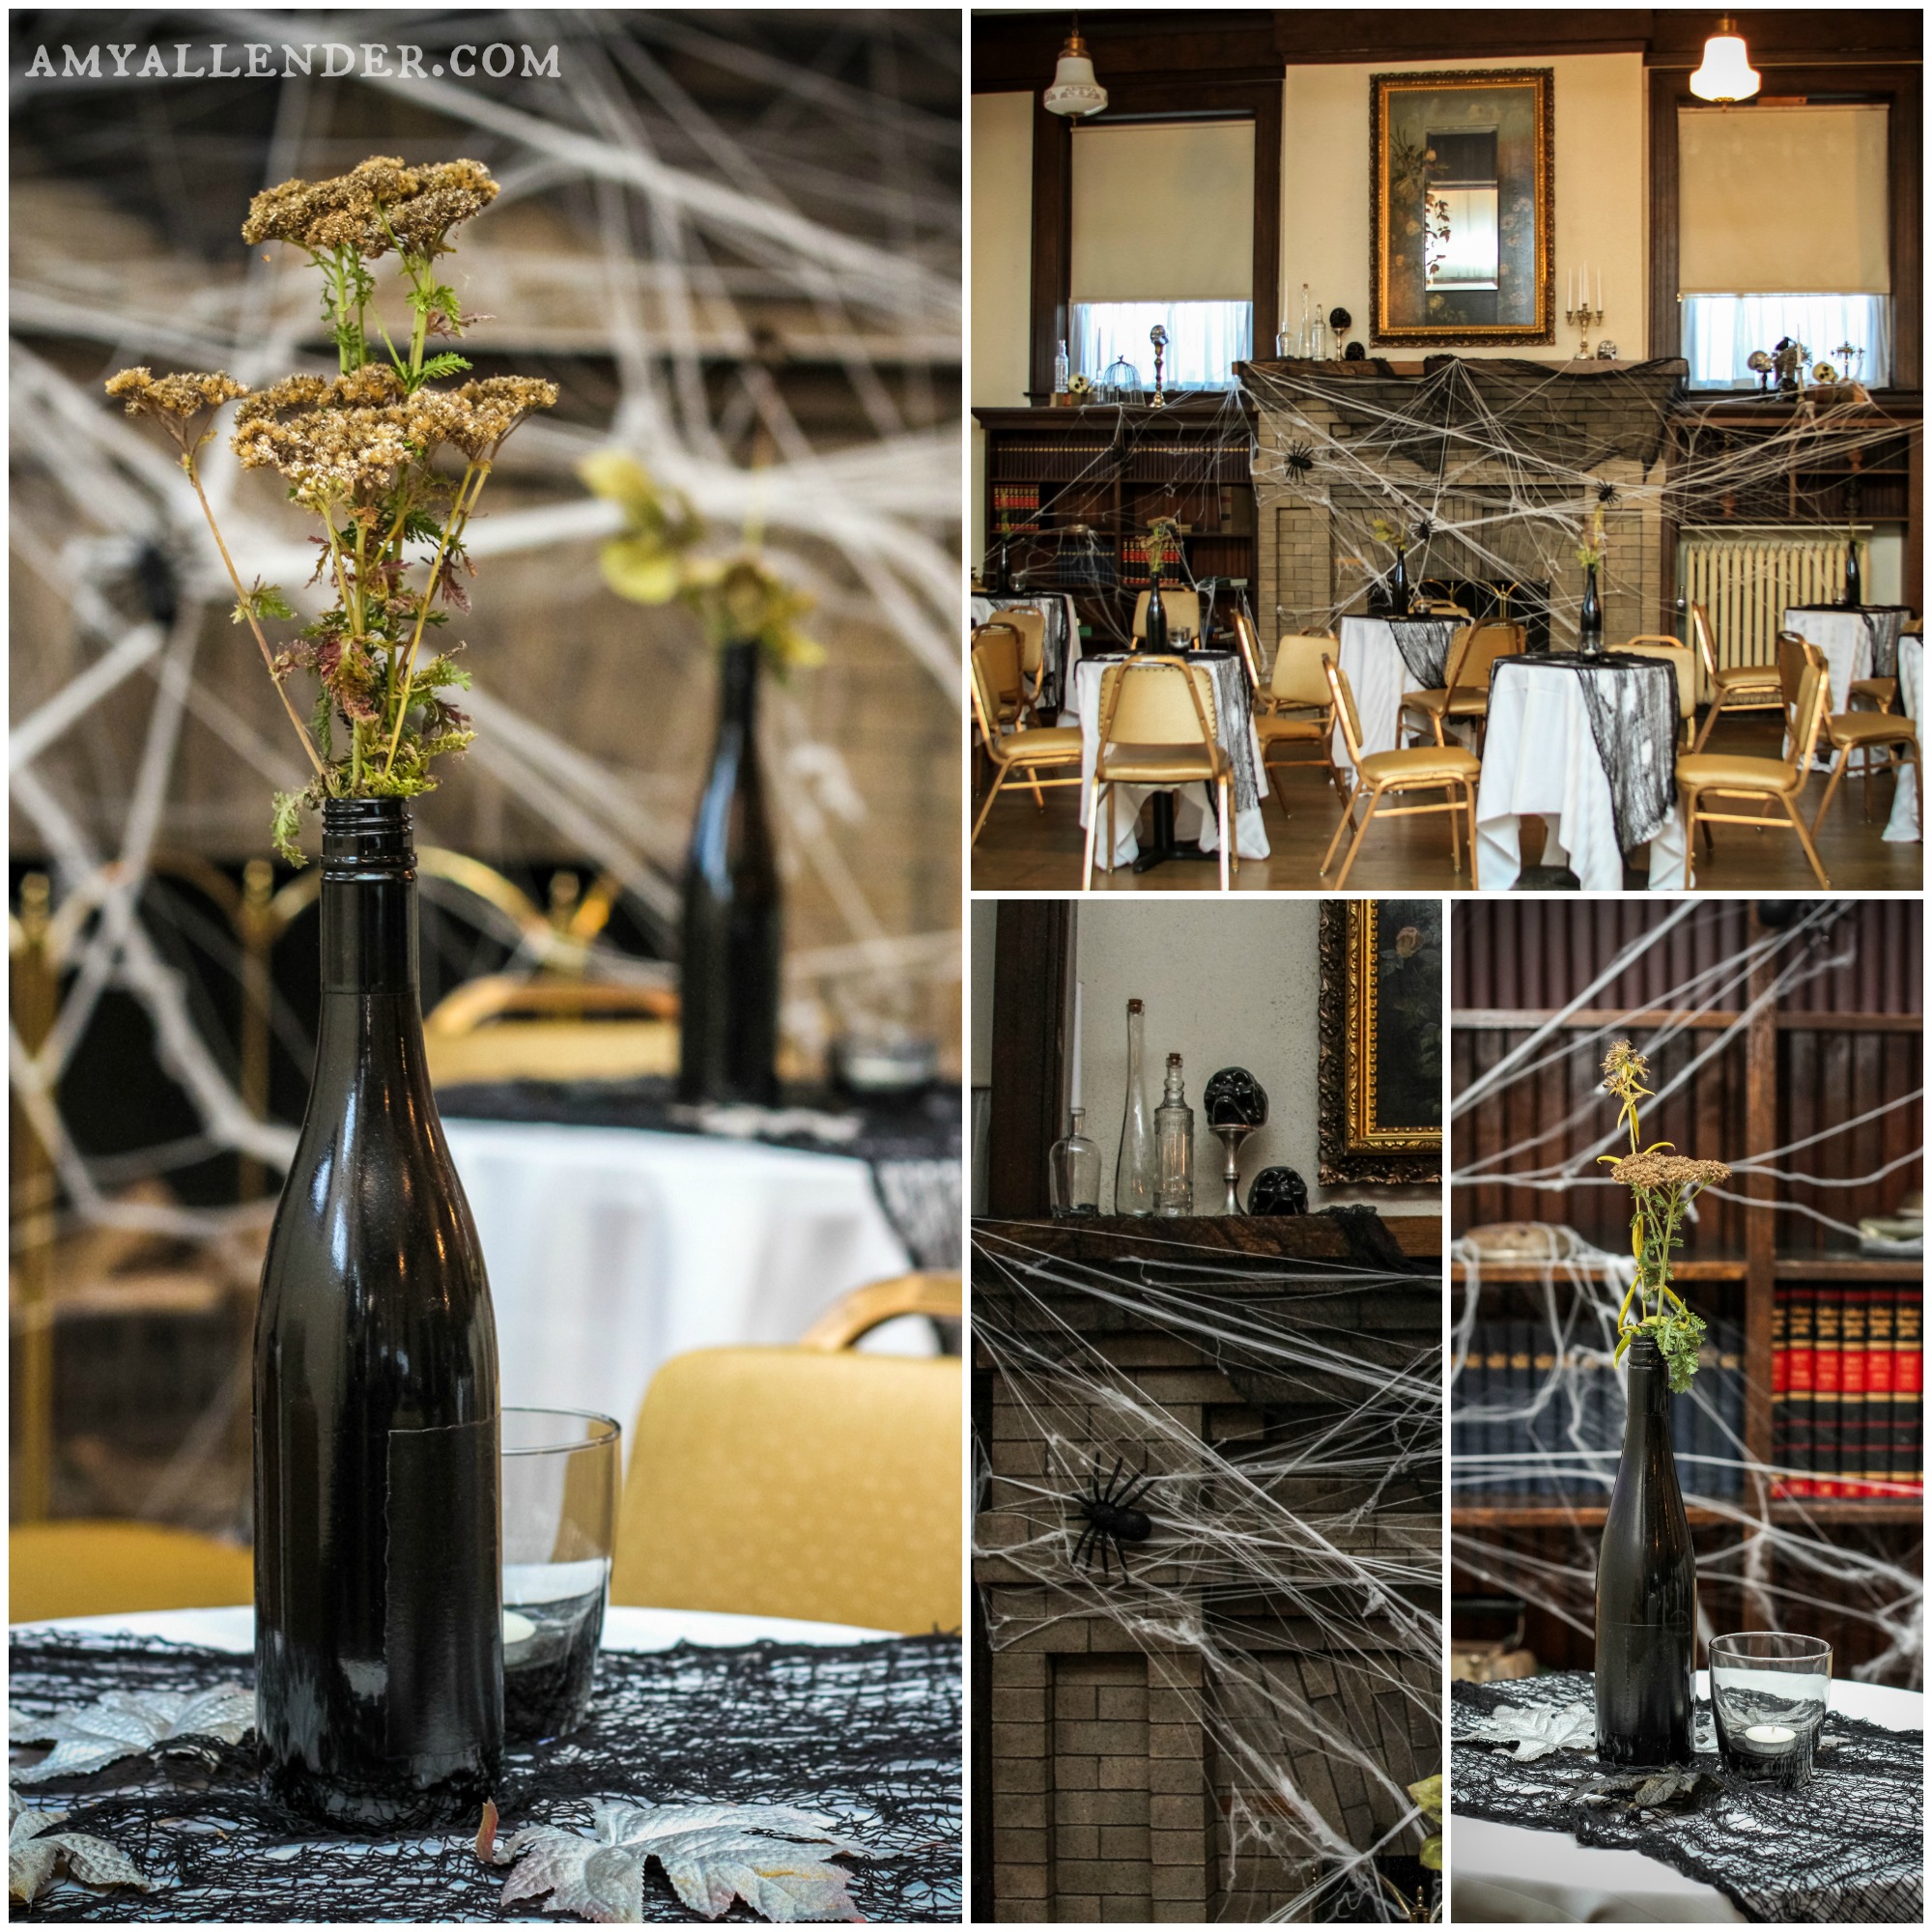
Oliver Nicole Events took care of the decor. Tawyna, the owner was so incredibly easy to work with. She spoke my language of DIY and low-cost. I can’t put in to words how perfect the decor was. She absolutely nailed the atmosphere I was hoping to achieve. Ghostly, but not horrifying. Scary, but classy. “You know that party the parents go to in Hocus Pocus?…I basically want it to look like that,” I told her at our first meeting.
I know Tawnya did most of the work…but I helped where I could. I was so super proud when I secured a massive donation of only slightly damaged pumpkins! I loaded somewhere around 70 pumpkins in my car–which Tawnya put to good use. When she called to tell me the dead roses she’d been eyeing were $3 a stem…my genius mother asked if we could just use dead plants from my own flower beds. Duh. The centerpieces were then filled with dead or dying sedums and peony leaves. It takes a special level of talent to turn yard waste into a classy display and she totally nailed it.
Downstairs in the old Children’s library we set up a small gallery with local art. I loved the creepy entries we got. Oh, and that spooky photo of the girl with a sickle?? I found it in a closet. {Told you this place is a little weird.}
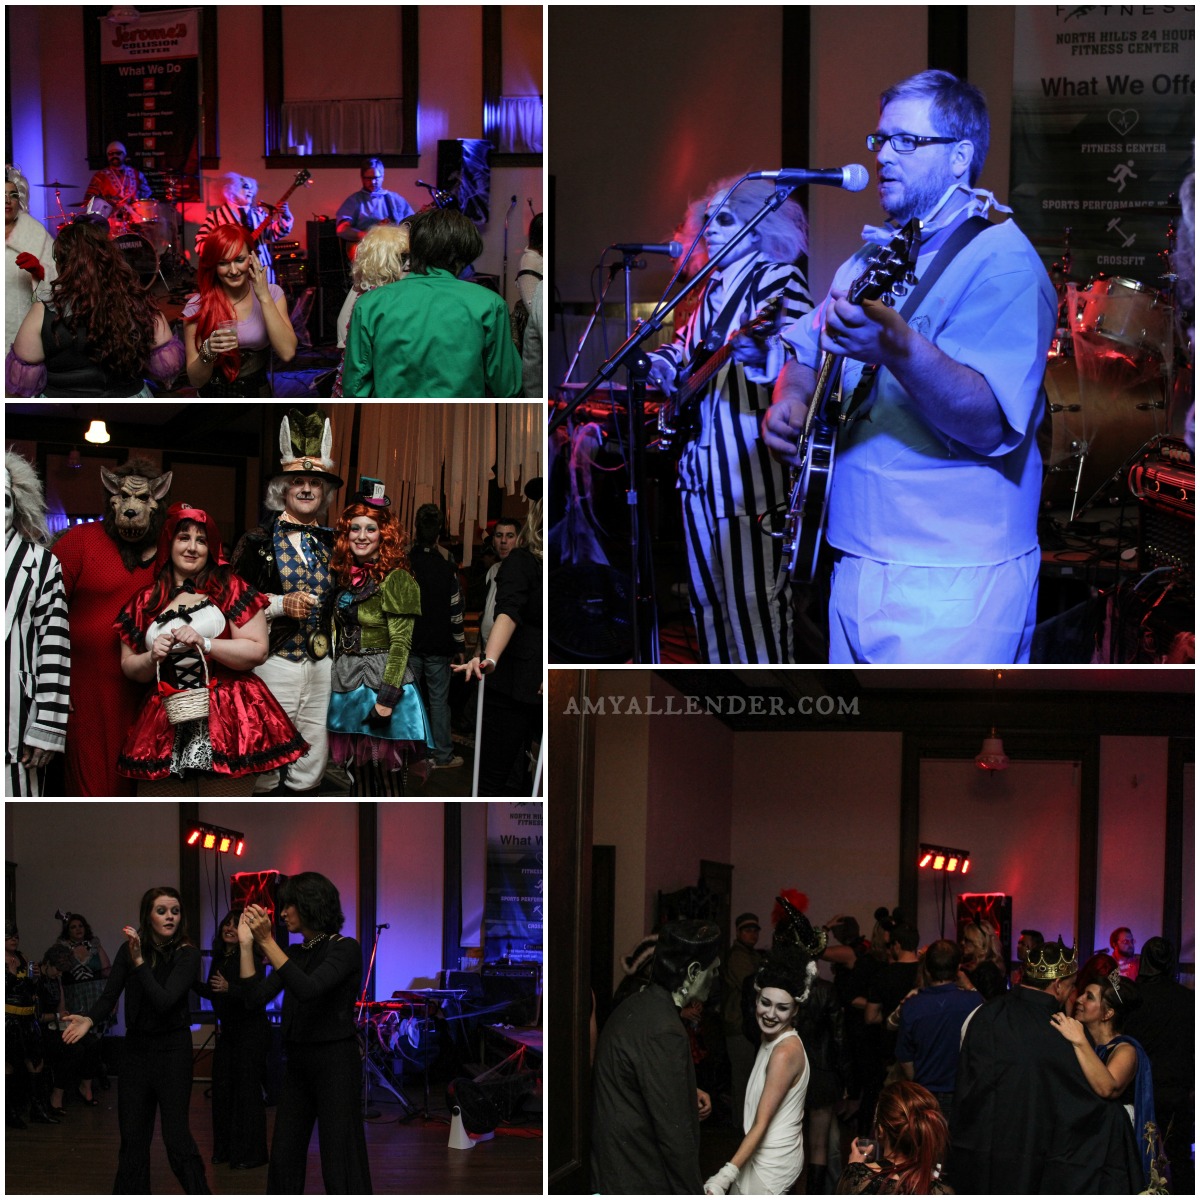
Going back to my original goal of showing off Minot’s art scene and things to do in Minot–we kicked off the evening with a performance by musicians from the Minot Symphony Orchestra. They absolutely blew me away. And I LOVED that they showed up in costume.
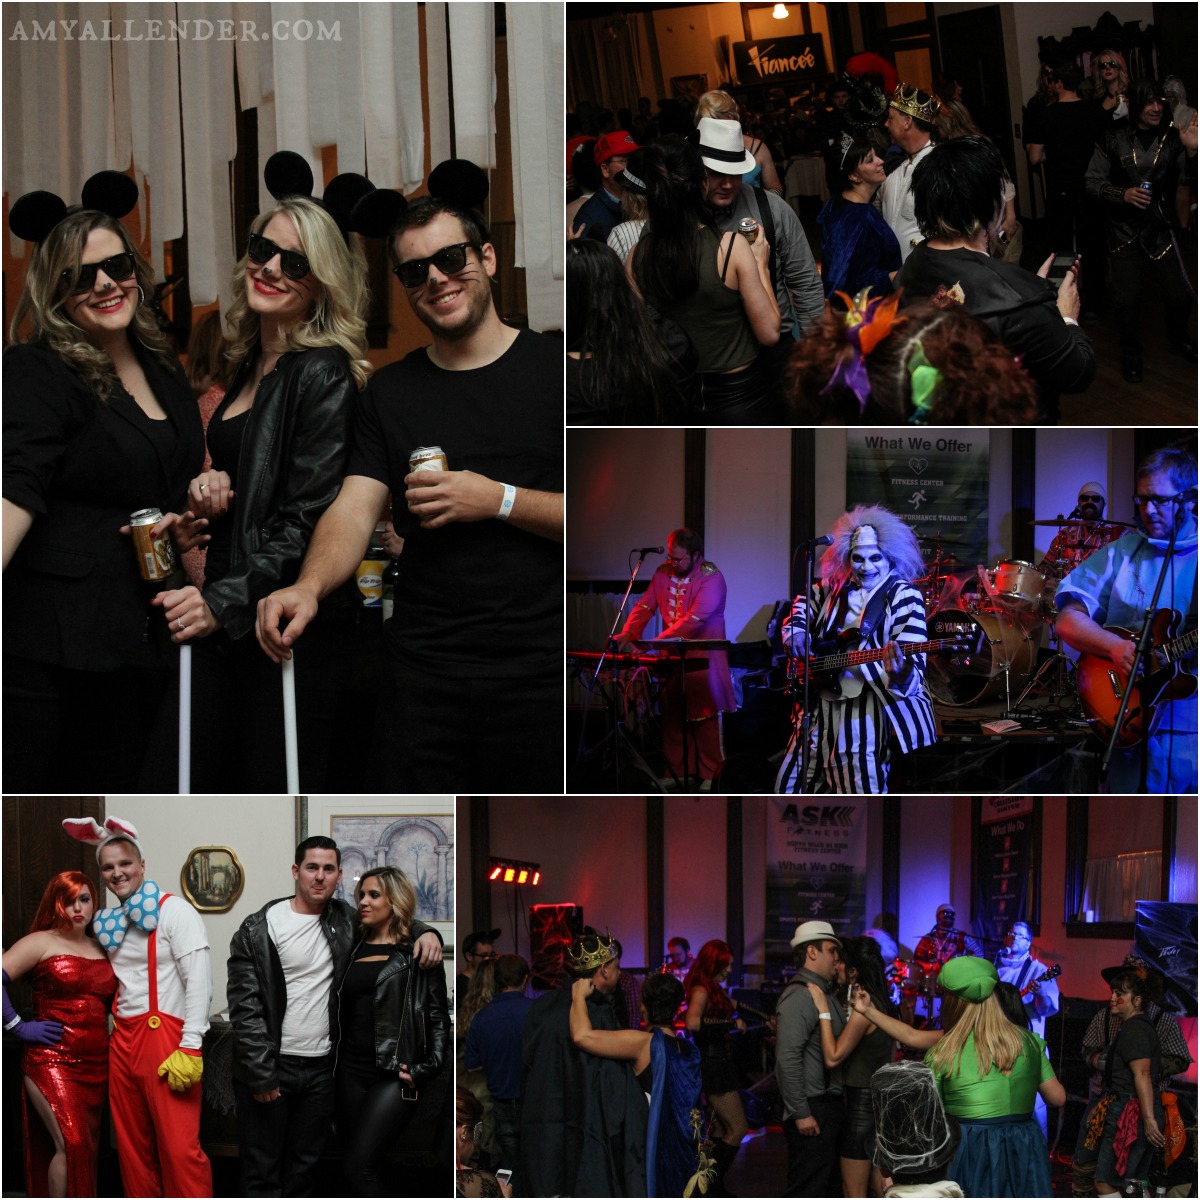
When 8pm rolled around guests started arriving. Lots of guests. The best part was that everyone {EVERYONE!} came in totally awesome costumes. Nothing helps a party like folks who are fully committed to the theme. I am still shocked that everyone who walked through the door arrived looking positively amazing decked out as someone they weren’t. The entertainers, the guests, the volunteers. Everyone looked great. That really had my heart doing somersaults.
When the party was in full swing, while Derek and I were dancing, I told him, “This is what you think Halloween will be like when you grow up…but it never is.” Seriously. Halloween and New Years are always so romanticized in the movies and on TV. As a kid you expect that you’ll grow up and have these super dazzling things to do–but that hardly ever comes to fruition. Finally in the year 2015–in my 28th year…Halloween was how I pictured it as a kid. All these people in a spooky old building, crowded with costumes, an awesome cover band and lots of dancing…to me, this is magic.
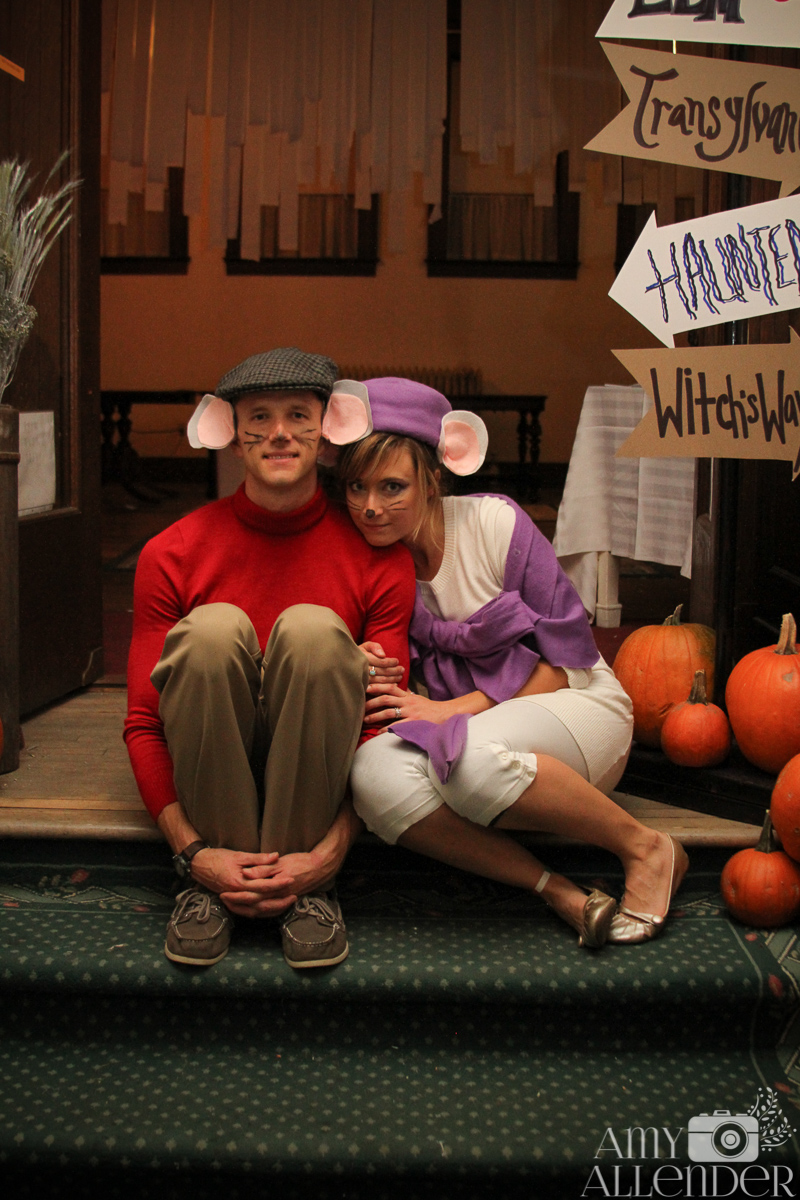
Okay. Let’s talk costumes. Everyone blew me away. I love the Frankensteins. And I totally admire Mr. F for staying in his mask throughout the whole party. I was also a big fan of the Man in the Yellow Hat {who took 2nd place in the costume contest.} Oh, and how can you over look Beetlejuice and Lydia! She nailed it. But wait! There’s more!! What about Disgust from “Inside Out”–amazing!!–or Mary Poppins–Or the coolest skeleton I’ve ever seen–or the Cheshire Cat {who nabbed 1st place.} Hippies, royalty, an awesome rendering of Bonnie and Clyde–Roger Rabbit, Sandy and Danny, Three Blind Mice! How do you decide??
We also saw a fully committed squirrel, someone dressed as a SnapChat, a full blown flying monkey {a little terrifying actually}, Ariel, Cruella, Red Riding Hood and a Wolf dressed as grandma…the list goes on and on. The costumes were wonderful.
The Mouse River Players came and did a Sanderson Sisters bit {I put a spell on you…}, the MSU Community Dance Club busted out a mash up that showed off thriller and ballroom styles all together, we were taught to Thriller, The Magic Tap Cloggers dazzled with their high energy Elvis mash up. We ate junk food and sang and danced and gave away prizes.
Some people left early. And others stayed to the very last song. Like I said…there are things I’d do differently and things that I think can be improved…I hope everyone had fun. But at the end of it all–this is the most fun I’ve had on Halloween in many full moons, this is how I think Halloween should be. I’m so glad so many people came out and shared this fun night and helped out the arts in the process.
It was a lot of work. But for some reason, I just love this town. I love it. And I hope that maybe, just maybe I can help other people love it too.
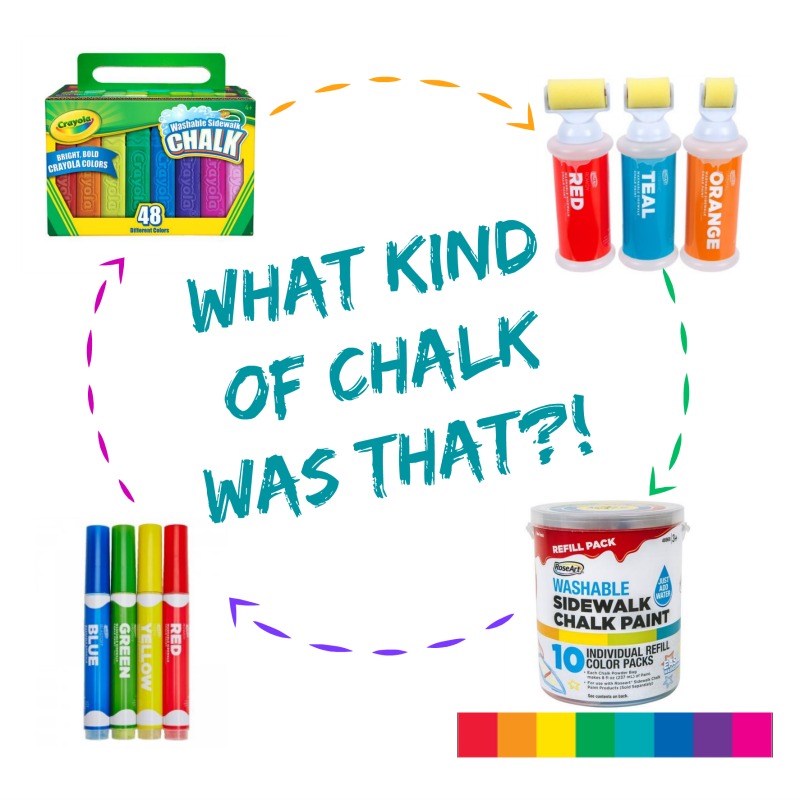
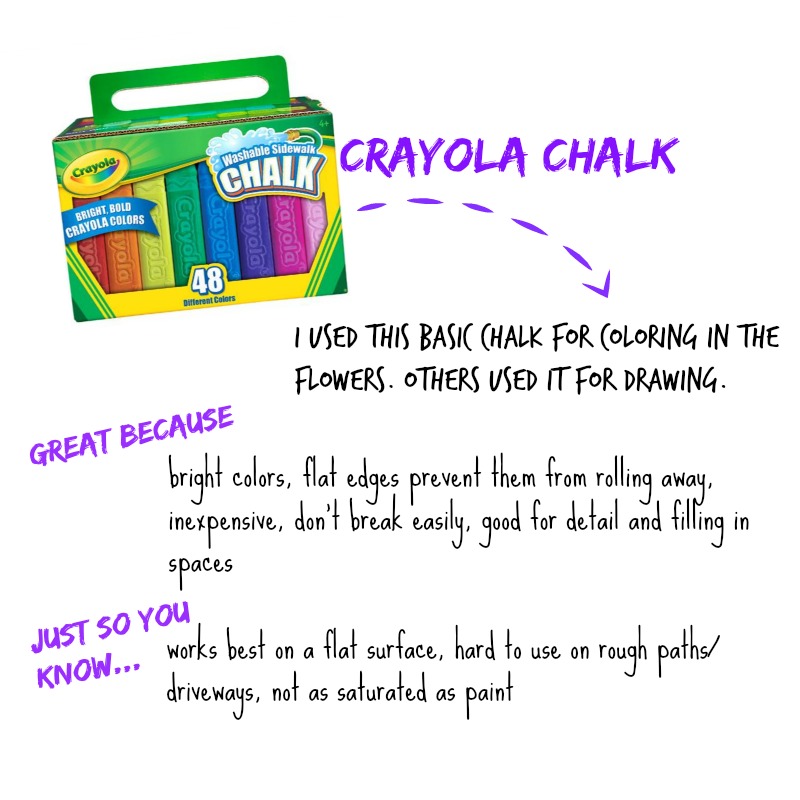
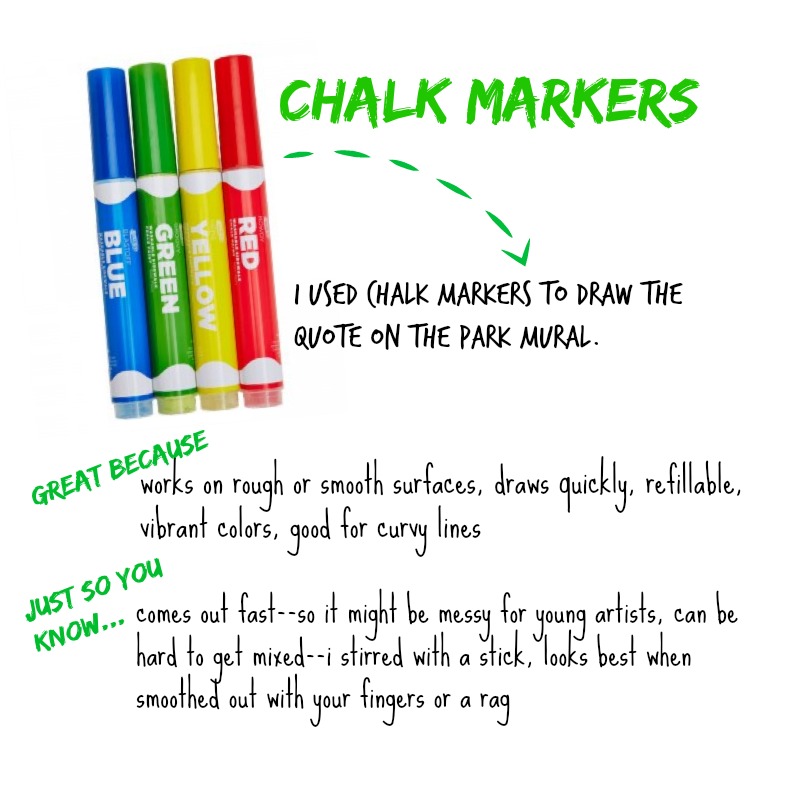
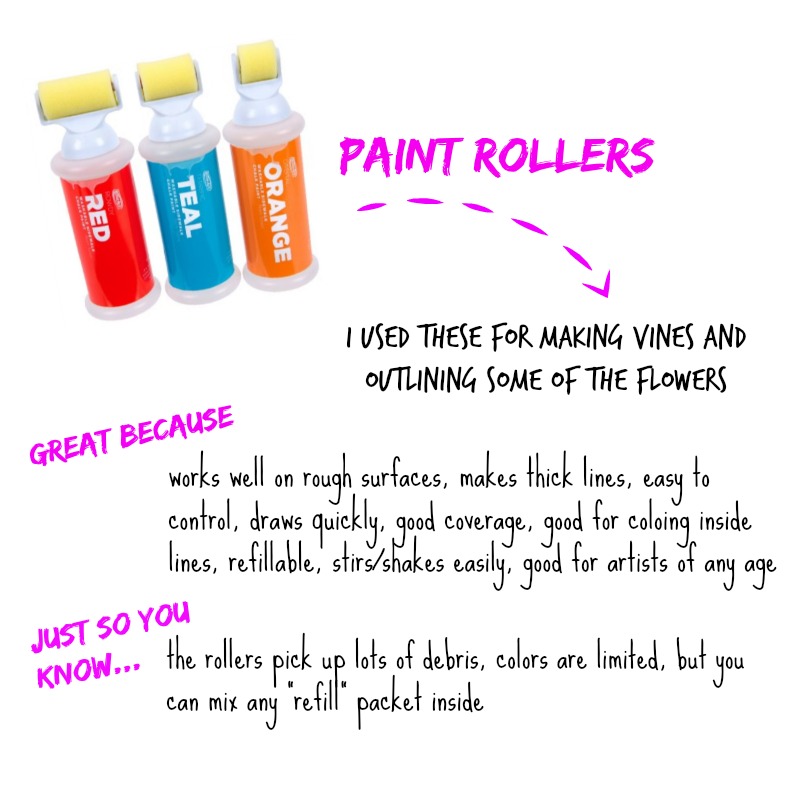
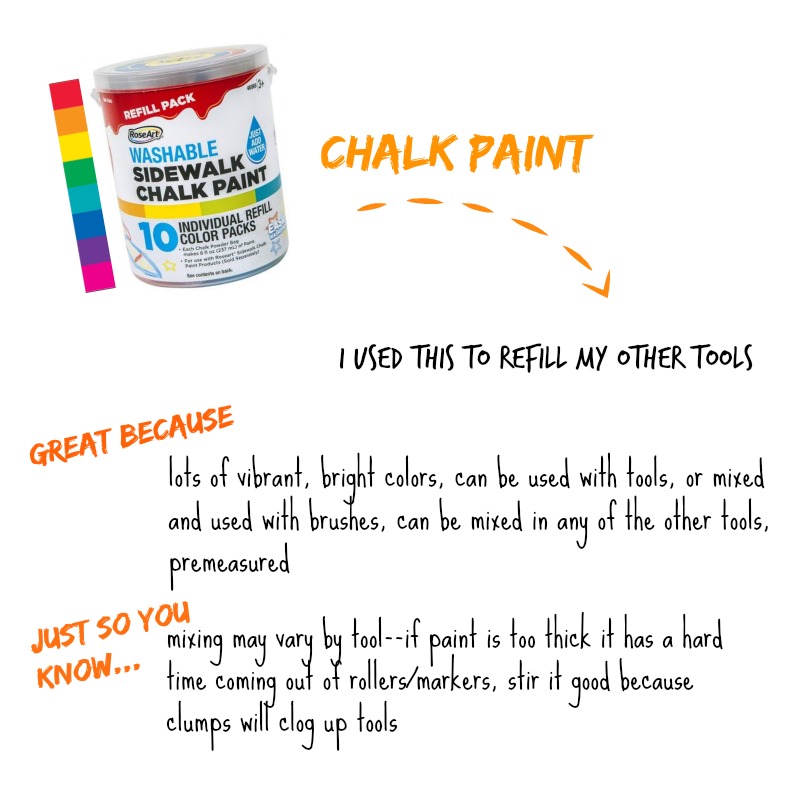
I’ve been so flattered by the very kind and positive comments about ChalkFest. A few people have asked what I used to make the mural and get such nice crisp lines. Instead of tell you…I thought I’d show you. I used a combination of tools. I bought everything at my local Wal-Mart. Everything was cheap. In the $3-6 range. I was super pleased with everything I bought, but here’s the skinny on every product I used.
{I forgot to mention in these graphics that the chalk I used was Crayola and the paint supplies are all from RoseArt.}
With the chalk markers be super sure you get all the paint mixed up really good…otherwise it’ll clog. Also, this is really better for older artists because the paint comes out really fast.
I really loved the chalk paint mixes and if you want to skip all the products you could easily just use it with brushes instead.
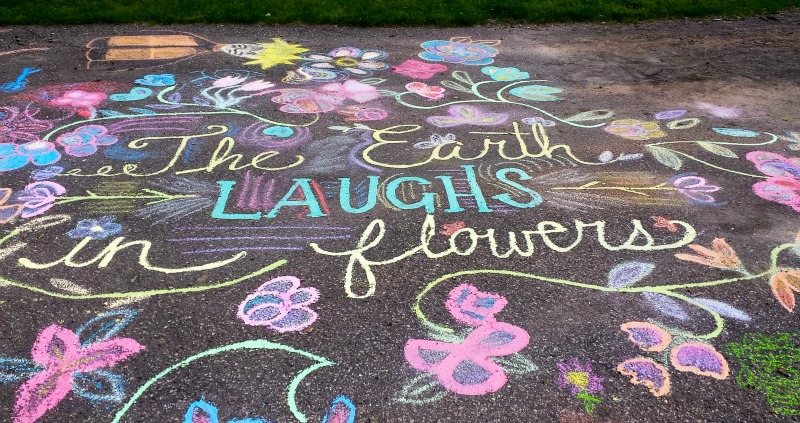
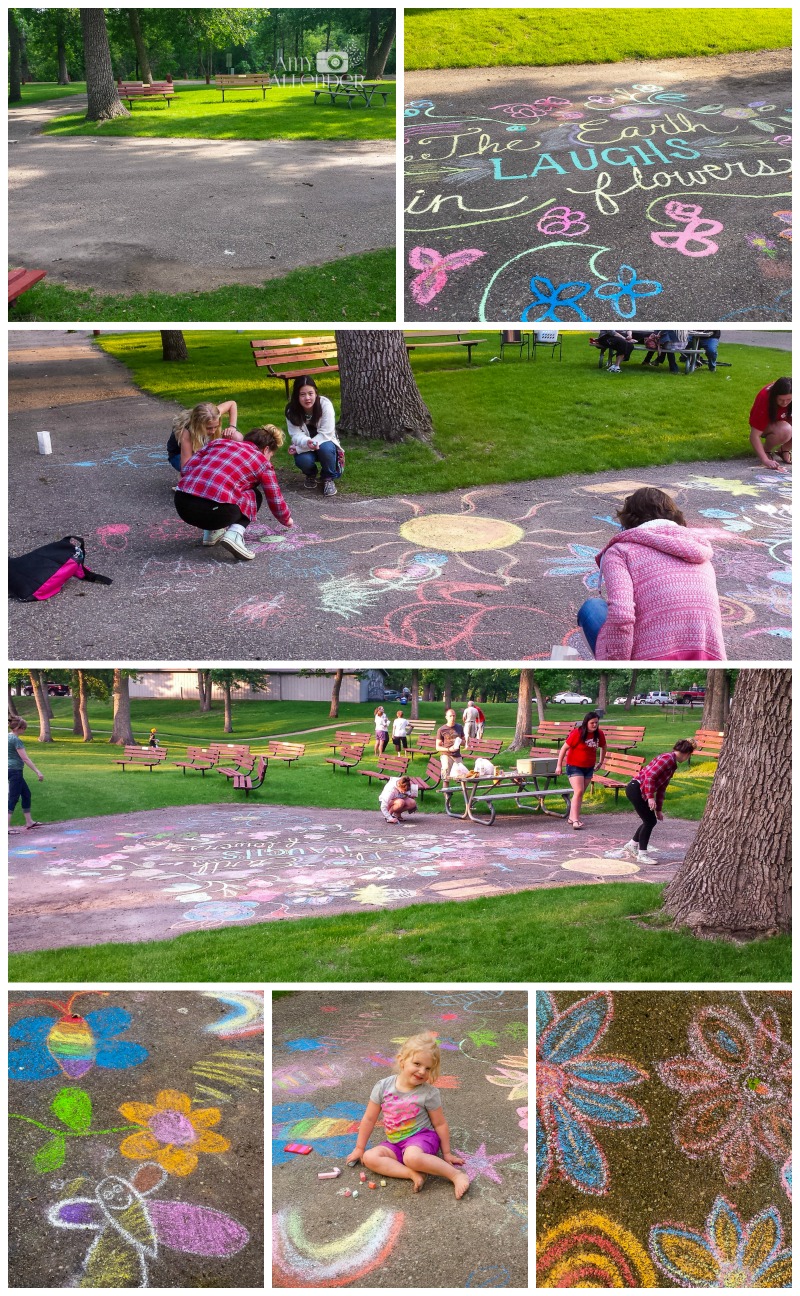
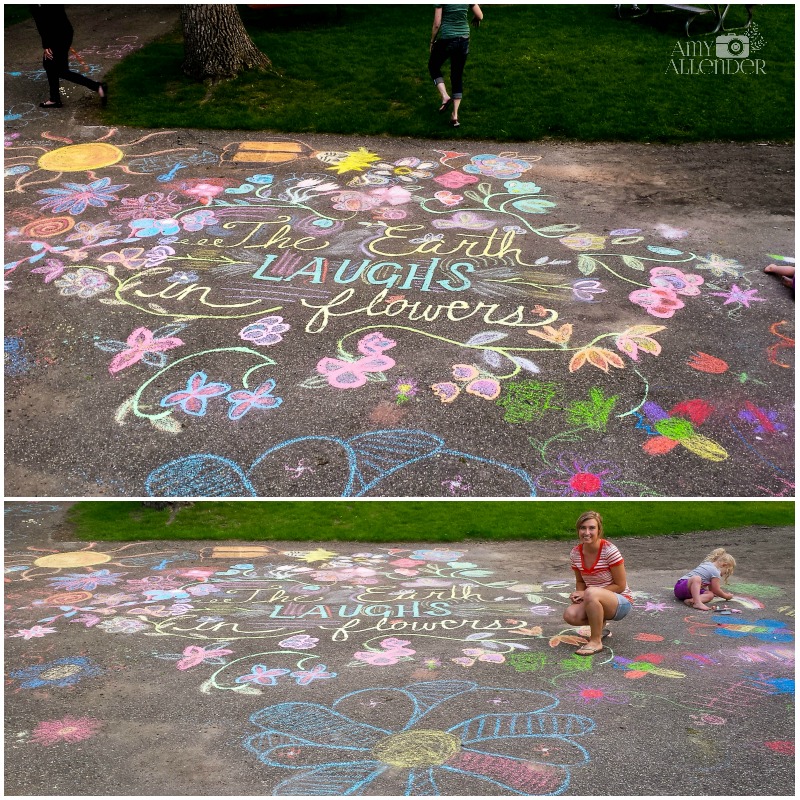
Hemingway once wrote, “The earth laughs in flowers.” That might be true…but a few weeks ago the earth was laughing with flowers, butterflies, rainbows, ice cream cones and a few basketballs…or at least that’s what our community chalk mural was filled with.
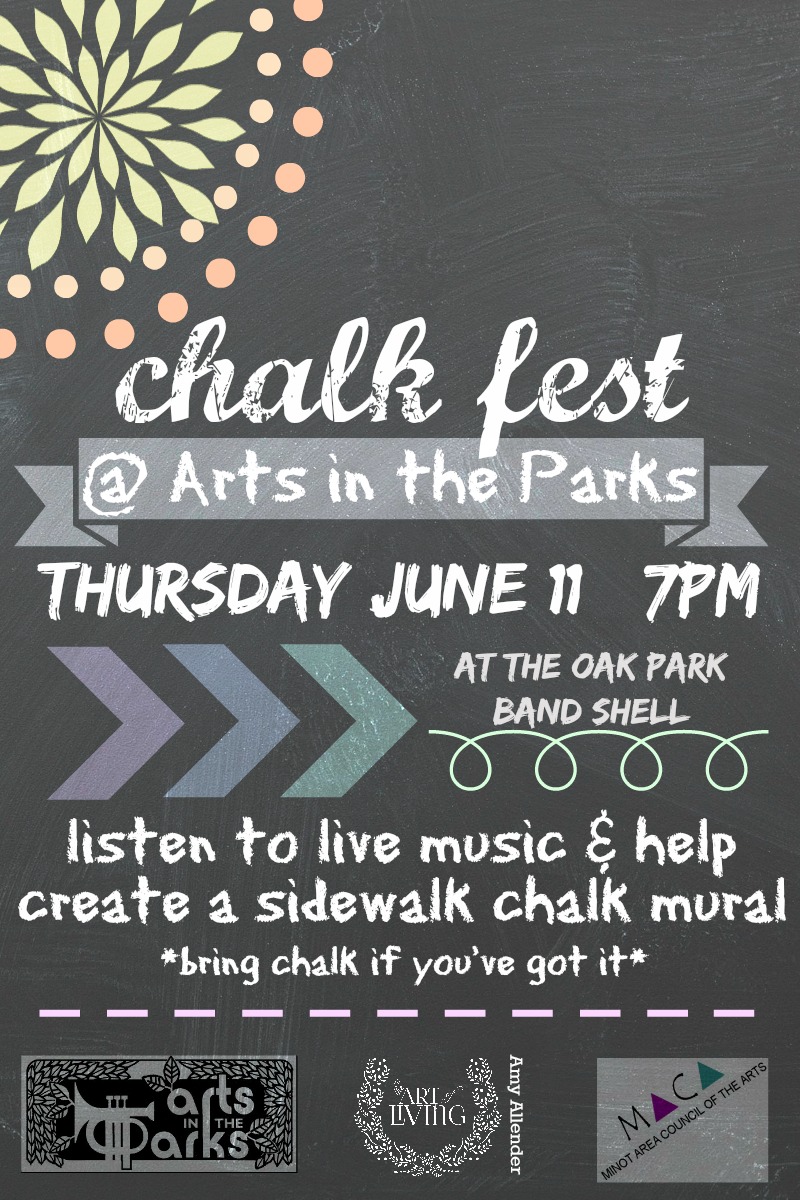
A few weeks ago I was the featured artist at Minot’s Arts in the Park series–from the arts council. And…in an effort to draw a bigger {maybe younger} crowd I decided to create an interactive sidewalk chalk mural. 1.) Because I love side walk chalk–and all chalk, really. 2.) Because I really like to think up ways to get the community involved in art. And…3.) Because I get nervous being “featured” at anything–I’d rather make up some activity and trick others into hanging out with me. Yes, I’m really that awkward and creepy.
I put this flyer out on the web just a few days before the event {it was a last minute decision.} And I was so impressed at how kind people in town were to share it. Minot really is hungry for fun things to do…so folks are eager to share and spread the word.
And I think it paid off. We did have a bigger and younger crowd. I started with this blank canvas…and if I did it all over again, I’d bring a broom to sweep up the goose poop and dirt before I started drawing. {I touched a lot of goose poop with my bare hands that night…} Before the concert I drew in the quote and outlined a few flowers. When folks arrived, I encouraged them to color in an outline or draw flowers–since that was the theme–but I don’t like to be bossy, so really there were no rules.
I was hoping we’d get more people who stopped in and contributed a flower or two–and some did–but I was just as content with the solid stream of kiddos and teens who stayed and colored with me the whole night. Some even stayed after the band had packed up and gone home.
In the end, I think it came out pretty well. Colorful, joyful, summery. If the earth laughs in flowers, I honestly believe sidewalks smile in chalk.
I do lots of things here in Practically Canada. Lots and lots of things. Lots of varied activities that lend themselves to a never-boring {but sometimes a little too busy} lifestyle. But–of all the things I do, working with the Minot Area Council of the Arts {MACA}’s Artists in the Schools Program is definitely in my top three.
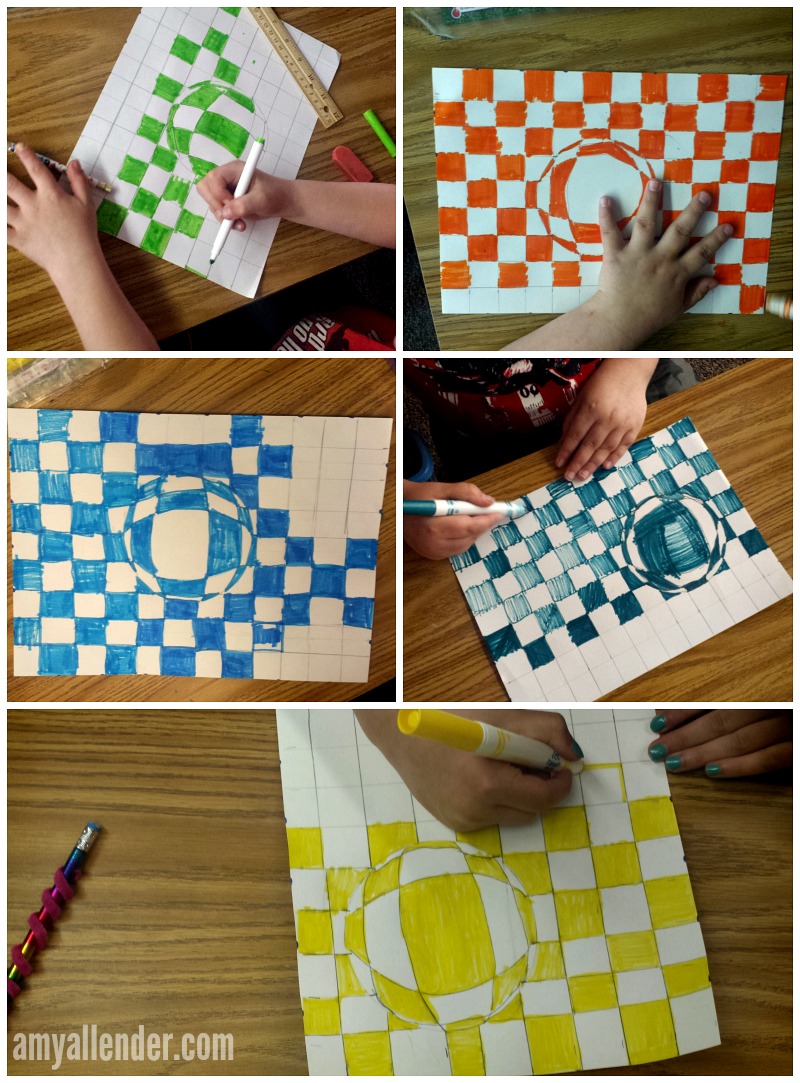
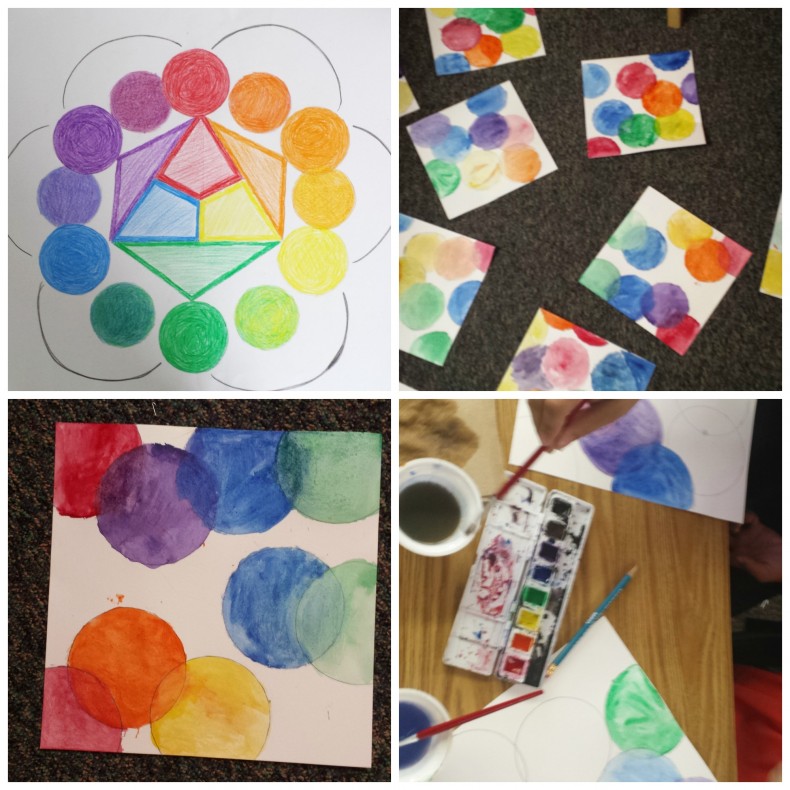
You’ve heard me talk about this before. I’ve cut snowflakes, learned the color wheel and painted many, many canvases. Last week I did another class focusing on optical illusion art for kids with an outstanding group of 3rd grade students at Bell Elementary. This project is a little tricky, so I don’t break it out unless the group is well behaved and able to tune in and follow directions. This particular class was fantastic on all fronts.
I started with the usual discussion on what an optical illusion is. How sometimes things aren’t always as they first appear {a lesson not only for art, but for many aspects of life.} The kids always love learning about optical illusions and they are so excited for the chance to make their very own version of op art.
This particular project is great because it combines artistic skill with mathematical skills such as use of a ruler, measuring, and pattern creation. It’s also cool because every kid can turn out a really cool product–even those who don’t see themselves as “artistic.” I love proving to kids that they can be artists even if they don’t have a natural aptitude for free hand drawing or painting. I believe it is vital that little ones embrace their creativity–and that adults don’t stifle it by instilling an attitude that “you aren’t artistic.” Creativity is key to problem solving…so let’s not crush their creativity! Agreed?
Okay. I’m finished ranting. I just love art. And kids. And kids doing art.
So. Now I’ll explain how we did this one. It’s pretty simple really.
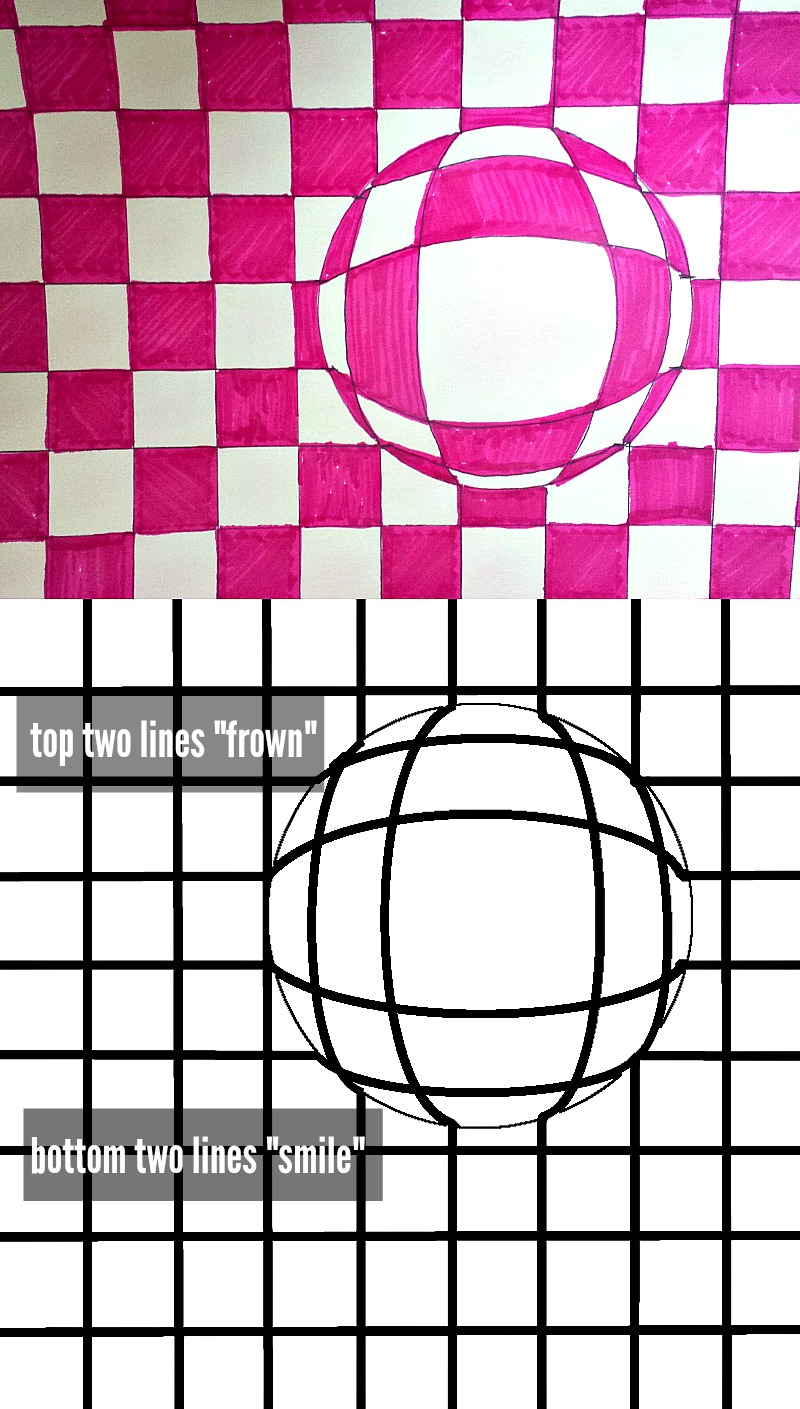
The top is my example. The bottom is how the grid looks before it’s colored.
Start kids off with their paper flat on their desk. Have everyone trace a circle on their paper. Anywhere is fine.
Have them use a ruler to mark every inch. Then, without turning the paper…have them slide the ruler to the bottom of the page and mark every inch again. Have them connect the dots–stopping at the edge of the circle so they don’t draw through it–repeat on the other two sides of their page.
Once the grid is done, have them connect the lines that but up to the edge of the circle. The top two should be connected with a line that looks like a frown–following the arc of the circle. The bottom two should “smile.” Then, turn the paper 90˚ and repeat that process. Then, it’s just a matter of creating a pattern of color.
Start with a row that runs through the circle. Color every other square. Where the circle intersects with a square it should be the opposite color. {If the square is uncolored that section of the circle will be colored; if the square is colored that part of the circle will be uncolored.} Inside the circle every other space will be colored. Then resume the pattern in the squares.
Once that first row is finished, complete the pattern within the circle. Then finish the pattern in the squares–every other should be colored, with the rows alternating like a checker board.
So that’s it. Hopefully that’s helpful to my teacher friends out there. It really is a great project for honing in on all kinds of skills. Just maybe it’ll be something fun for your classes at the end of this school year!
Over the next week I’ll be teaching six Artists in the Schools session at elementary schools across town. Today, I kicked off the marathon with a Water and Wax session with a group of first grade students.
The idea behind this session is to teach students a little science in with the art project–and to make something cool. We discussed the absorption property of water–how it sometimes soaks in to things, and other times rolls off a surface. Then I covered the fact that crayons, made of wax, repel water and led in to the project.
As you may imagine–if you’ve ever worked with elementary school kids–that getting the instructions out to a group of first graders was much more challenging in person than typing the words here on the blog. There was a lot of restlessness while the teacher and I tag-teamed to get papers taped to desks. Once they were down there was peeling of tape…and retaping…and a few threats of revoked participation rights.
Once the paper was out I heard this:
“Once we have a paper can we start?”
I hadn’t even shown them the example.
I explained our first step–find a light colored crayon. Not white–because we need to see our lines. Any other light color: yellow, light green, peach, light pink. Little did I know this would be such a hard step to follow. There were about four students sharing a table and caddy of crayons, so they needed to share their table’s supply amongst themselves. Once I told them to find their crayon, this is what I heard.
“Um, we don’t have a white crayon.”
“Okay. You don’t need one right now.”
“My favorite color is purple, so I’m using that.”
“Is purple a light color–something closer to white than black?”
“I don’t think so.”
“Okay. Pick another color…yellow, light green, peach, or light pink.”
“What about dark blue?”
“What about it?”
“Aaaammmmyyy! Our table doesn’t have light green!”
“Okay. Do you have one of the other colors?”
“Yeah.”
“So….the problem is….?”
“We don’t have any of the colors you told us to use. Can I use green instead?”
I look in the caddy. All the colors are there. I pass one to each child.
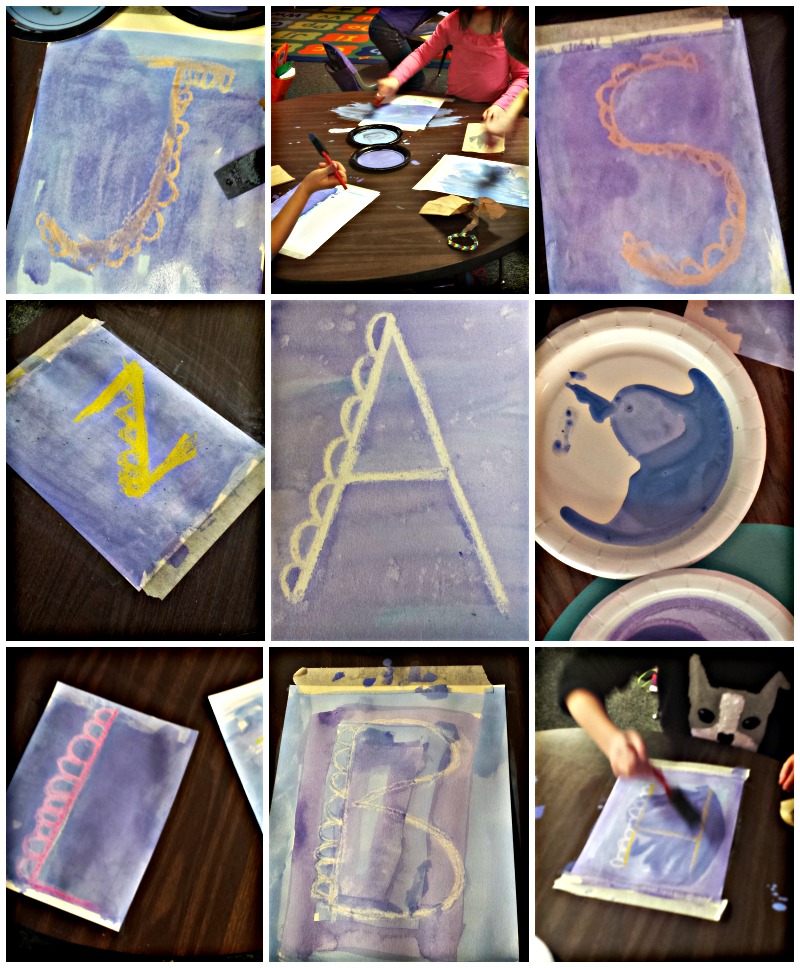
Once the color situation was mostly resolved we moved on. I told them to draw the first letter of their first name on their paper. Then I explained how they could add the “dragon scales” to one side of the letter to make it look a little more fancy. “If you understand what to do, you may begin.” Then things took an awkward turn.
“Uh, Amy…I did mine this way.” Dark purple crayon is on the paper. The teacher swoops in, asking why she used that crayon when only moments before, we’d given her a peach color to use. Paper is flipped, crisis averted.
While half the students are still working, the other half has finished and are now leaving their seats one by one and coming to my side {as I’m trying to help someone with a legit question} to tell me they’ve finished. Meanwhile, one little guy comes up and says,
“Well…I did an A.”
“Okay. That’s good. We’ll move on in just a second.”
“My name doesn’t start with an A. I did it because that’s what you said you were doing.”
A whole table–who was pretty chatty during instruction time–all drew the letter A, as in Amy, instead of their own letters. Untape, flip, retape.
Next direction. Trace your letter using that same color, or a white crayon. Go over it at least eight times. Make your marks nice and heavy, we want lots of wax on the paper.
This part went pretty smoothly…with the exception of a few who finished in about 60 seconds and immediately came to tell me that they were done. I just told them to keep tracing. When everyone seemed to have their letter traced enough times–one kid told me he traced his 38 times–we moved on to the paint portion of the class.
Paint is always scary to me, but these guys did great. Even the one who used so much that it was as much on the table as on the paper {see top middle photo above…} My very favorite part was hearing them gasp and get excited when their letter appeared after repelling the water color. “Its. Working!” I love when they think they’ve made something really cool. I love it when they are proud of their work.
All in all a good class, all in all, great work. I really love doing these sessions in the schools. Despite the weird questions and the faulty listening and the short attention spans, I really do think they try their best. And…Boy, oh, boy do they make me laugh.
Today I did Art in the Schools with a second grade class. I have had lots of requests for Classroom Canvases…which I love doing, but it’s fun to do other things too. This color wheel session is one of my favorites because it teaches basic color theory–which totally makes me geek out.
Inspiration for this session originally came from this post on a blog that I really love. She has lots of great art inspiration for classes of all ages.
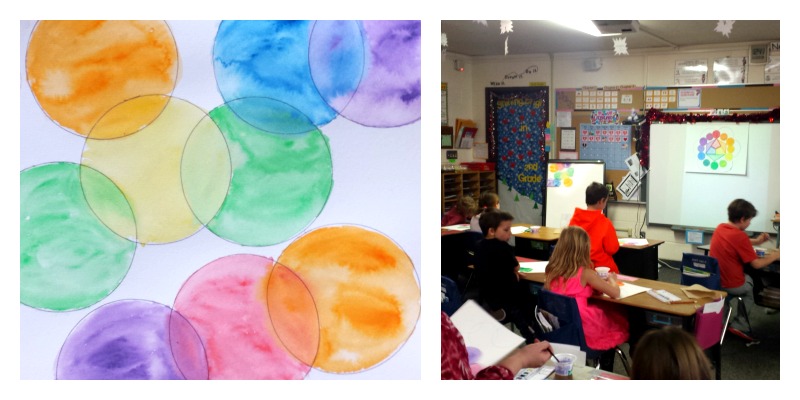
I started by explaining the color wheel. I was so impressed by this class. They were so well behaved and such good listeners. I made a diagram to illustrate the lesson. It’s just on poster board, and colored with crayons. We discussed the diagram, working from the inside out. At the center are the three primary colors. Next, along their edges, are the secondary colors–what you get if you mix those two primary colors together. The outer edge includes, primary, secondary and tertiary colors {those between primary and secondary colors.}
Most importantly, I explained the concept of analogous colors–those that are similar and sit next to one another on the color wheel. The black lines on the diagram link up the analogous colors of a secondary color wheel.
For our project I had kids trace circles {which they claimed was cheating–gasp!} on a sheet of water color paper, overlapping at the edges. Then, using water color paint, they filled their circles in using analogous colors. Here’s the gist. You can start with any color you like. Paint the entire circle. Then move on to a circle it overlaps. This circle must be painted with an analogous color–blending the paint where the two overlap, to reveal a tertiary color. Keep going until they are all filled in. It takes a little planning so that you don’t get stuck with a circle that cannot be matched–but this class had no problems with it. The diagram really helped those who got stuck. I just referred them back to the wheel when they were unsure of what color to use next–just follow the black line to see the two choices.
I emphasized that analogous colors are those that blend well together. They are colors we naturally want to mix. That colors from one primary to the next will blend together well…but if you go further the colors become complimentary and begin to cancel each other out if they are blended. I don’t think that concept stuck with everyone at first, but once they started painting I pointed out that their water reflected what happens when competing colors are mixed–you end up with brown or gray. I overheard one girl tell her desk mate that it looked like sewer water. {I’ve never seen sewer water, but I think it’s a pretty good visual.}
After doing this project I realized that it could also be done just using primary colors–creating a secondary color in the overlap. Maybe I’ll try that next time. At any rate, this was one of the best classes I’ve taught, and I really feel like they learned something. What a fine way to wrap up the week.
This week has been all about the Classroom Canvases I started on Monday. Really…when doing four back to back to back it turns in to a weeklong project. Which is fine by me, because I really do like doing them. Well–I finally got them all finished up! The kids did a fabulous job. Top notch work, in my opinion. And tonight I’m presenting to you the finished product.
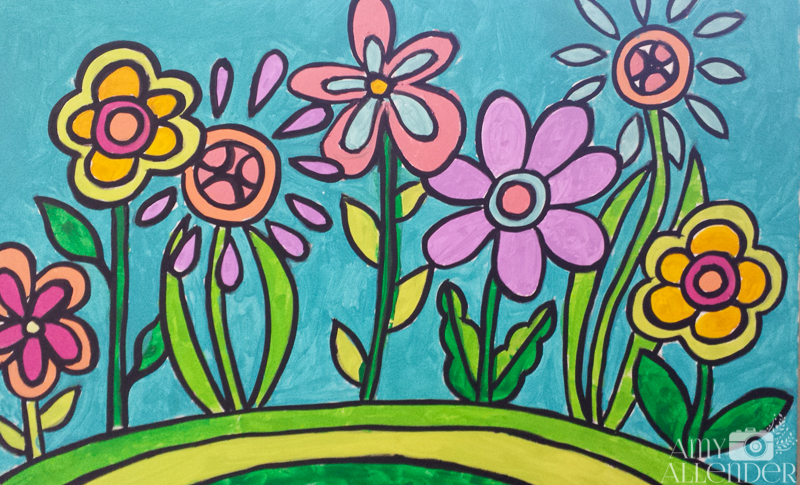
This is the first canvas I painted with the kids on Monday afternoon. This was home to the class that yielded most of the hilarious comments I shared with you on Monday evening.
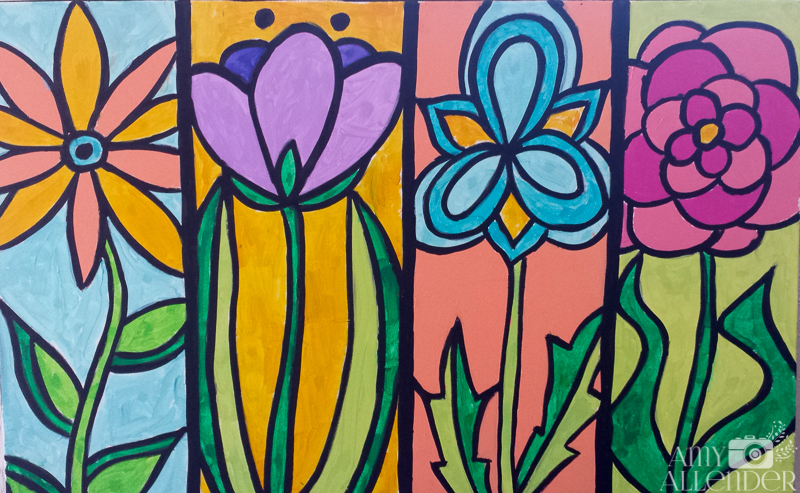
I’m going to be honest. I love this design. Something about it reminds me of a stained glass window. I’m so incredibly happy with the way it turned out. This one was painted by the other class I wrote about on Monday.
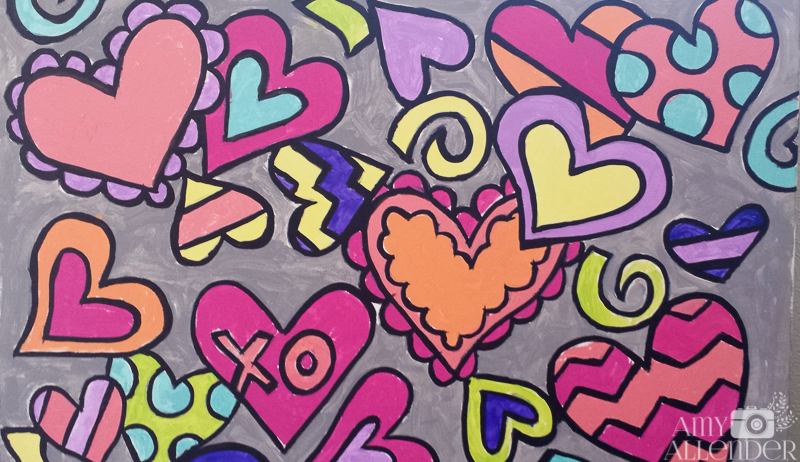
The third class I painted with chose a Valentine’s Day theme. I was stumped at first. Indecisive on what to do. I wanted it to be fun, but not too mushy or girly. This is what I came up with. It reminds me of a upended bag of elementary school Valentines.
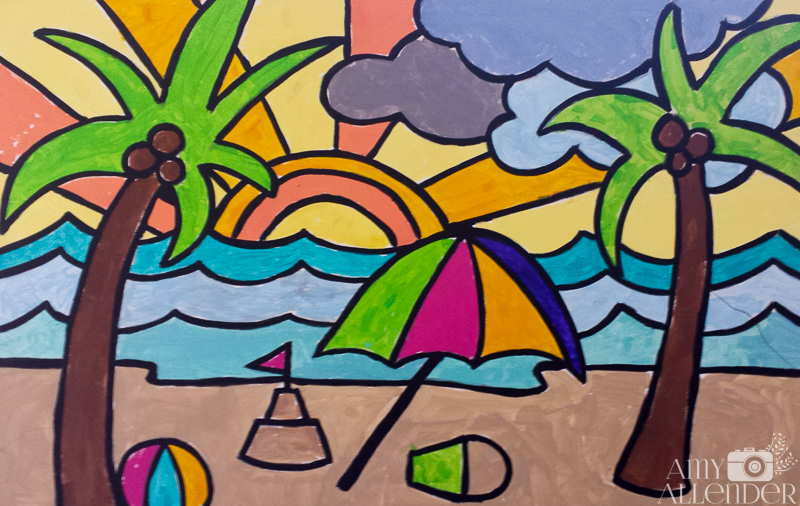
The final canvas of the week is a beach theme. I enjoyed creating something that depicted warm, sunny weather, something we probably won’t see again–after this week’s heat wave–for a few more months. It was while painting with this class that I got one of my all time favorite kid comments: “You know, now that I think about it…knowing how to paint is a pretty important thing.” Ya, know what? It really is.
Let’s all remember that creativity is a skill worth honing in on. I’m so lucky to be able to speak the importance of art into these sweet children’s lives! Have a great weekend!
Renew your zeal for the Bible with three days of exclusive devotionals! Interesting and relevant writings and reflection questions will remind you why the Word of God is so awesome. You'll learn a lot and you'll leave excited to know God more and grow deeper in your faith.
Your kick-start is on the way!
You've always dreamed of reading the Bible in chronological order. Now you can!
Getting my printable PDF plan is easy. It's not fancy, but it does fold easily into a bookmark, so you can keep it close by and easily see what's coming next. I hope you find it as useful as I do.
**Remember to check your PROMOTIONS FOLDER. Even if your confirmation comes to your normal inbox, the actual download may come to that pesky promotions folder instead!**